How to Set Up Universal Gcode Sender (UGS) for Windows Operating System

Step 1: Downloading & Installing Driver
While UGS itself does not need a driver to run after being installed on your computer, a driver is needed for your CNC to communicate with the software. This driver, called CH341SER.exe can be downloaded from this link.
Find the file wherever it was downloaded to, double-click to run it, and provide whatever windows authorization is required. If you have any firewalls installed on your computer you may be prompeted to provide further authorization as well. Continue to authorize until the following window loads:
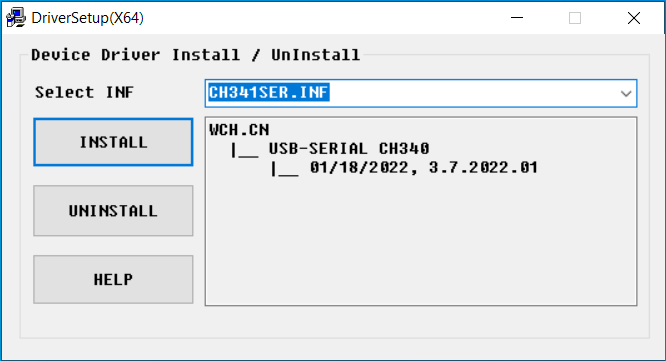
Press the install button, shown above, and allow the installation to complete. If for any reason you are unable to complete the installation process, try continuing past this step, as some iterations of Windows OS may already have this installed.
Step 2: Downloading & Running UGS
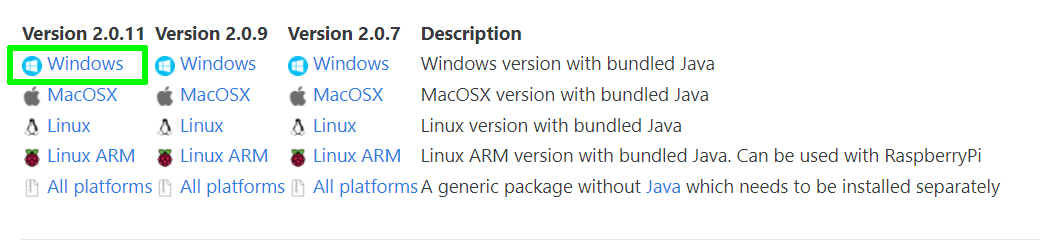
UGS is a program still in active development, so it is always good to install the latest stable version for the best user experience. In order to do so, go to the UGS download page here and select the upper-left download link as shown in the green rectangle:
The downloaded file will be in a compressed .ZIP format, so you will need to unzip it before installation. If you are not familiar with this process, please take some time to watch this youtube video covering the process.
Once the file has been unzipped, you should have a folder called "ugs-platform-app-win", and you will want to open up the next folder, "ugsplatform-win" and then open up the "bin" folder within that one. Within the bin folder, you will see two programs.
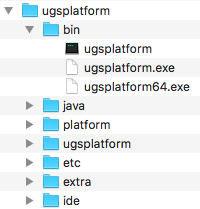
The first, ugsplatform.exe is meant for older 32-bit computers, but if you have a modern 64 bit computer then you will want to run ugsplatform64.exe for your computer. To reiterate, because it is important, here are the pathways for the two programs:
For Older Computers: ugs-platform-app-win > ugsplatform-win > bin > ugsplatform.exe
For Modern Computers: ugs-platform-app-win > ugsplatform-win > bin > ugsplatform64.exe
Before running the file, take a moment to make life easier for your future self by right-clicking your file and selecting "send to" from the drop-down menu, and then selecting "desktop" in order to export a duplicate launch icon to your desktop that you can launch UGS from in the future.

Step 3: Connecting your CNC to UGS
Start off by connecting to your controller hardware using the toolbar at the top of the program. In order to do this first select UGS in the firmware combo box:

Next hit the refresh button, and then select the correct port for your hardware. If you can't find the correct port in the list, make sure you have the drivers installed.

Finally, with your port selected, set your baud rate to 115200 and then press the connect button as shown below in the blue box:

With this your CNC should be connected and you can check the current CNC status. If you see an "IDLE" or "ALARM" status then your CNC is properly connected and you are good to go, but if you see it stuck on "Connecting" then you may need to try the troubleshooting steps below:
- Make Sure your Offline Controller is Physically Disconnected from Your CNC: This is a very frequent cause for "Port Opened" as your CNC can not connect to more than one device at a time. Once you disconnect the offline controller, close out and then restart UGS following the steps above to see if you have resolved the issue.
- Check your Emergency Stop Switch (If You Have One): Not everyone realizes that the emergency stop switch locks into place when triggered, and it might be triggered out of the box if you accidentally pressed it in during assembly, so take a moment to turn it in the direction of the arrows on the button and see if it pops up. If this was the problem, you will immediately see the status change to the normal and expected "IDLE" or "ALARM" status.
- Make Sure that You are Not Running Other CNC Programs: As stated before, your CNC can only talk to one device at a time, but it is important to understand that this also includes other programs such as Easel, bCNC, Carbide Create, Candle, or even other copies of UGS.
- Hardware Failure: No one likes getting equipment that has something wrong with it, but despite our best efforts at quality control, it can happen; that's what our 1-year warranty is for. If you suspect this is the case after trying the above please reach out to us at support@sainsmart.com for further assistance, but in order to speed things up, here are some things we will likely have you check anyways:
- Try a different USB cable: Only one USB cable comes with your CNC, but if you have a conventional inkjet or laserjet printer, it uses the same type of cable as your CNC. If changing the cable out solves the problem, let us know and we can work on getting you a replacement.
- Try a different USB Port/Computer: Sometimes the computer itself is the problem, or a specific USB port on it. Between this test, and the prior USB cable test, we can pretty quickly conclude the issue is related to the CNC controller board itself.
Step 3: Configuring UGS for your CNC
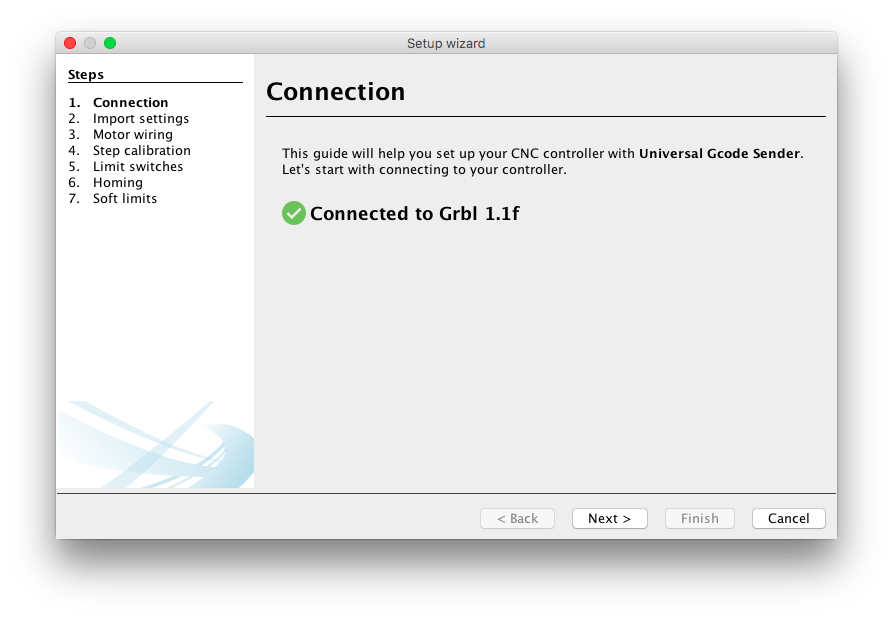
One of the distinct advantages of UGS is the "Setup Wizard" which allows you to configure limit switches, homing, soft limits and calibrating your machine. To go through this process, select the Machine tab and then Setup Wizard from the resulting drop-down menu.

Assuming your CNC is already connected, this should be the first page that you see, affirming the version of GRBL that you have connected, as well as listing the configuration options:
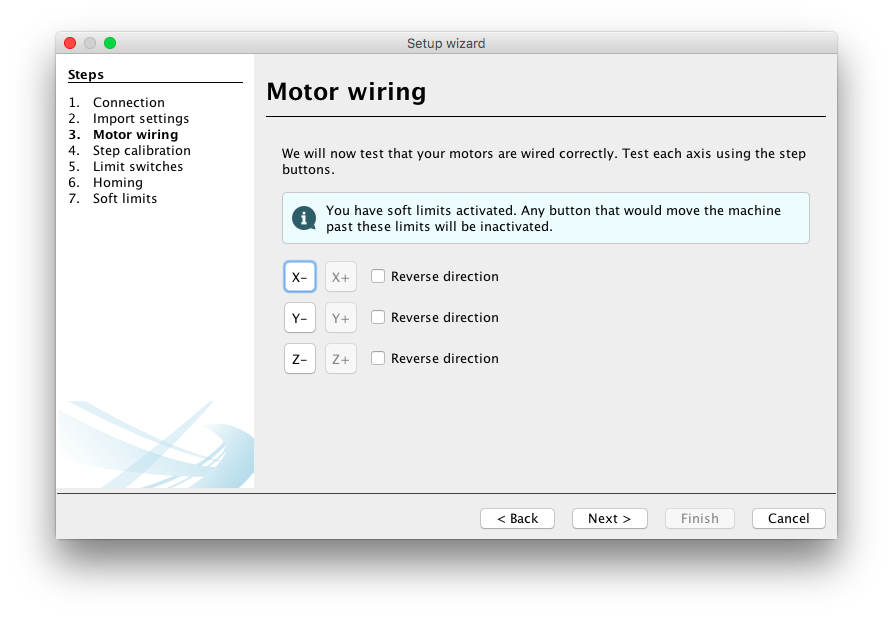
Skip past the "Import Settings" page and continue on to the "Motor Wiring" page where you can test each axis on your CNC. Take your time jogging each axis back and forth and make sure your CNC responds as expected. The option is also provided to invert your jogging controls.
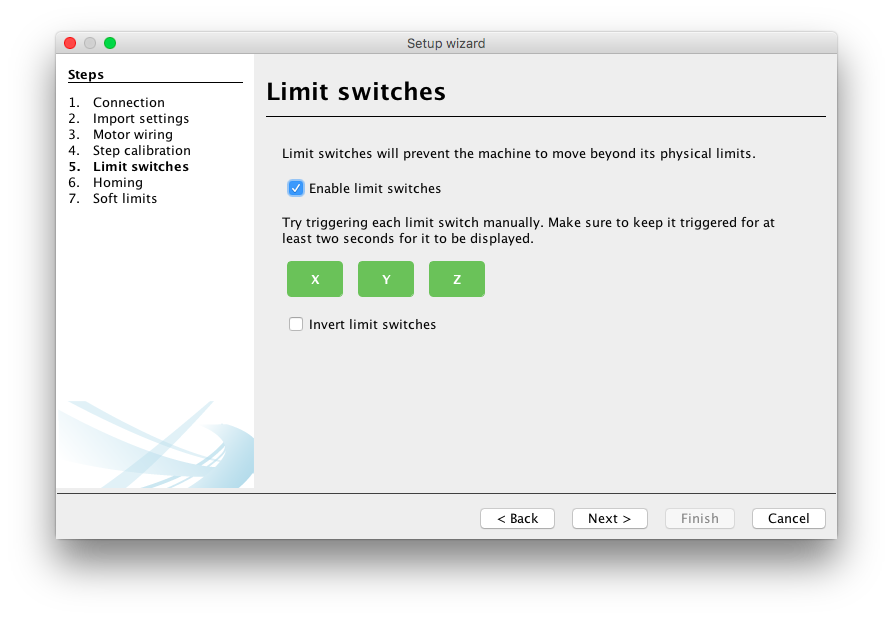
Once you have confirmed that there are no issues, you can skip "Step calibration" as we do that for you before your CNC leaves the factory and move on to the "Limit Switch" page. On this page you will want to press each limit switch by hand (if your CNC has any, otherwise skip this step) while making sure that the corresponding axis lights up. If an axis does not light up when you press a switch for any reason, or it remains lit up when the switch is not pressed, please contact us about this at support@sainsmart.com for further assistance.
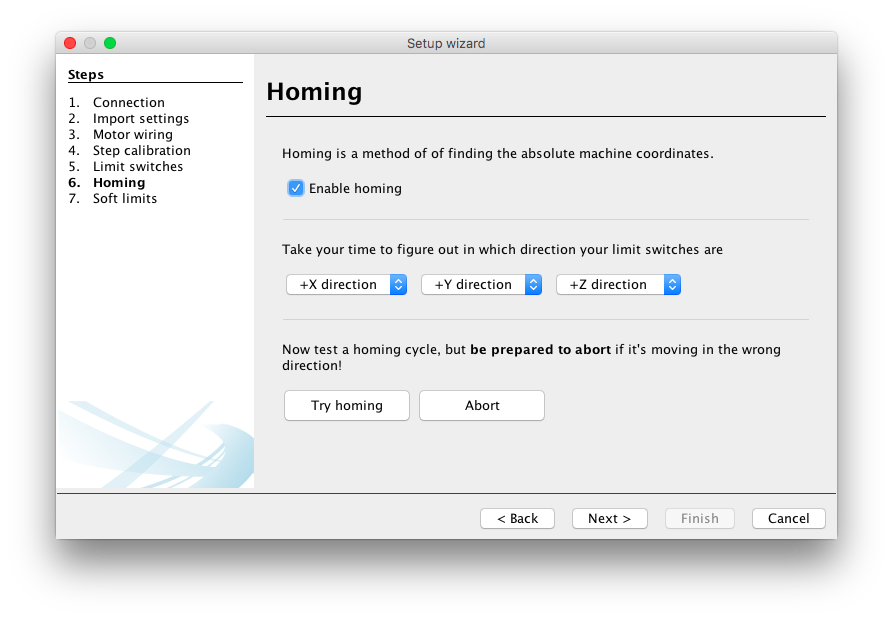
Assuming again that you have limit switches, the next page will test the homing process. You can use this page to customize the homing location of each axis and then make sure that the homing process works before continuing to the last step.
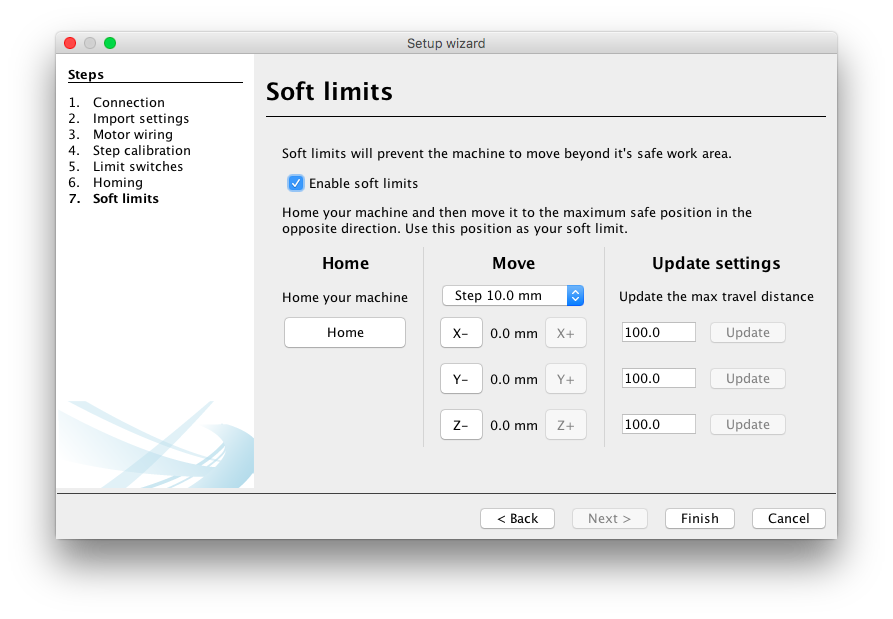
The last page, Soft Limits, is a bit of an exception in that we do not suggest this for machines that have limit switches. If you do have limit switches, make sure soft limits are disabled. If you do not have limit switches though, soft limits can be useful for providing some measures to protect your CNC from colliding with itself. In the latter case, follow the instructions on the paged to configure this feature.
WIth configuration complete you can go ahead and close out the setup wizard. UGS is now configured and ready to run a project on your CNC. Consider trying out some of our test files to further familiarize yourself with both software and machine.