L8 LightBurn Camera Setting
 Updated
L8 LightBurn Camera Setting Guide
In LightBurn, a calibrated camera enhances engraving efficiency and precision. It enables rapid workpiece positioning, material conservation, object tracking, and lens and alignment calibration. Homing is recommended due to the software’s operation in absolute coordinates.
The subsequent sections of this article will provide a comprehensive guide on how to connect and utilize the camera within the LightBurn software to enhance your workflow efficiency.
Step 1 Connect L8

1. Connect the DC power, USB to PC, and Type-C Cables for LightBurn Camera.
2. Power on the Machine:
- Insert the key
- Press the push button switch
- Turn the key
- Turn on the emergency stop switch
Step 2 Lightburn Setting

1. Open the LightBurn Software
2. Import device Preset L8 setting file
- Click Devices
- Click Import
- Select the.lbdev file from the TF Card that comes with the machine
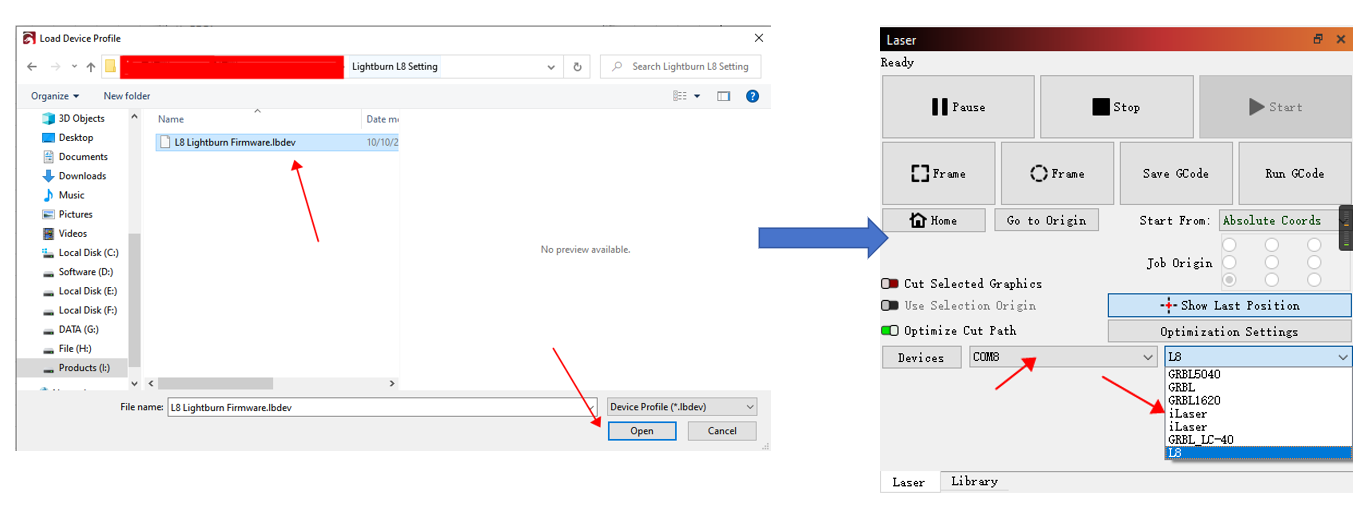
3. Load the file from USB
4. Select the correct COM number and device (in this case is L8)
Step 3 Camera Setting
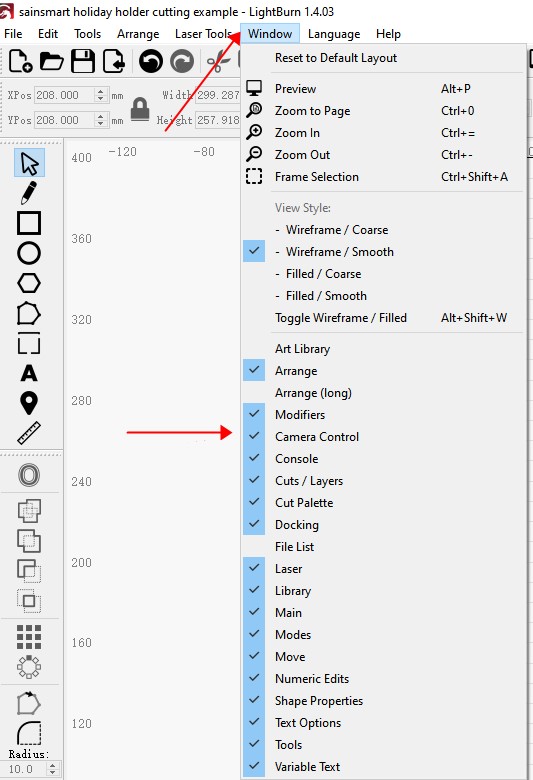
1. Bring out the Camera Control window
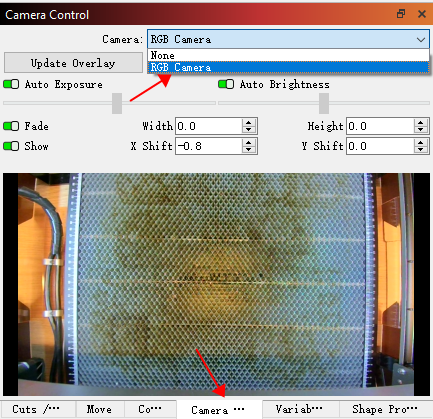
2. Select the Camera Control window, Choose RGB Camera
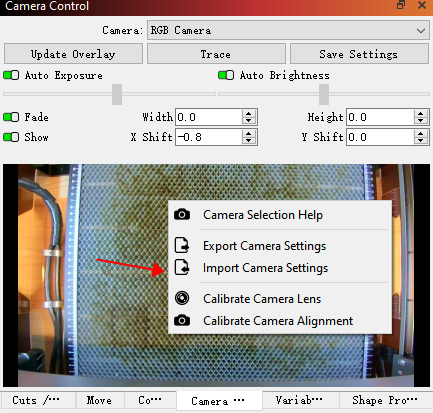
3. Right-click to import setting
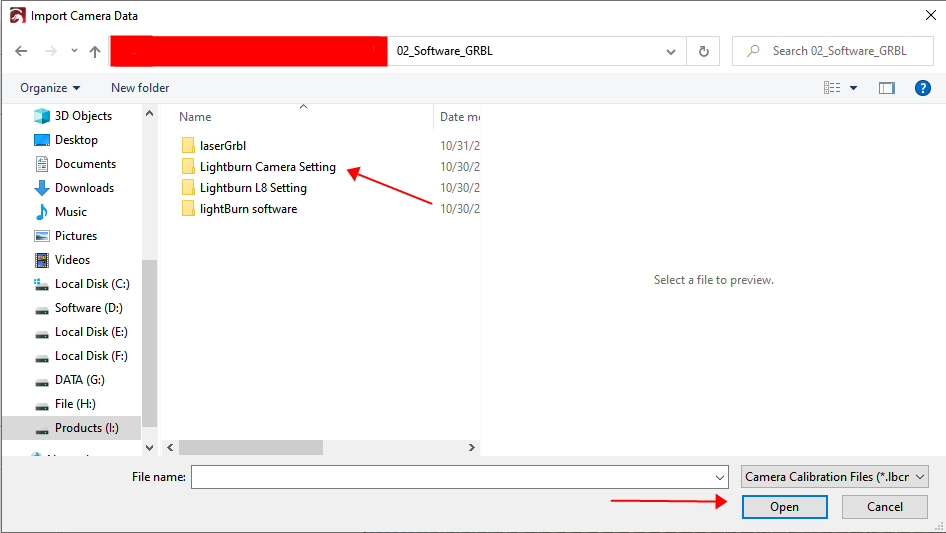
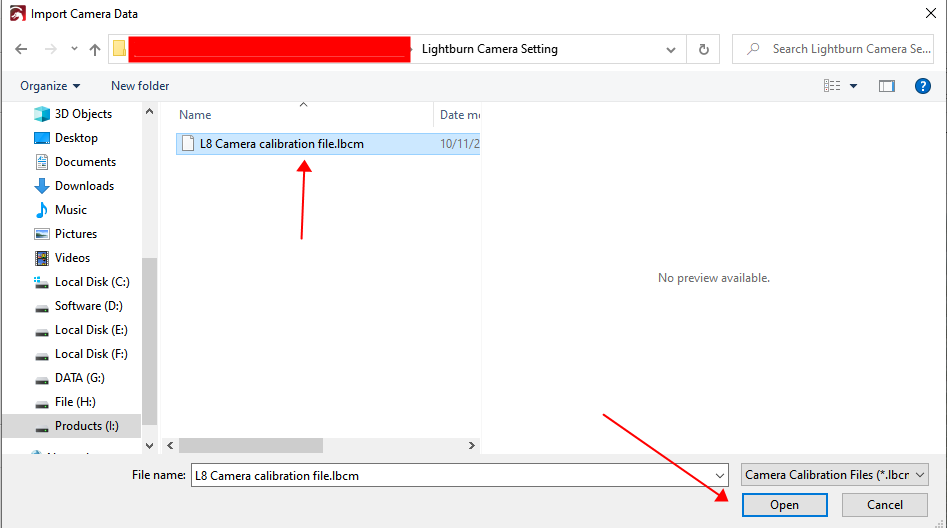
4. Open from the USB Driver and Load .lbcm file (Preset L8 Camera setting in LightBurn)
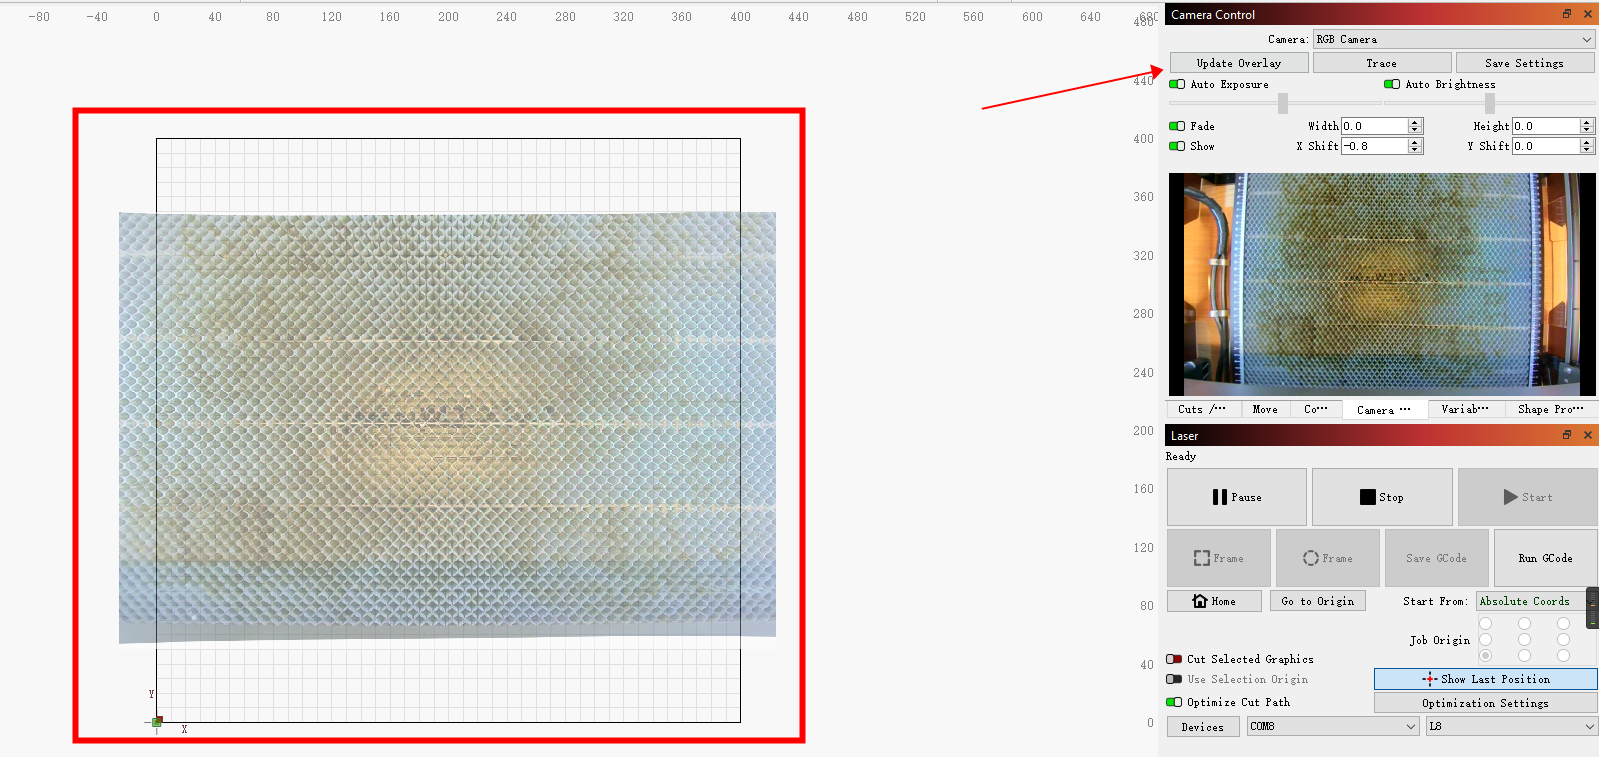
Now, you can click "update overlay" to make the screen appear in the action box.
Note: Due to the standard fisheye lens, the screen may not be full, which is normal. You can still work on the area outside of the screen.
Step 4 Camera Function Introduction
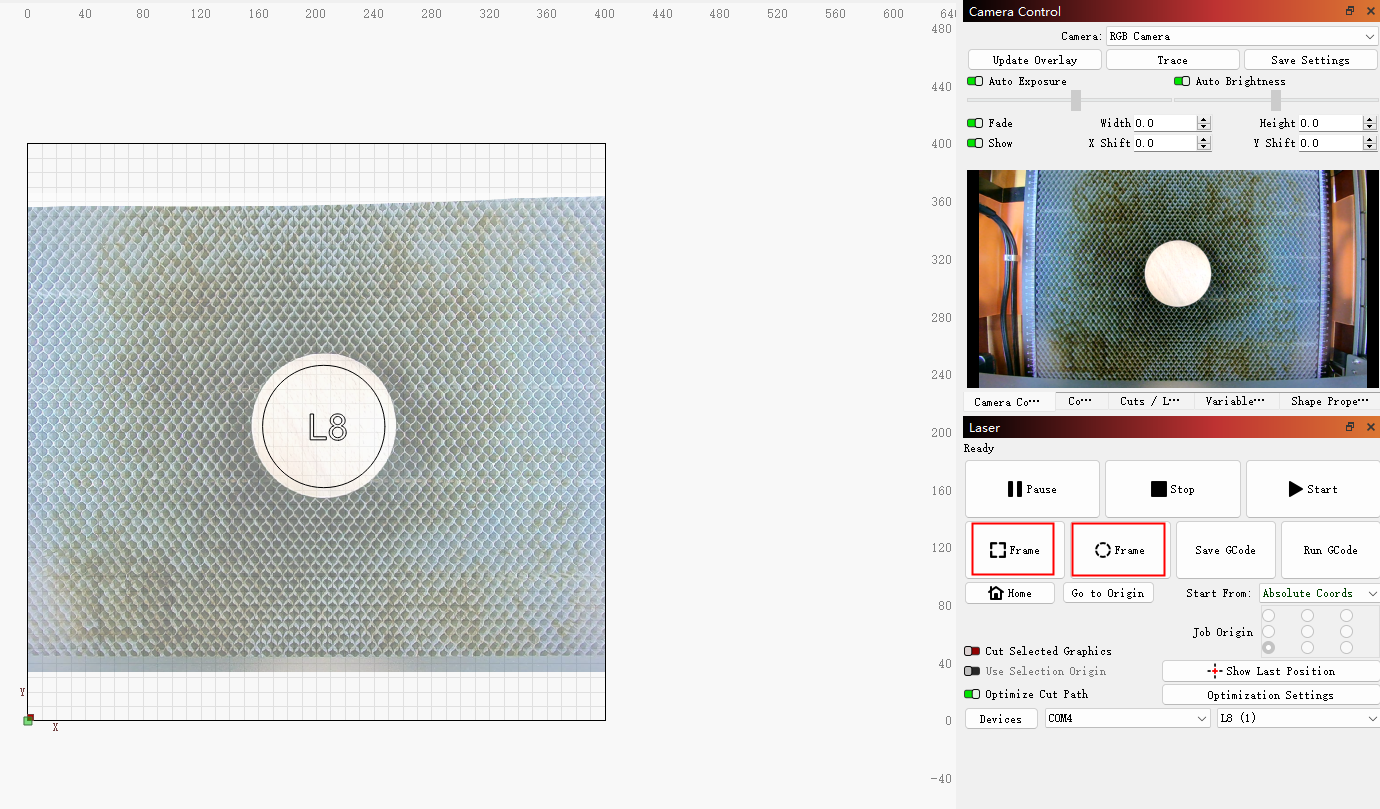
1. Place the material and put the desired icon on it. Click either the Frame button to see if the positioning is accurate
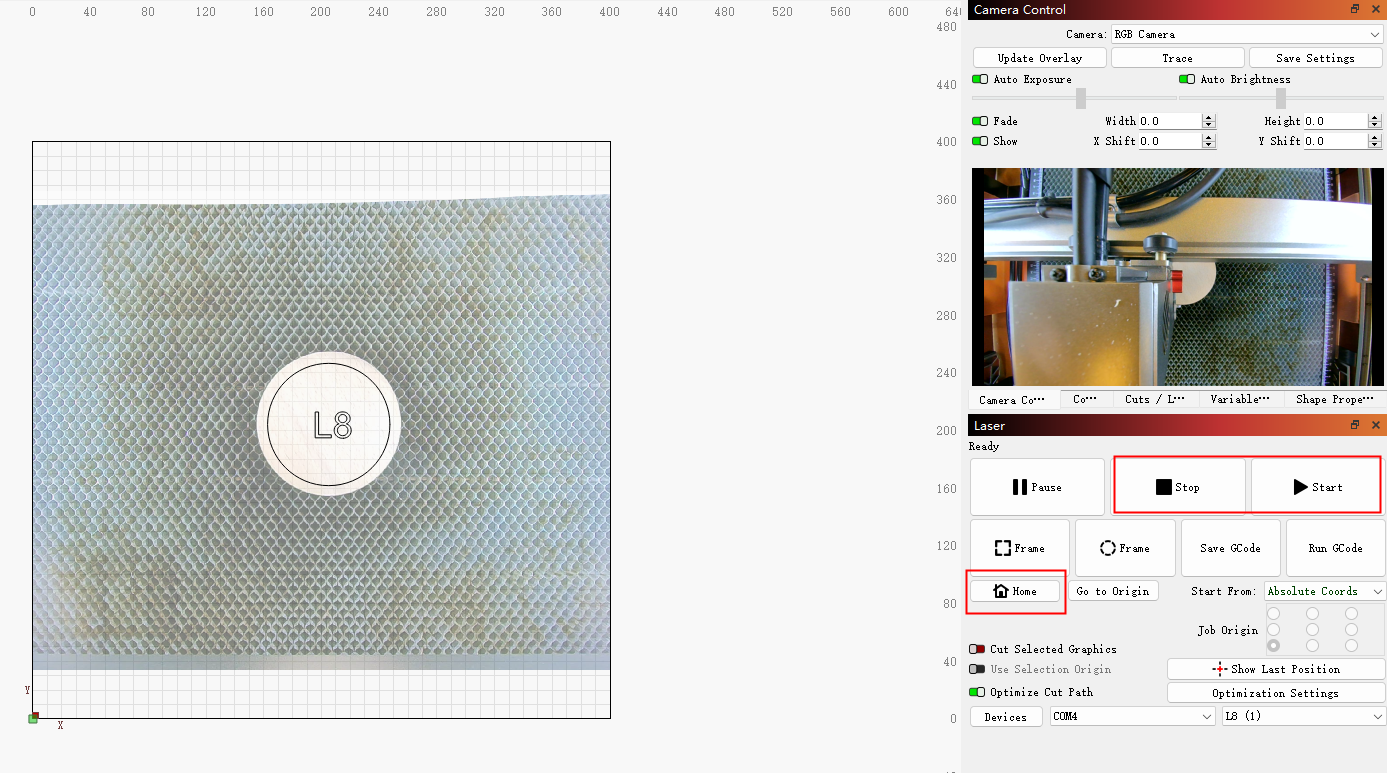
2. The right camera window updates the screen in real-time, and you can control the machine to Start or Stop or Home after positioning.

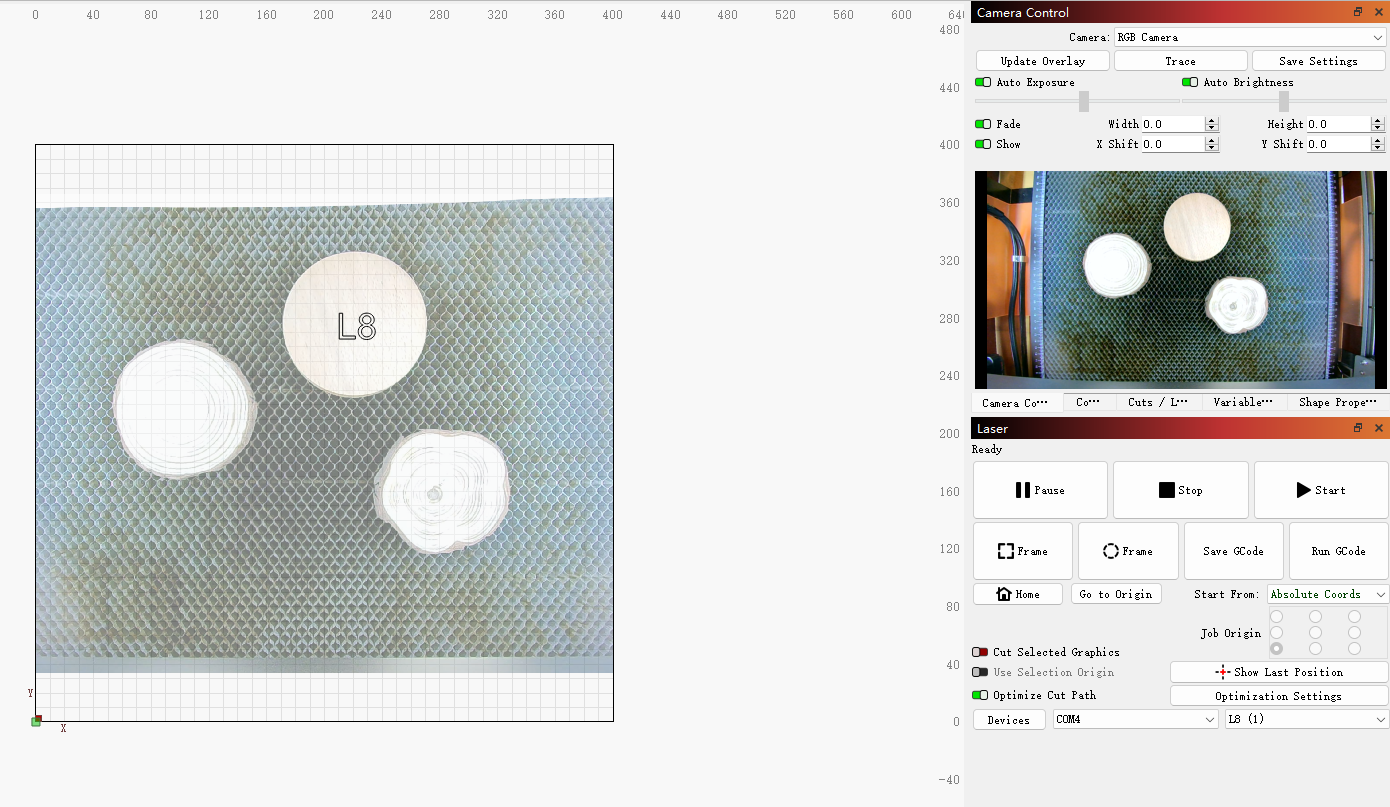
3. Update Overlay: Update the camera with the latest footage to locate the pattern. (Note: The screen needs to be updated after each movement of the material to ensure that the pattern is positioned accurately)
Calibration
Note: The device is dispatched with a pre-calibrated camera. However, potential discrepancies in accuracy may arise due to transportation or other external influences. In such instances, we strongly advise manual recalibration of the camera for optimal performance.
For detailed camera calibration steps, please refer to the ‘Camera Calibration Tutorials’ file in the helpdoc.