How to Reconfigure the 4th Axis Chuck

Introduction
This is not directly shown in the user manual, but the 4 teeth of the chuck (the parts that grab into your stock material) are both removable and reversable. In this guide you will be provided video and text instructions to disassemble your chuck, and reassemble it in both the main and alternative configurations.
What we suggest for this guide is the following:
- Chuck Locking Wrench X2 (Part #2 in the User Manual)
- (Optional) A low viscosity lubricating oil, such as 3-in-1 Oil, and some cotton swabs for applying it
Please Note: Before Getting started, make sure your CNC is powered down.
Disassembly
As the 4th axis arrives out of the box, the chuck will be locked and require the locking wrenches in order to loosen the assembly up, but after you do so you should be able to loosen and tighten by hand for the purposes of this guide.
Most likely though, the first time you disassemble the chuck will be much more difficult than shown in the video, as some lubrication is needed. I was able to disassemble it fully without lubrication, but if you continually find it sticking as you try, applying a little lubricant and moving the assembly back and forth from closes to open can help matters. Do your best to not to over apply to avoid a mess.
First Configuration
It is important to note that for both configurations, while it does not matter which slot you install the "teeth" into first, you must do so in an order according to the numbering on each of the 4 pieces. For the first, stock configuration you will want to install the teeth in order of 1, 2, 3, 4:
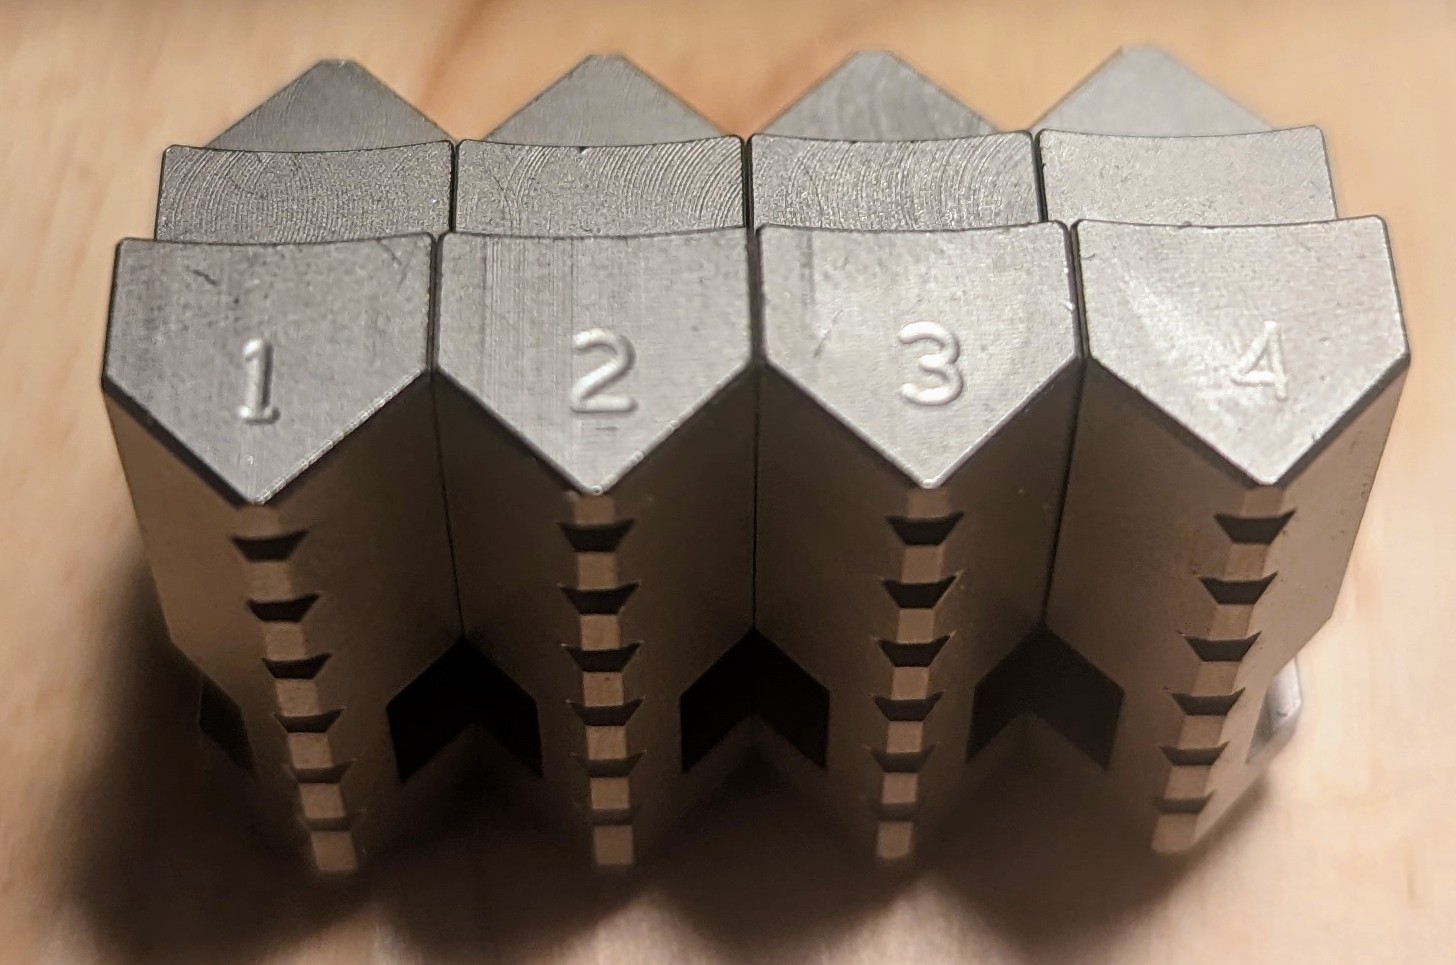
For this setup, you will want the tallest part of each tooth facing inwards.
Why Use this configuration?
This configuration is best for less precise work where you want to maximize the gripping strength of the chuck.
Second Configuration
For this configuration you will want to have the tallest part of each tooth facing outwards, away from the center, and you would want to install it in the order of 4, 3, 2, 1:

Why Use this configuration?
While the second configuration lacks the amount of surface area clamping down on your stock material, it is much much easier to clamp down on square stock, and also makes it much easier to center your stock (Square or Round) in prepration for engraving.