How to Center Your Stock Material

Introduction
Adding a 4th axis to your CNC can bring your machining capabilities to another level, but it is not without its difficulties as you may have found out from the previous guide (which you should really take a look at before doing this one), and getting your stock material installed, centered and secured is no different. Learning to do this will seem a lot more tedious than what you are used to with a 3-axis CNC, but it is very necessary given how the 4th axis works.
What is suggested for this guide is to have:
- Chuck Locking Wrench X2 (Part #2 in the User Manual)
- A compact bubble level, similar to or smaller than this one. Using this can be avoided, but it is strongly suggested for use.
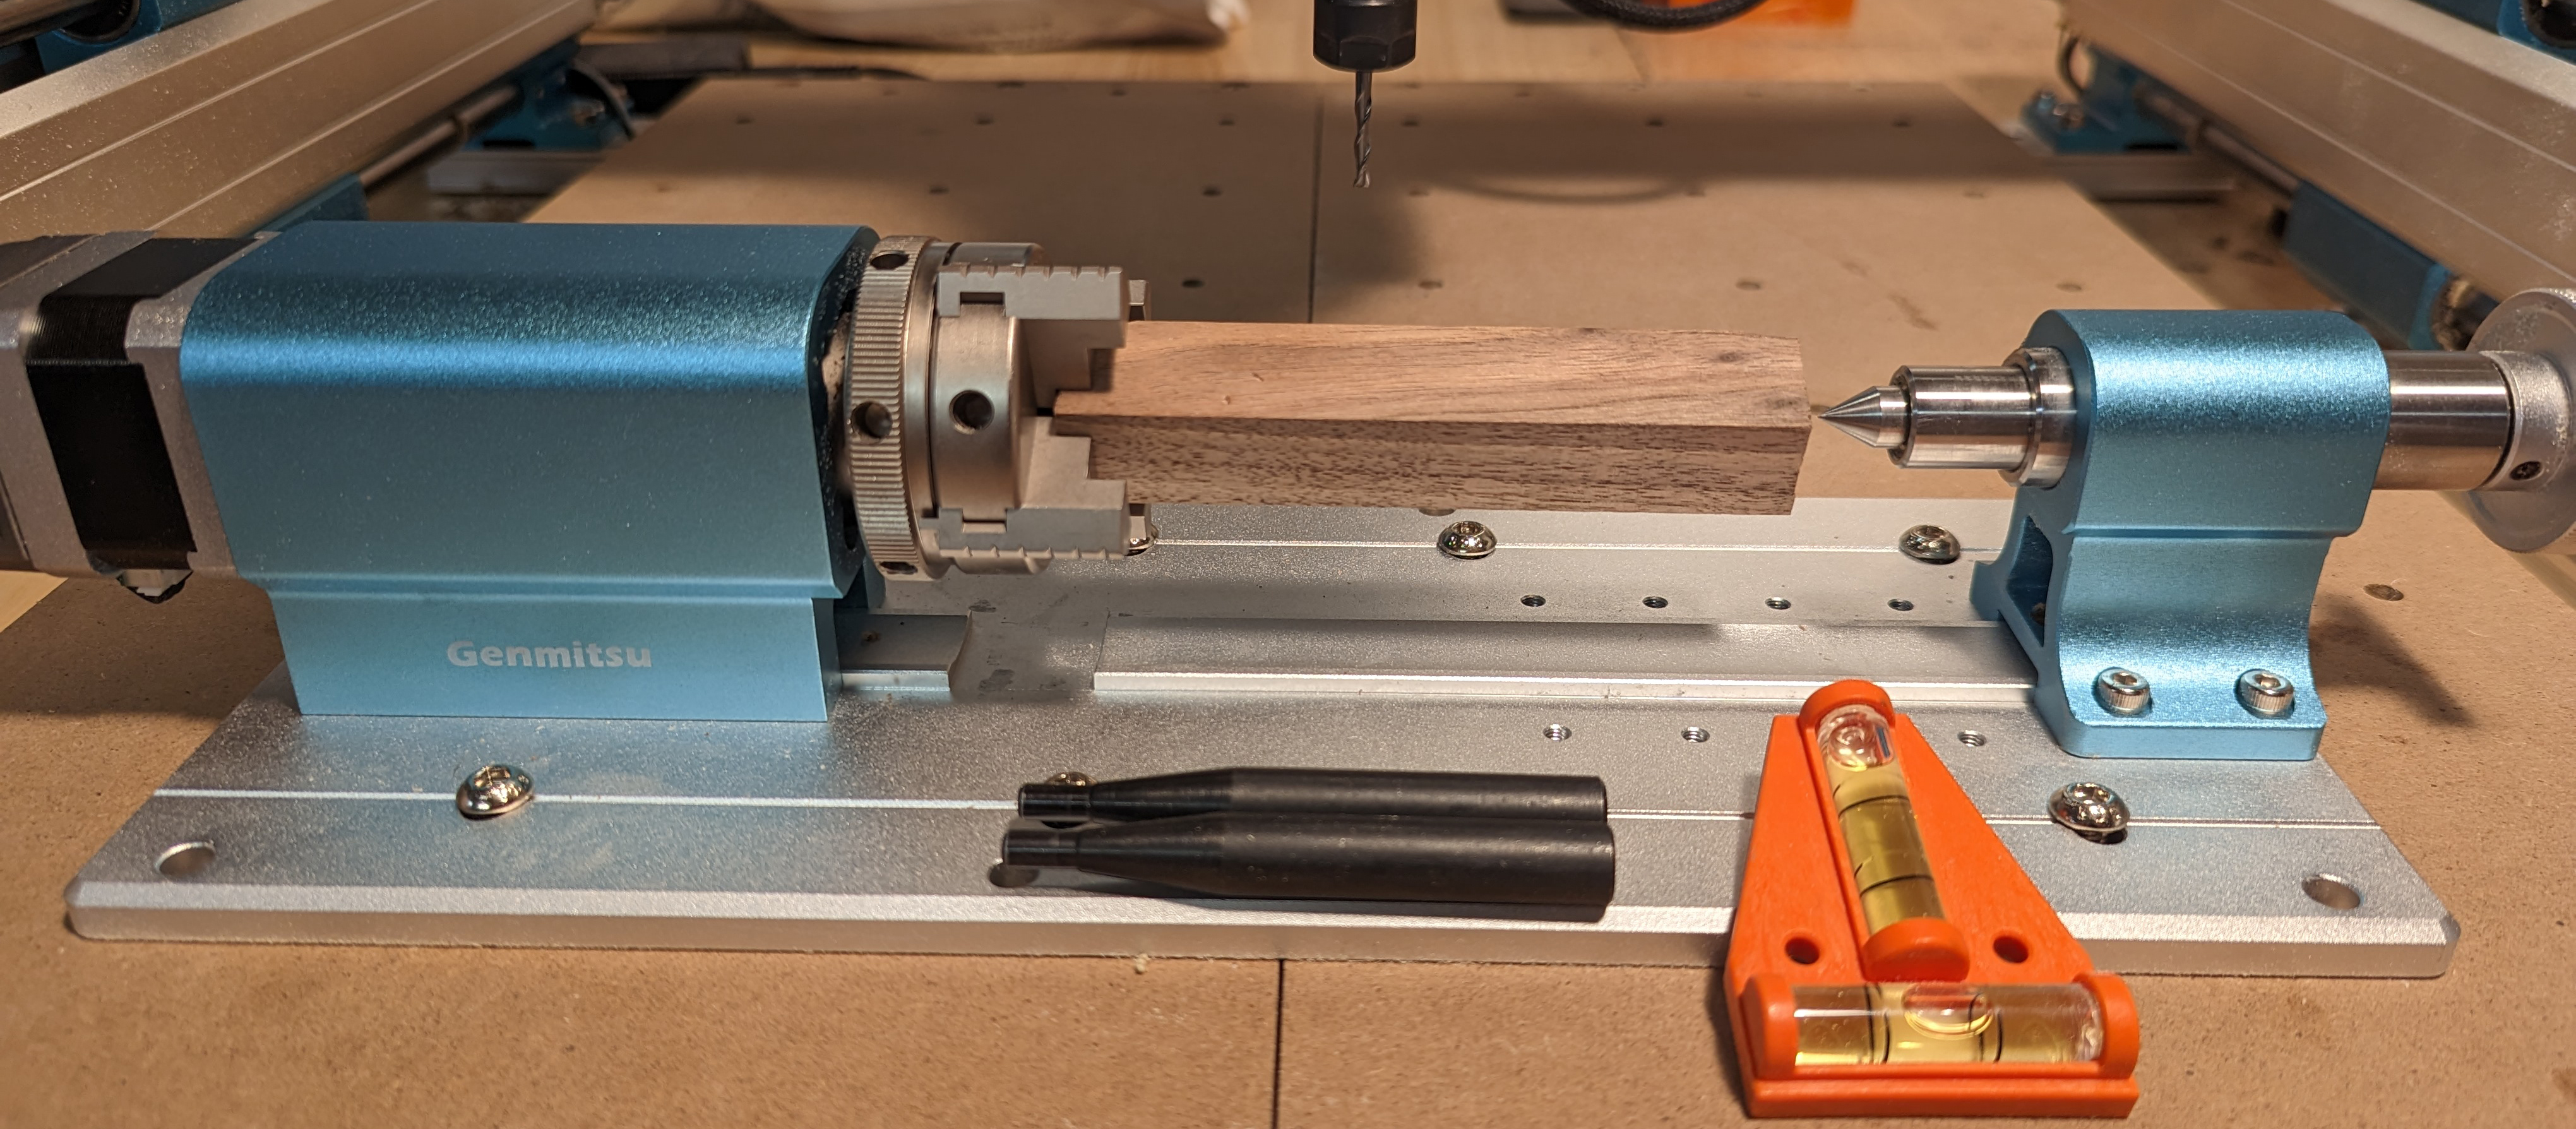
Installing and Centering Your Square Stock Material
For squared stock, it is strongly suggested that you configure your chuck in the Second Configuration as shown in the latter half of this guide, as it makes centering squared stock much easier.
The chuck itself is self-centering, so you really do not need to worry about the left side of the material, it is the right side with the tail stock that is really of concern. The whole goal of this process is to ensure that the tail stock locks into the true center of the stock material as much as possible. To do this, follow these steps:
- While holding the square stock in place roughly level, use your hand to tighten the chuck so that it stays in place on its own. Use the locking wrenches to lock it in a little further.
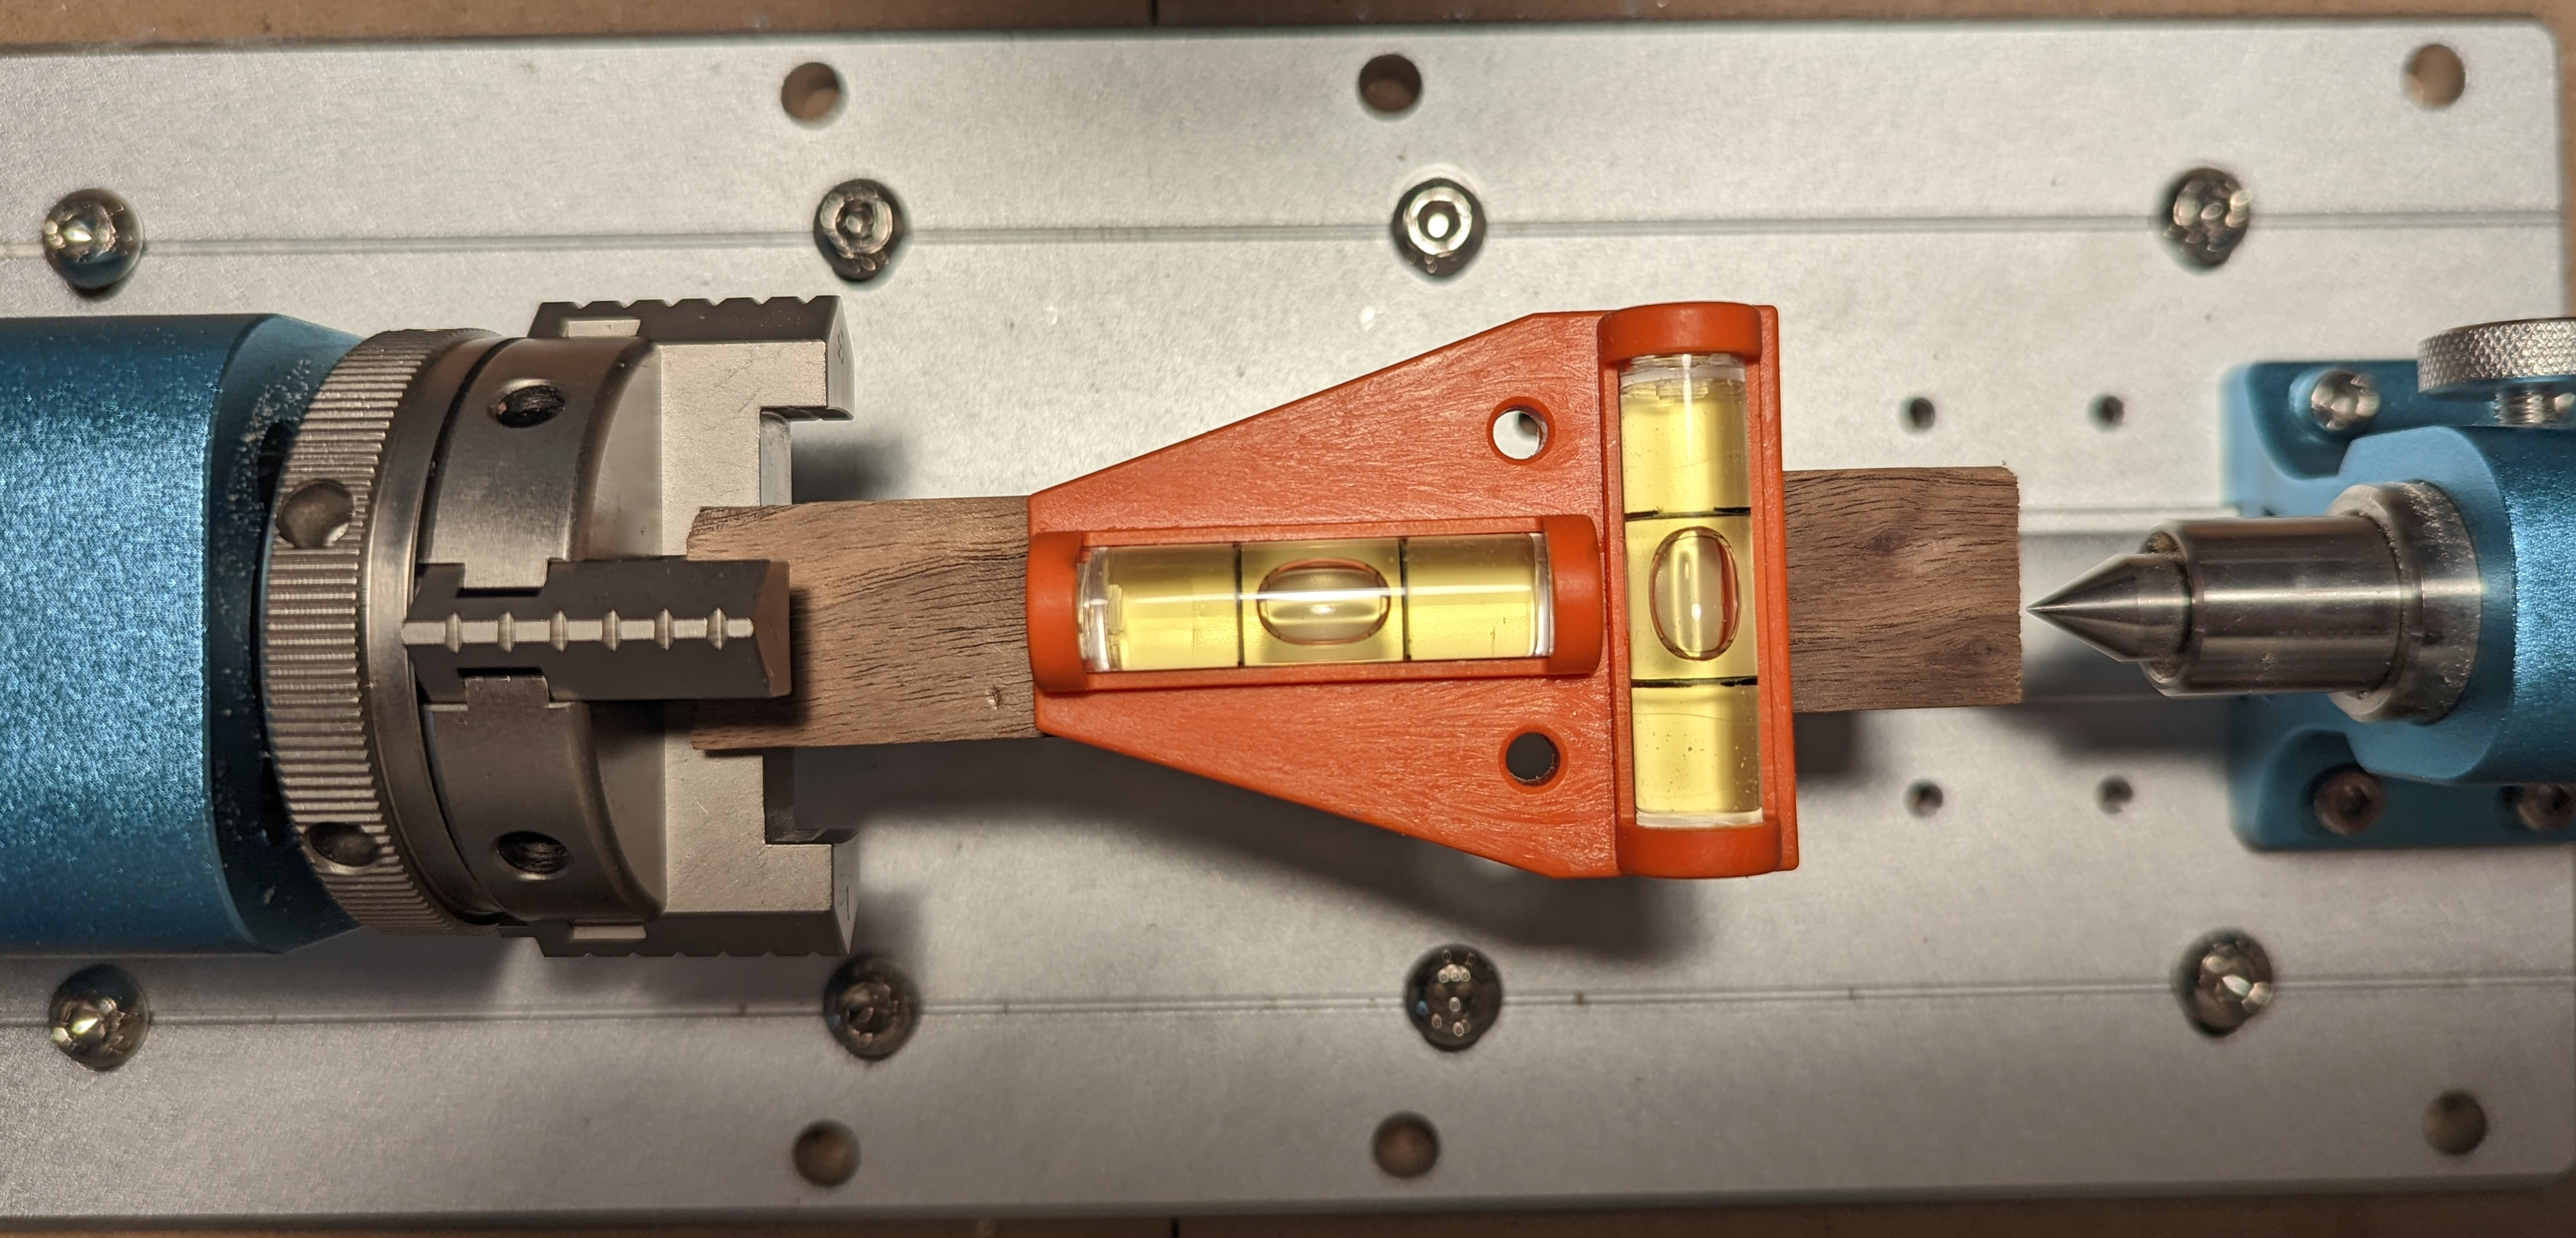
- Rotate the chuck so that roughly one flat surface is facing upward, and place your bubble level towards the right-hand side. It would be best to level the bubble on the Y axis (by rotating the 4th axis) to level it before moving to the next step.
- If you are not using an offline controller where you can jog the rotary axis easily, you can use a command through the console of Candle or UGS to rotate the 4th/A-axis. The command to do this is G91 A90 but after doing so you MUST enter the command G90 to make sure that the coordinate system does not get confused.
- Take one of the chuck wrenches by the narrow end, and use the wide end to tap the stock material from the top or bottom as needed to level out the bubble along the X-axis. The extra weight of the wrench makes fine adjustments a little easier than doing so with your hand. By the time you are done, it should look something like this:
- Rotate your chuck 90 degrees and repeat steps 2 and 4. If you are sure that your stock is 100% square and ready to go, you can get away with only doing this twice, one for the top and one for a side, but realistically the stock itself might be uneven, so I always do this for all 4 sides and split the difference if I cannot have both the top and bottom level at the same time.
- Once the stock is as centered as it is going to get, unlock the tailstock on the side screw, extend the tailstock using the larger wheel until it punctures into the stock material, and then lock down the side screw to keep anything from moving.
Installing and Centering Your Round Stock Material
For round stock, you can more easily set up your chuck in Configuration One, or Configuration Two from this guide, each has its advantages. If you are planning to engage the tailstock for extra stability then Configuration Two is best, as it generally makes centering the stock easier, but if you are going to use an aggressive toolpath or engrave without the tailstock then Configuration One makes more sense.
While the use of a level was of great importance for the square stock, this is not the case for rounded stock material. Square stock has a definitive top, bottom, left and right so it is important to make sure that it is level, but rounded stock is inherently identical no matter how much you rotate it around the "A" (4th) axis. Because of this, it is best to approach centering your stock in a different way.
- When it comes to round stock, the center of the material you want to engrave, at least on the Y axis, is the same as the center point of the Y axis itself. This can be really useful for finding this location once, and saving it via a work coordinate that you can instruct the CNC to recall later.
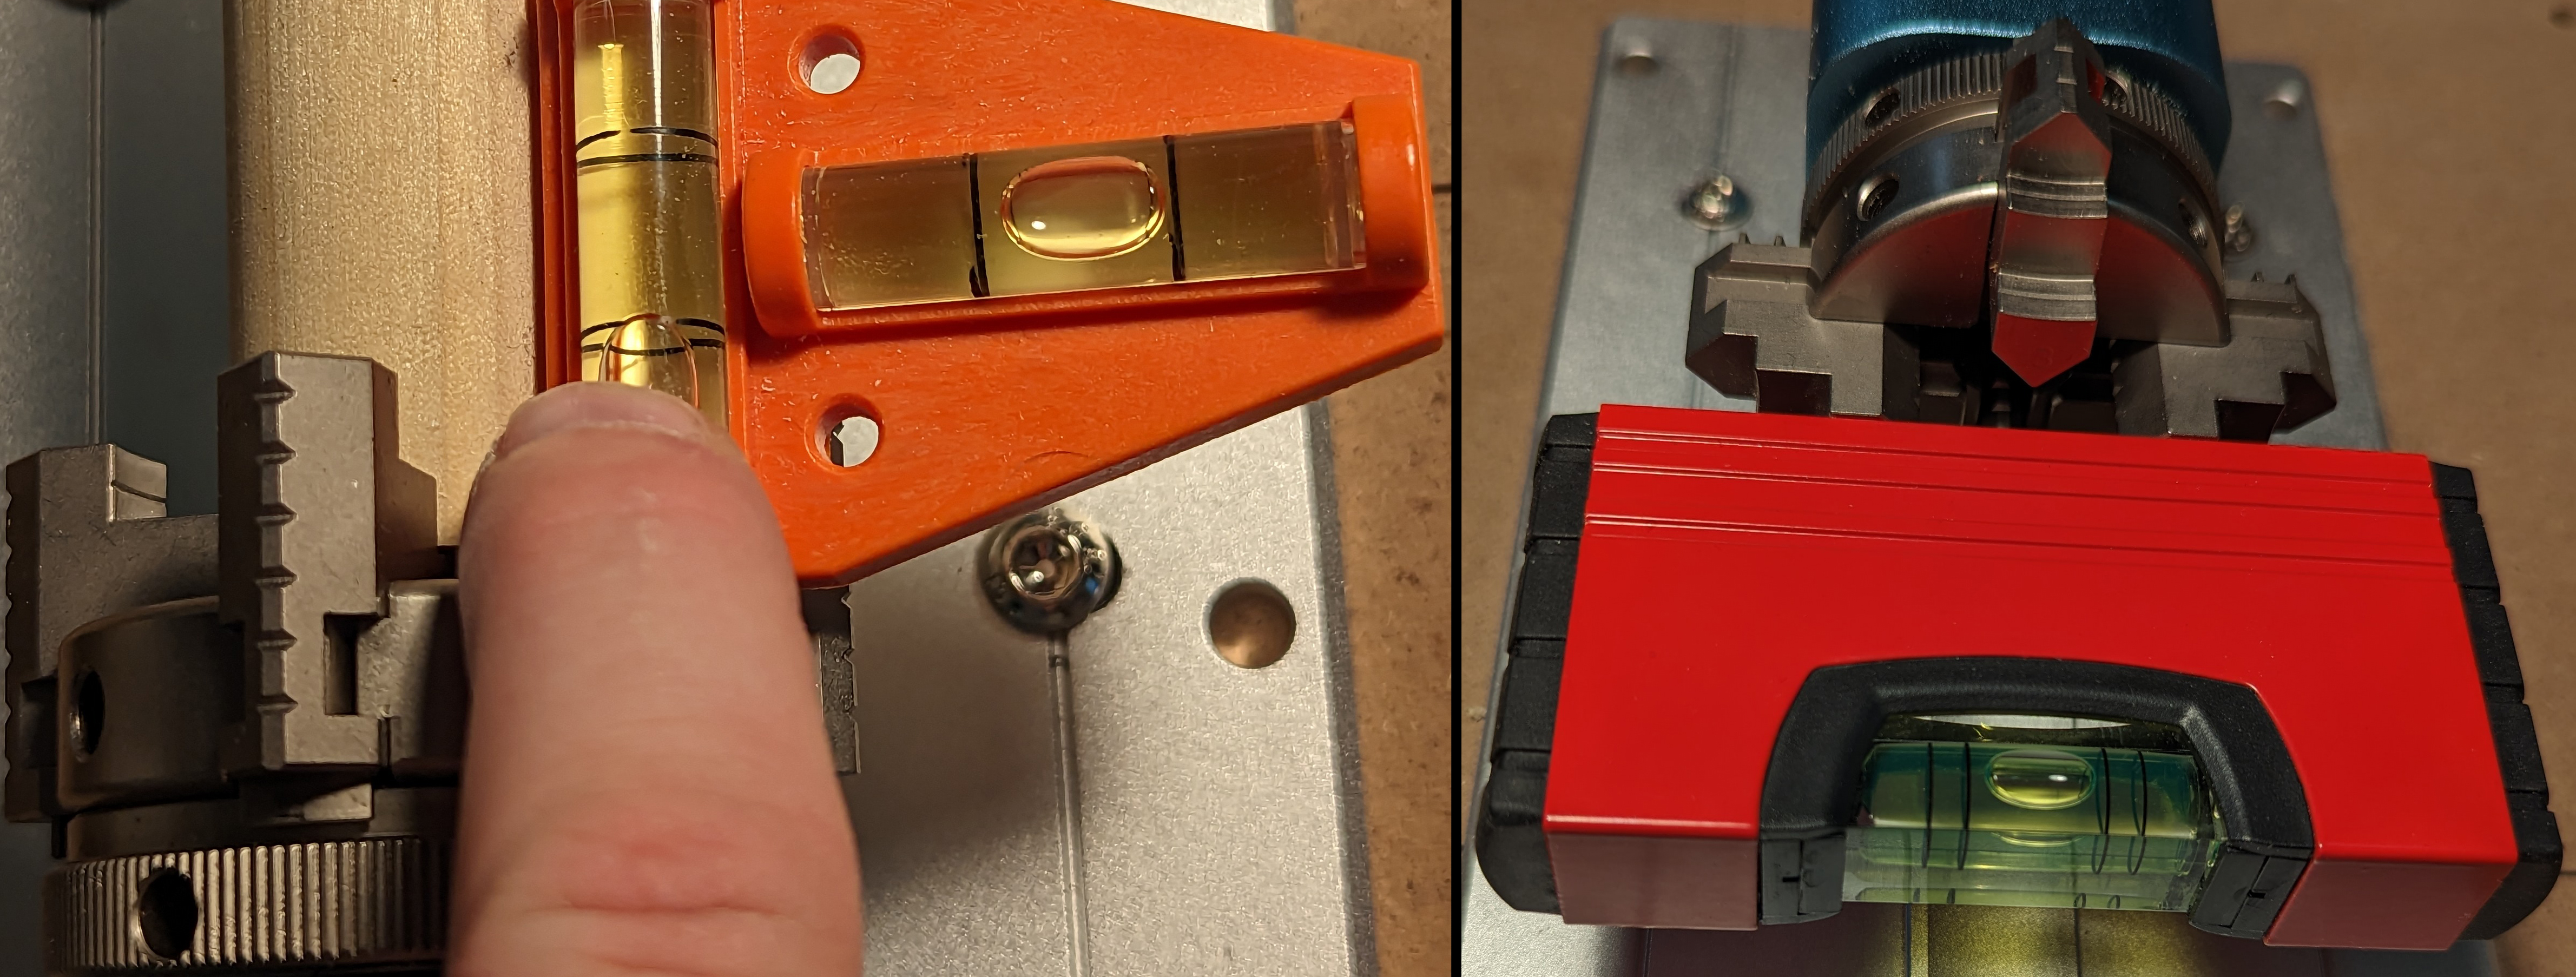
- The best way I have found, to get your Y-axis centered is to start by rotating your chuck so that one of the 4 teeth is sticking up at a perfect 90-degree angle. There are a number of ways that this can be done, but using the same level as before has proven useful.
- The trick to this is that when one tooth is vertical at 90-degrees, the two teeth to the side should be perfectly horizontal at that time. So by leveling one of the teeth on the side, you can assume that the top tooth is close enough to perfectly vertical. This can also be done prior to installing the stock material, using a larger magnetic level like the one shown on the right:
- With the center of the Y axis set up, you can then jog your CNC so that the endmill is as centered as possible on the collet chuck
- The best way I have found, to get your Y-axis centered is to start by rotating your chuck so that one of the 4 teeth is sticking up at a perfect 90-degree angle. There are a number of ways that this can be done, but using the same level as before has proven useful.
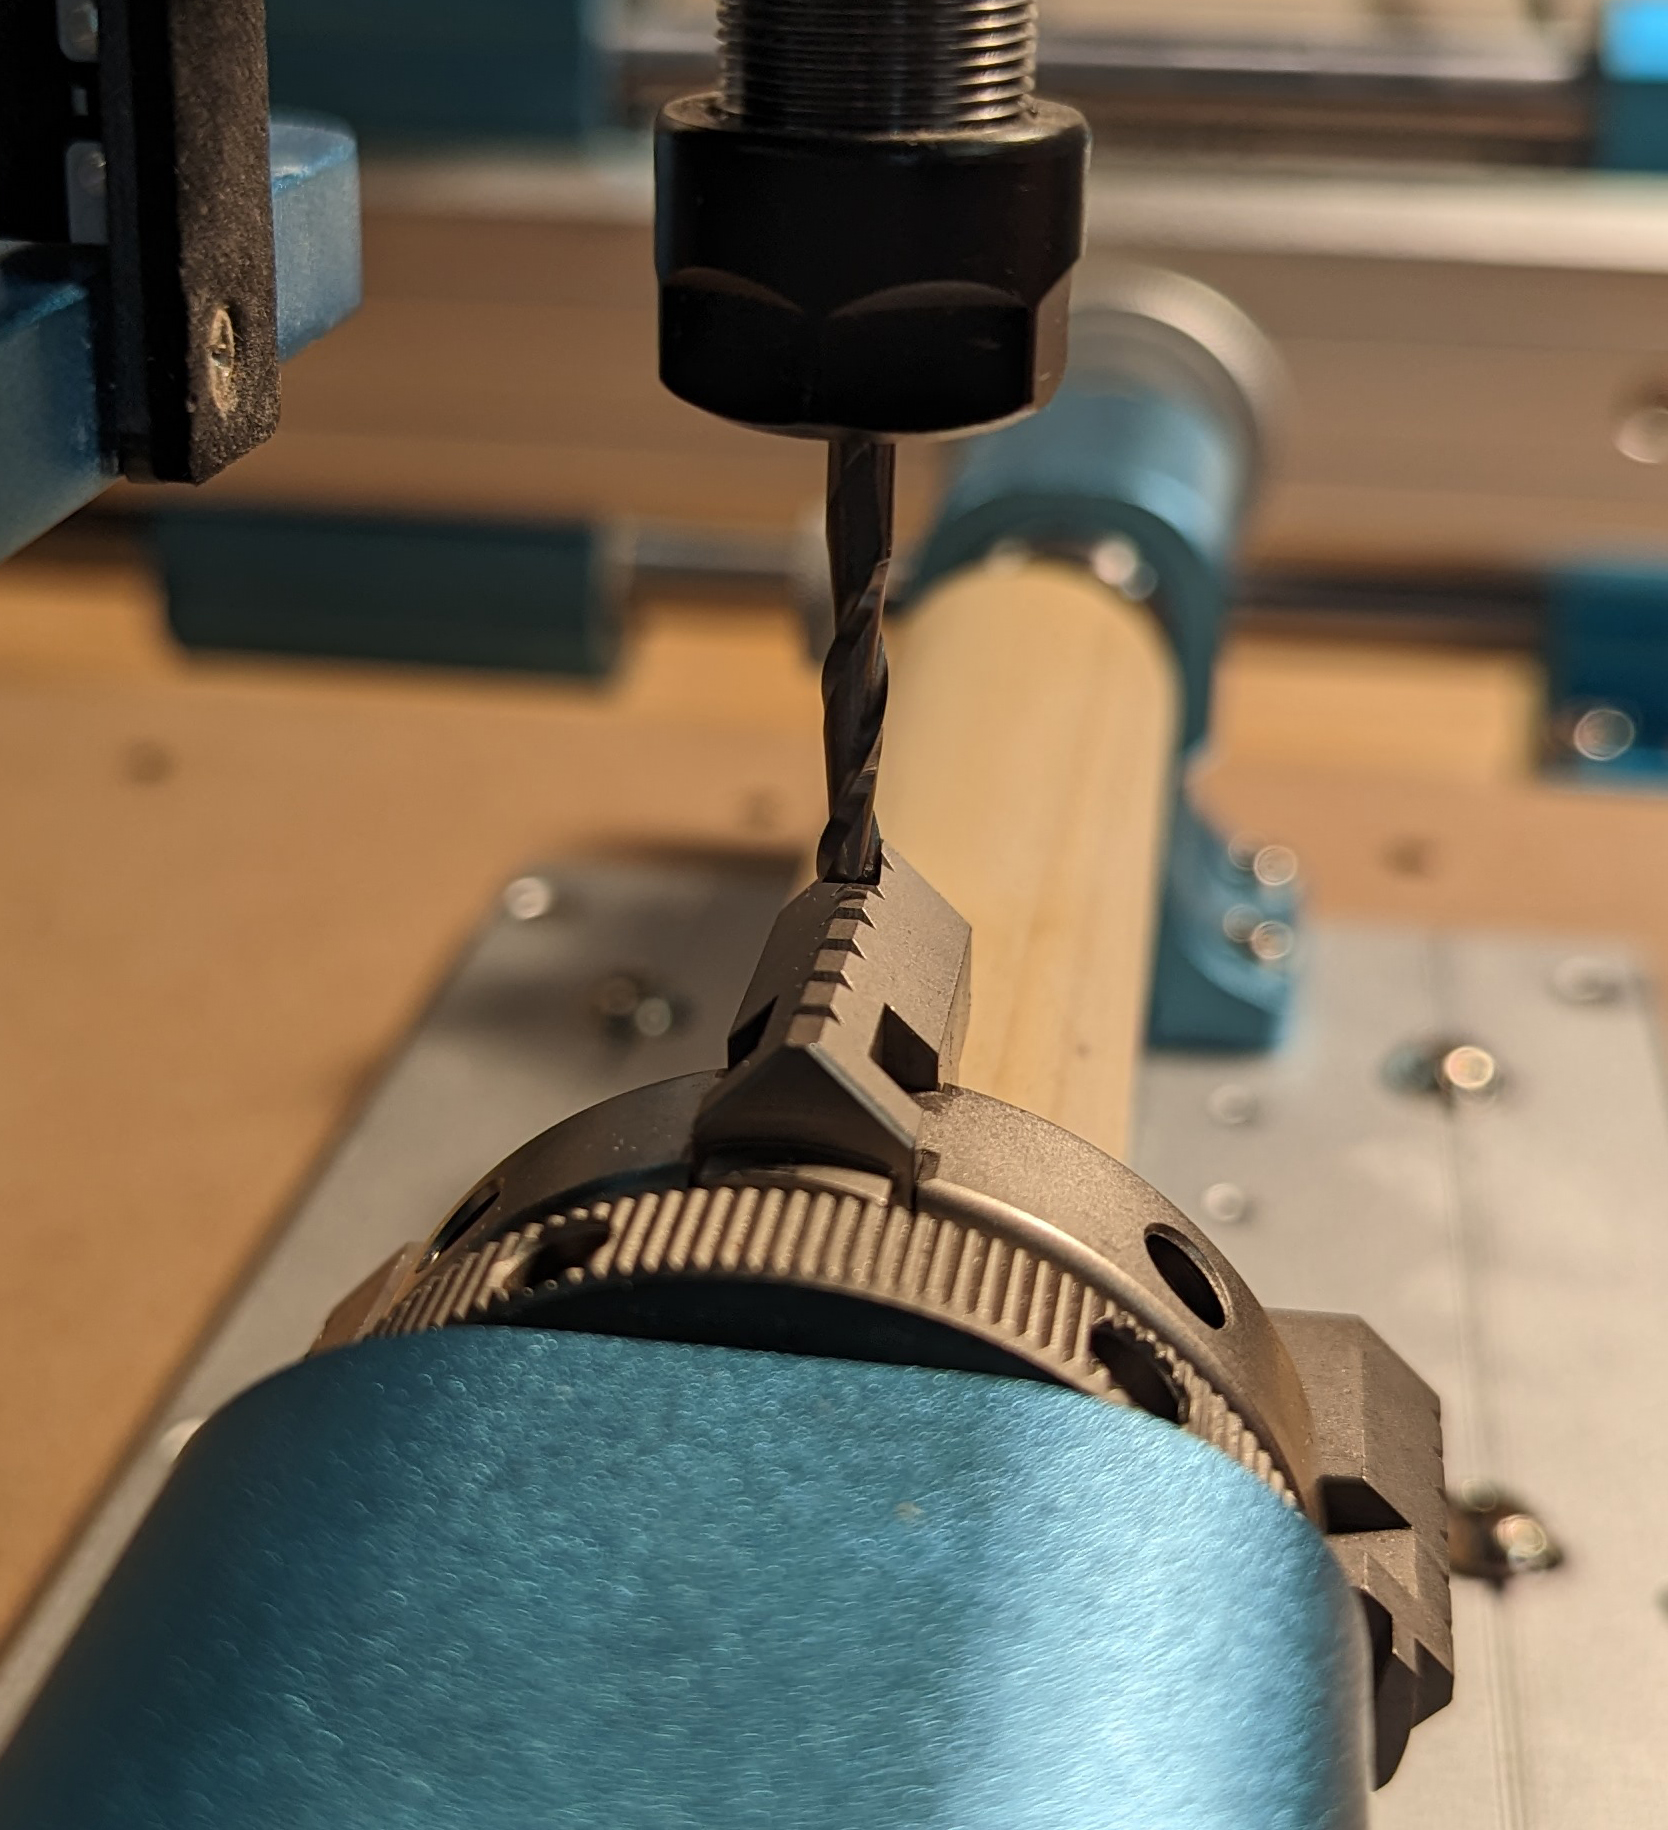
- At this point, you should have your rotary axis centered as much as possible and we can now proceed to center the stock. Next lift up your Z axis, jog X to the right so that you are again over the stock, and then lower your Z axis until it is just barely touching the stock using the "Paper method". This method is where you jog your Z axis down, starting in increments of 1mm, then .1mm, and finally .01mm until the endmill is pinching a piece of paper between it and the stock. The paper should still be able to slide around, so if you try to slip the paper out and it won't move, or it tears, then the z-axis is too low.
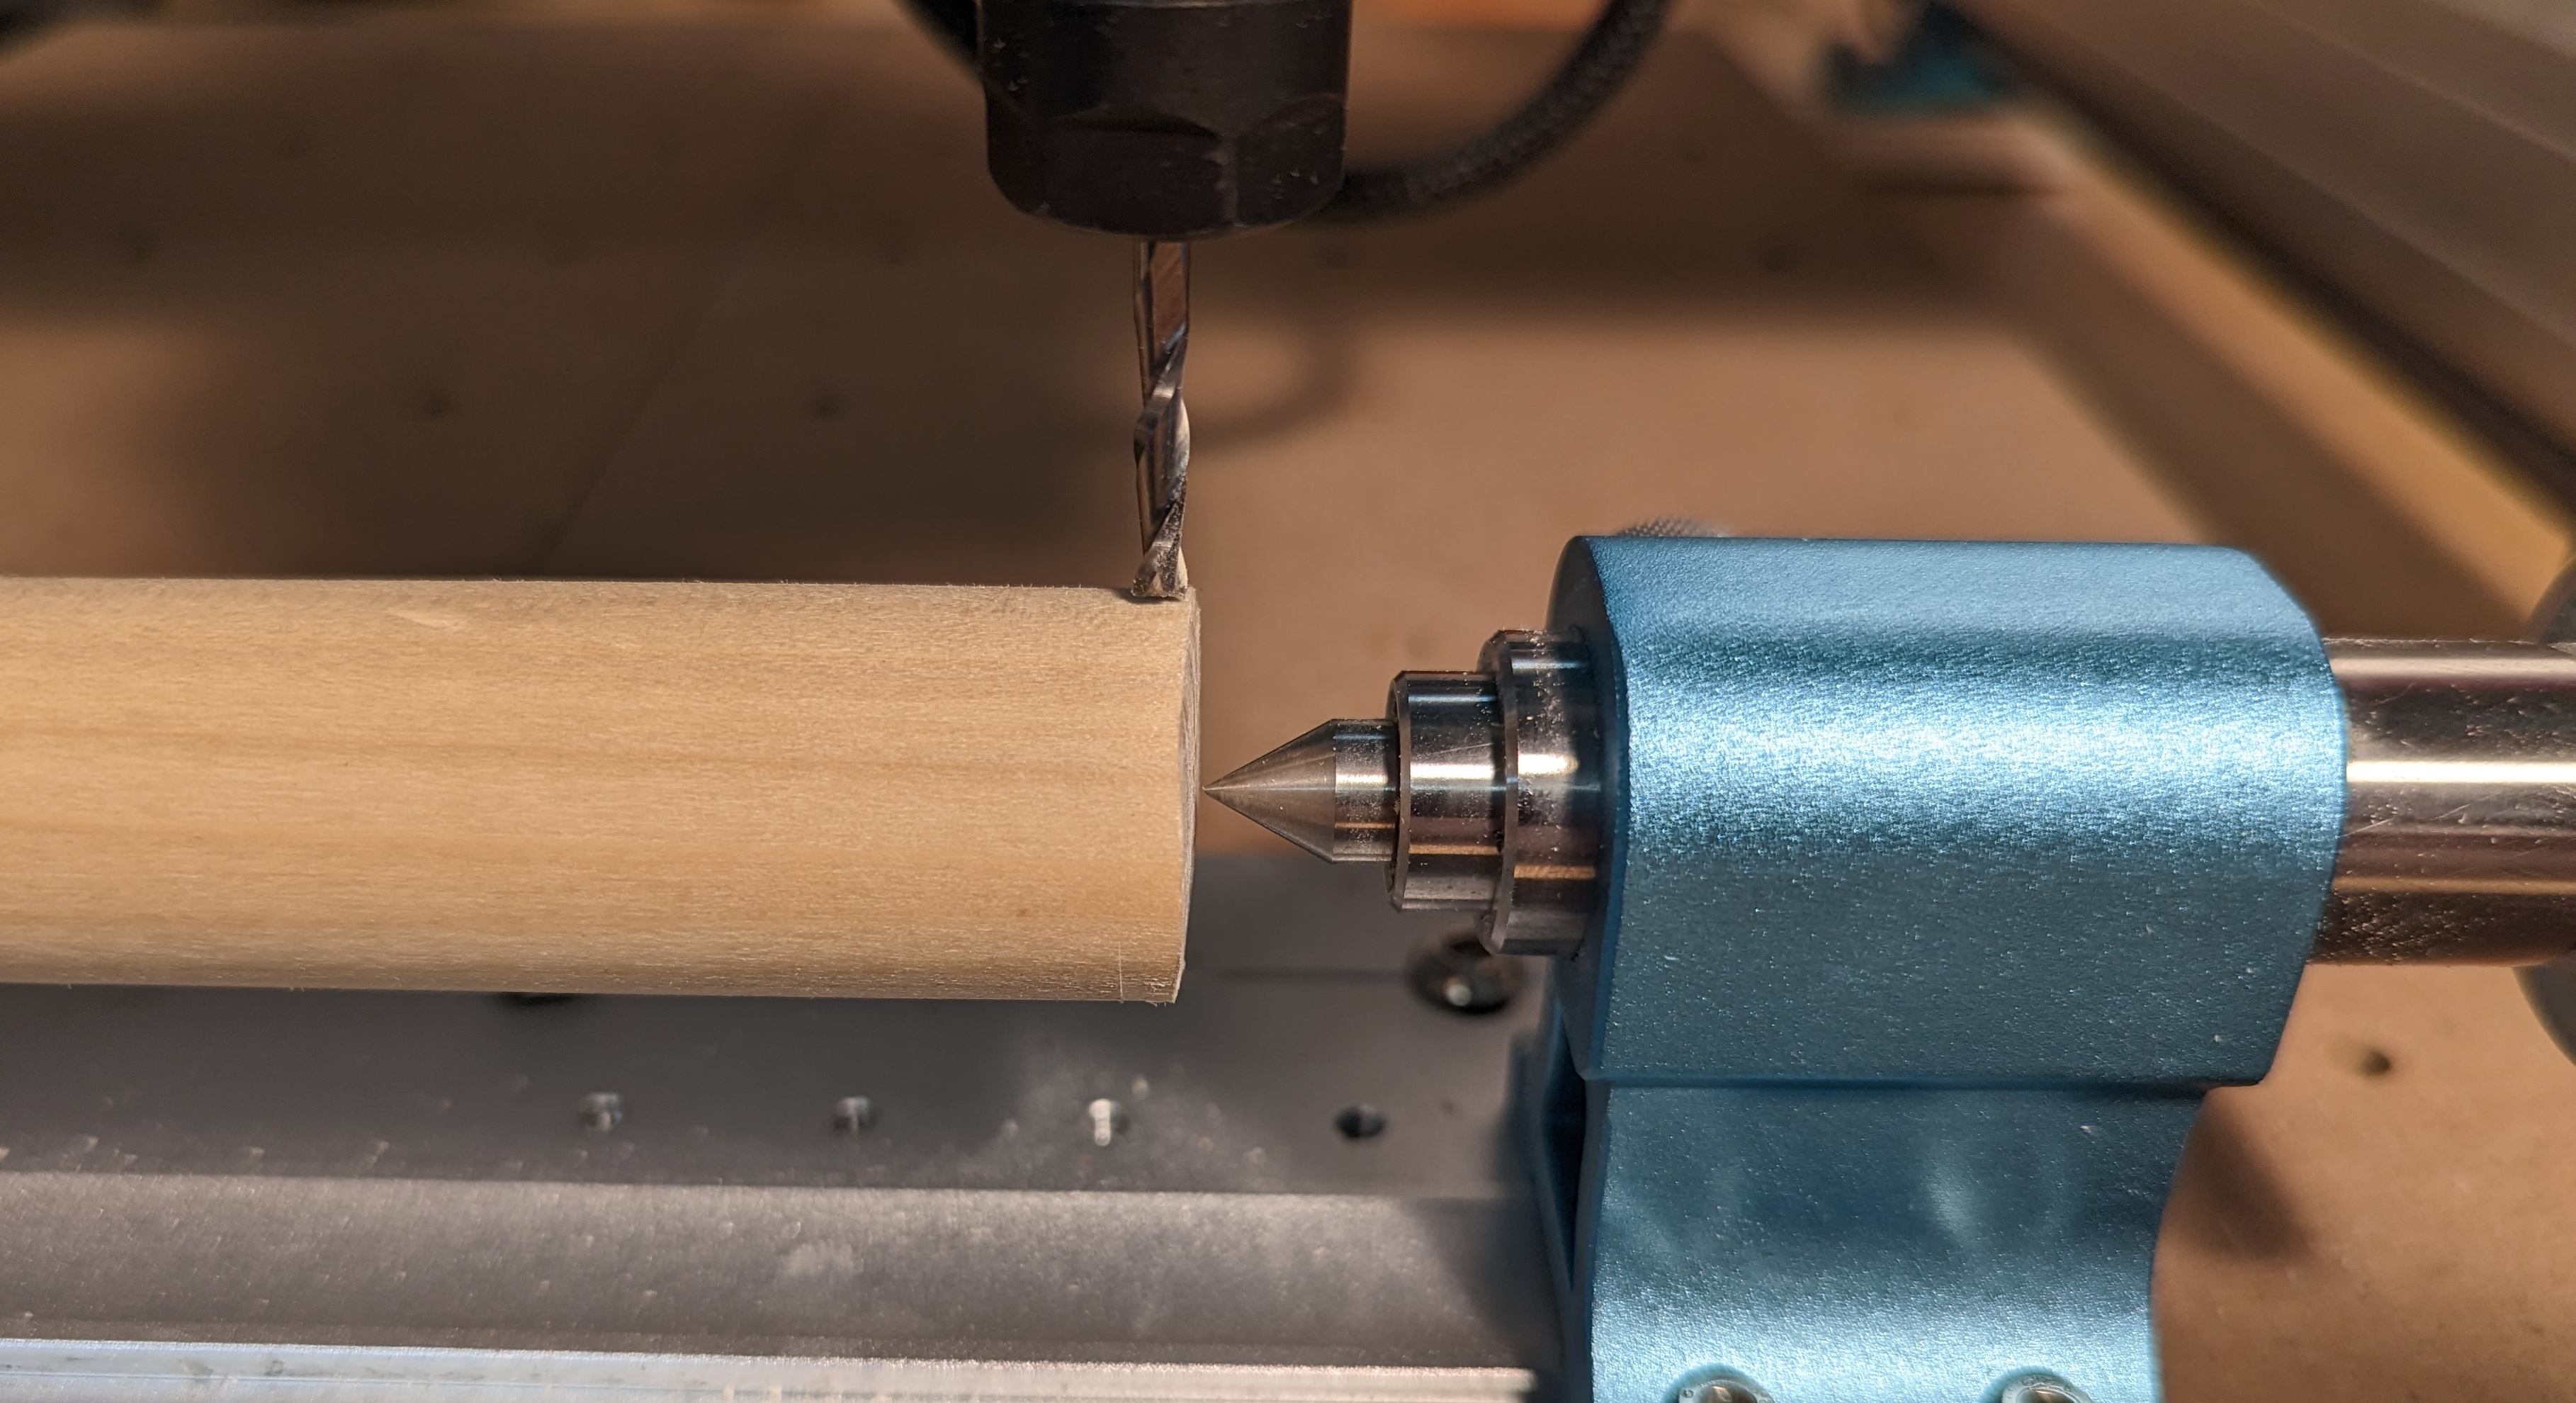
- Jog the Z axis up by 5 mm from the point you obtained from step 2, and move your X axis all the way to the end of the stock before lowering the Z axis down by 5mm again. At this point you should have a situation roughly like the image shown below. Push the end of your stock material up from the bottom until the endmill is touching.
- Jog your Z axis up by 5mm, rotate your 4th axis by around 90 degrees, it doesn't have to be perfect at this point, and then lower your Z axis down 5mm again. Push the end of your stock material up from the bottom until the endmill is touching.
- If you are not using an offline controller where you can jog the rotary axis easily, you can use a command through the console of Candle or UGS to rotate the 4th/A-axis. The command to do this is G91 A90 but after doing so you MUST enter the command G90 to make sure that the coordinate system does not get confused.
- Continue repeating step 4 another 2 times to be abundantly cautious if you want, but the stock should be centered at this point and you can engage and lock in the tail stock. Make sure to also lock down the collet chuch further with the chuck wrenches as well.