How To Zero-Out Your 4th Axis Project

Introduction
Where you need to zero each axis is based on the designs of the projects that you will make when building your projects, and toolpaths to cut those projects in software like DeskProto, V-Carve, and Fusion360 just to name a few. This guide will show how to zero your CNC in three different ways that we suggest that you use, but if you do not use the methods suggested then this guide will not work for you, at least not completely.
If you need help determining how to set up your project to conform to these suggested configurations, please note that this is done in the software, and you would need to seek out the support of that software in some form in order to do so.
A Note on using Z-probes: Do not even try to use the Z probe. It just isn't going to give you good results on 4 axis projects.
Zeroing your Stock Material Option 1
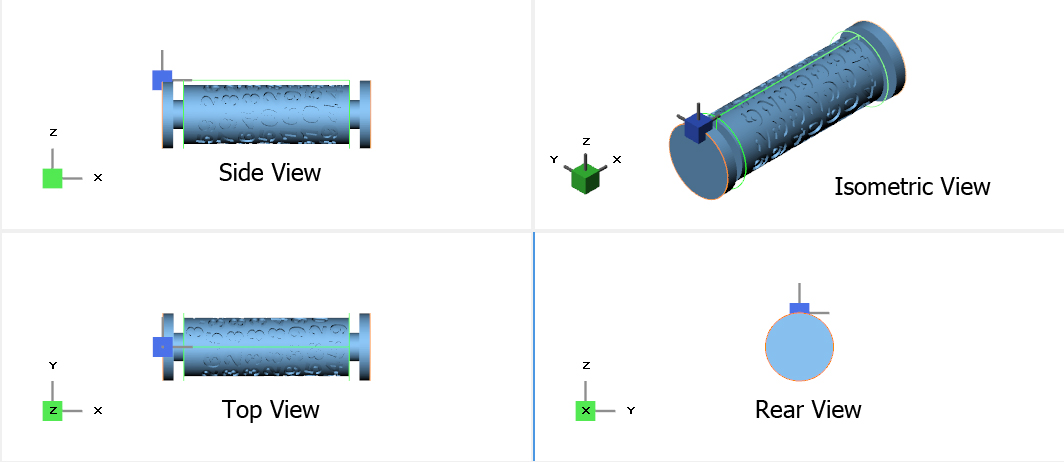
Unless you are doing something very specific (see Option 2 below), this should be how you want to set up 4th-axis projects 100% of the time. With this setup, you will find that:
X: The X-axis is zeroed to the left of the project, with the center point of the endmill being the starting point
Y: The Y-axis will be zeroed at the exact center point of the stock. This will be covered again below, but if you centered your stock according to the 2nd half of this guide, then your Y-axis is already zeroed.
Z: The Z-Axis will be zeroed off of the top of the stock, from the center point of the Y-axis. If you try to zero your Z-axis while Y is off-center then your depth of cut will not be correct.
A: For those unaware, this is what we call the Rotary, or 4th-Axis. If you wanted to send commands to move this Axis it would have to send commands to A as well. For this configuration, you just need to zero the A axis wherever it is before you start the program. It is important to note with the A axis, that in conventional software like Candle and UGS you cannot zero the A axis with a button click, you need to send the command G92 A0 in order to do so.
- Home your CNC, always do this, it's a good habit to get into. It is vital if you need to run a second program after the first for any reason. For more information on this process, which works with the 4th axis, see this guide.
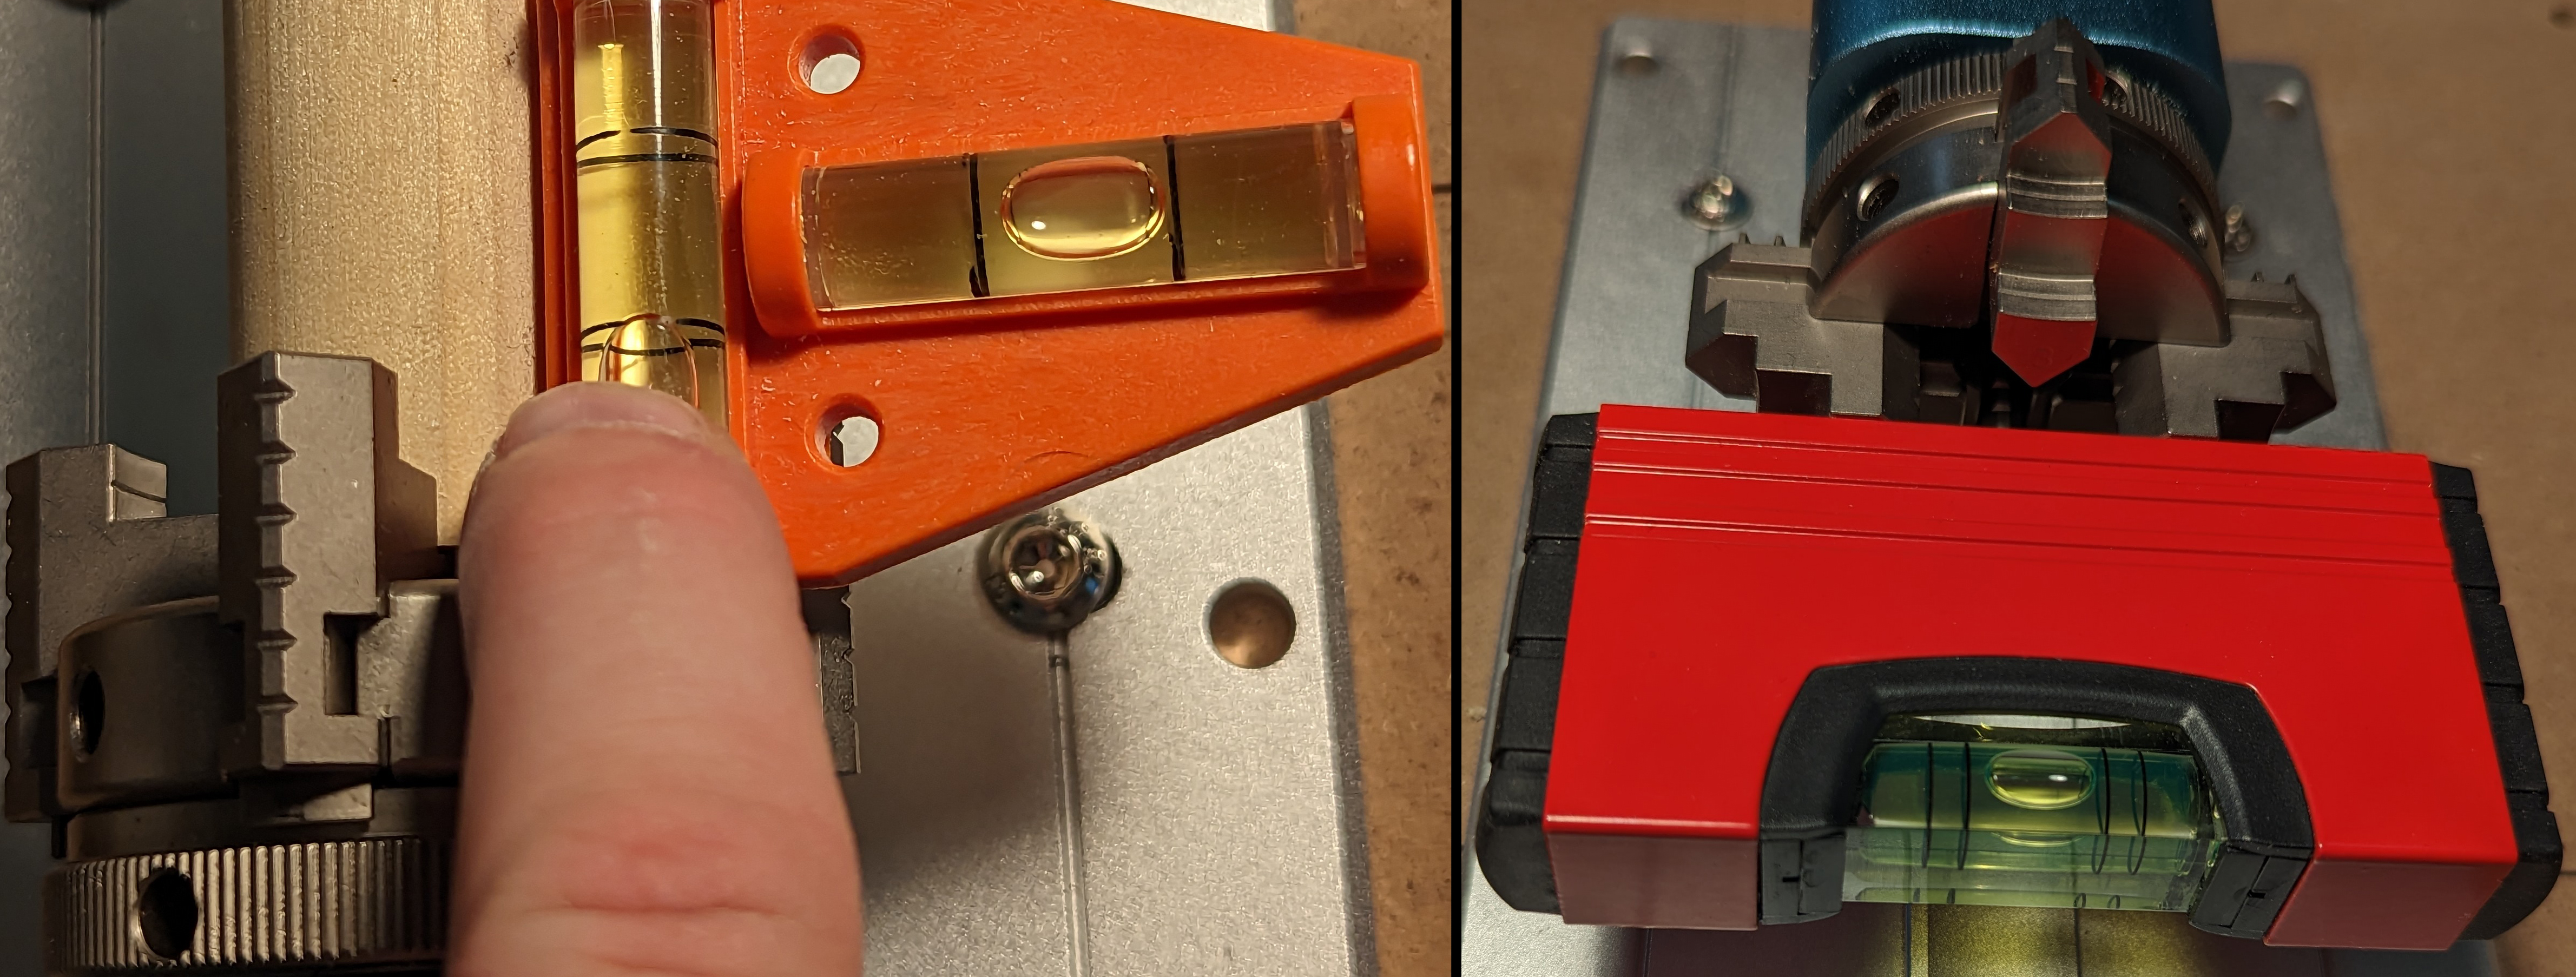
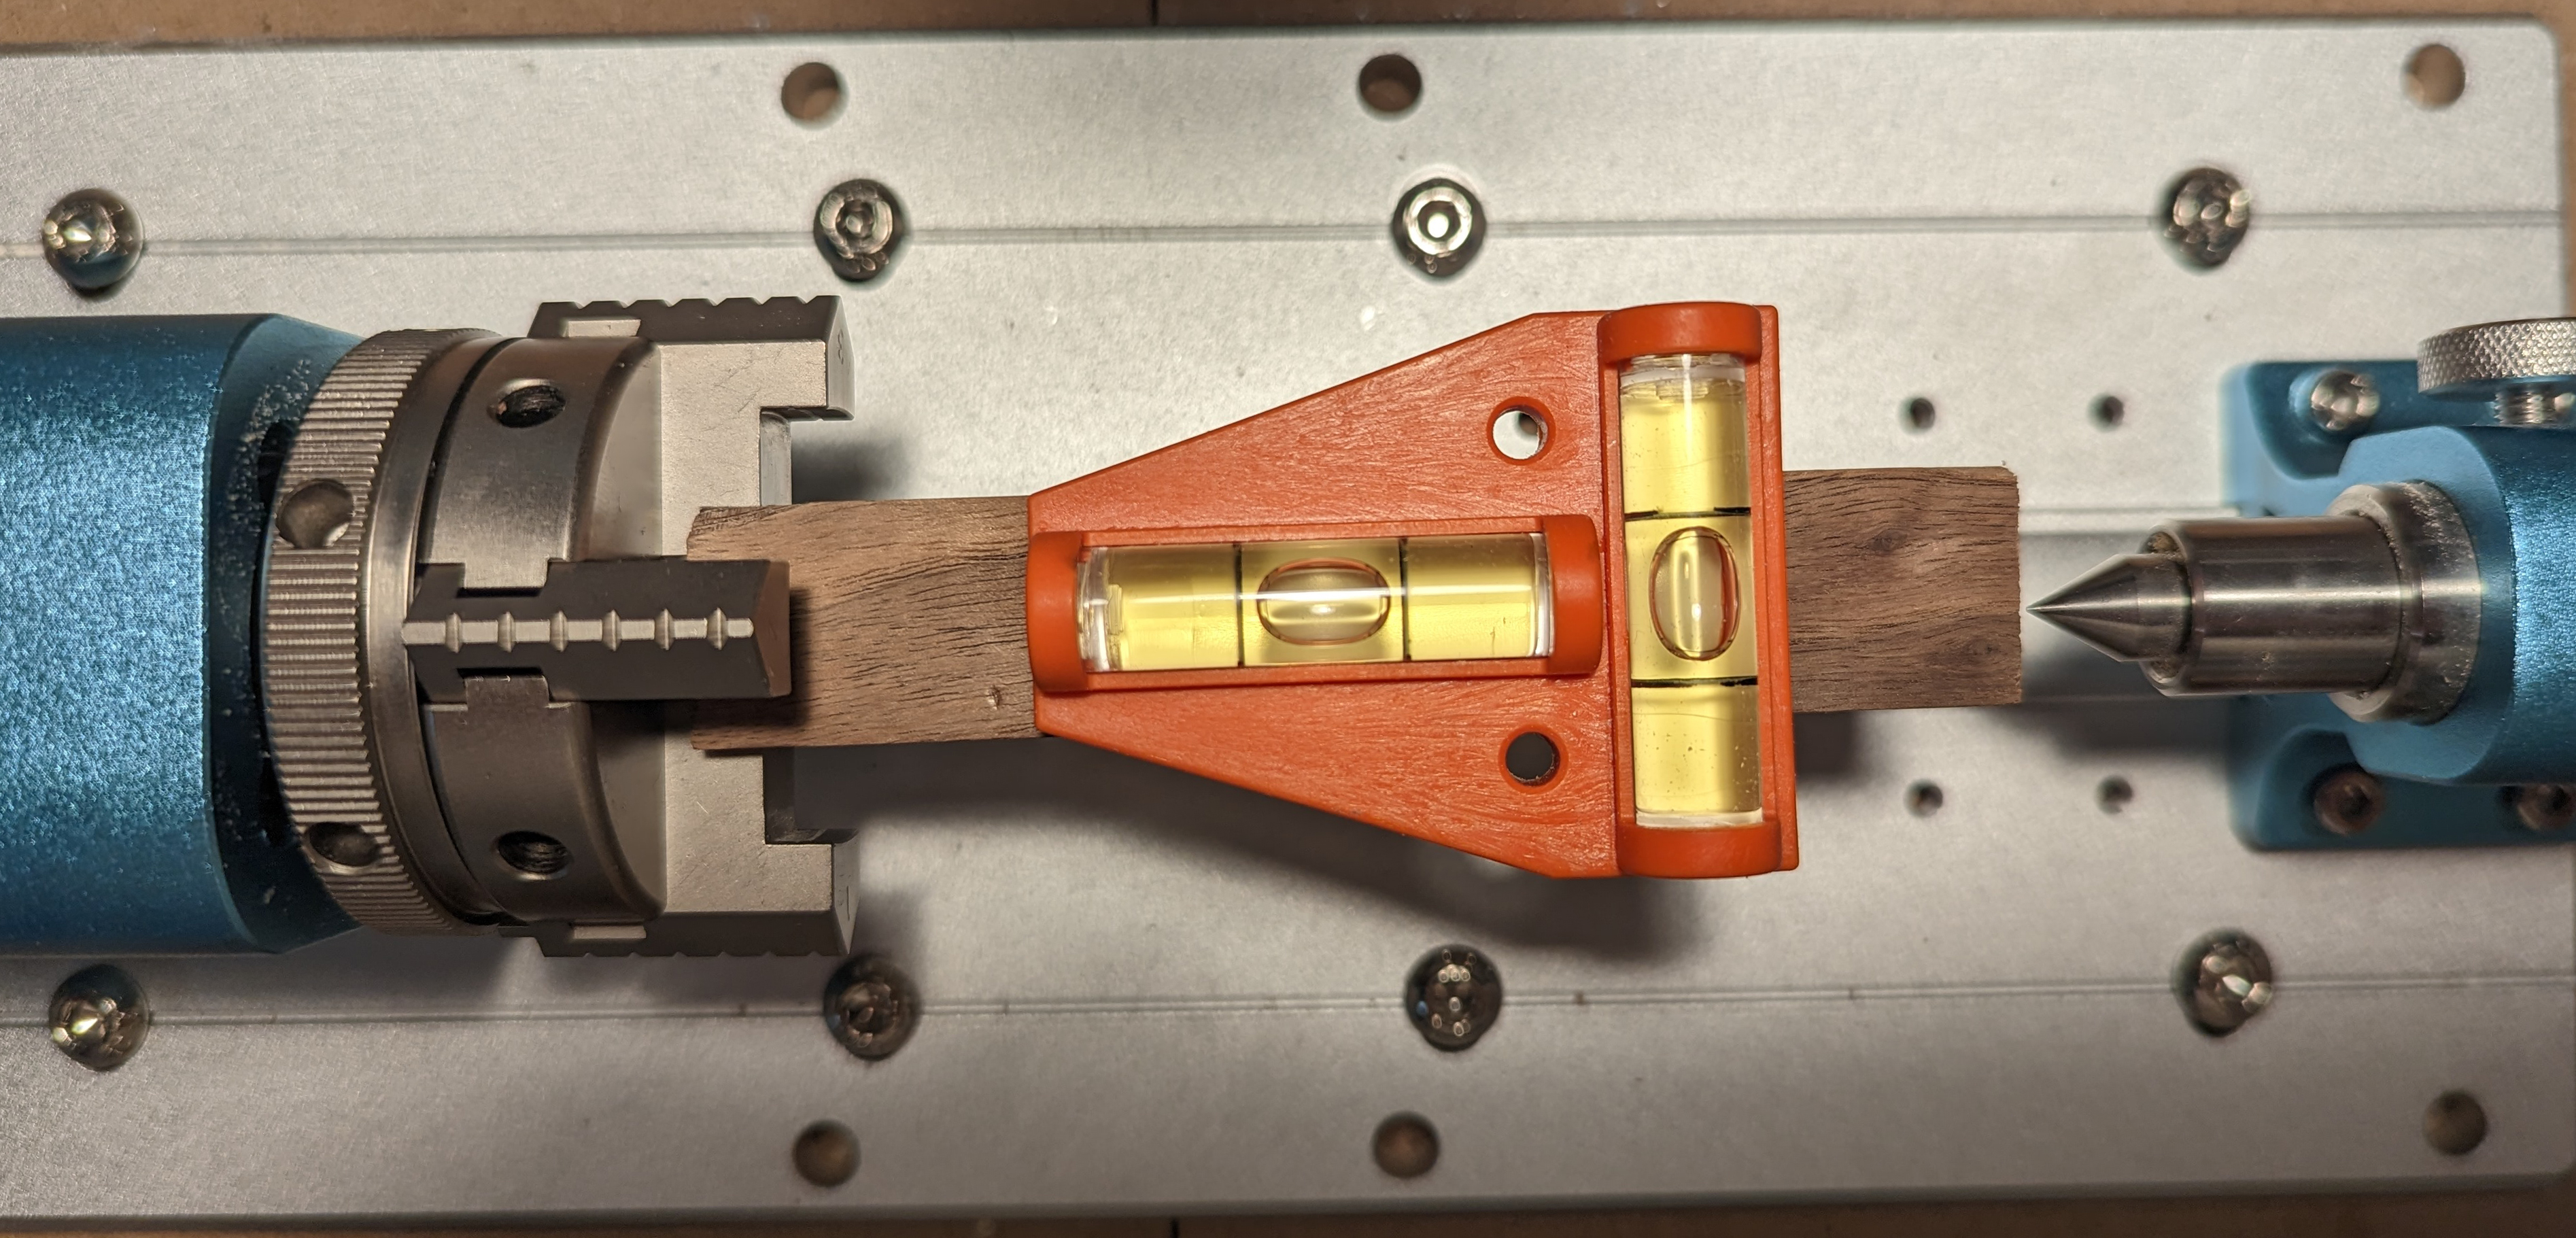
- You will want to start with the Y-axis, and to do that you need to center it on your stock. The best way I have found, to get your Y-axis centered is to start by rotating your chuck so that one of the 4 teeth is sticking up at a perfect 90-degree angle. There are a number of ways that this can be done, but using a small level.
- The trick to this is that when one tooth is vertical at 90 degrees, the two teeth to the side should be perfectly horizontal at that time. So by leveling one of the teeth on the side, you can assume that the top tooth is close enough to perfectly vertical. This can also be done prior to installing the stock material, using a larger magnetic level like the one shown on the right:
- With the center of the Y axis set up, you can then jog your CNC so that the endmill is as centered as possible on the collet chuck. Once in place, you can zero the Y axis, or if you are using a program like Candle or UGS you can wait to zero until the X axis is in place as well.
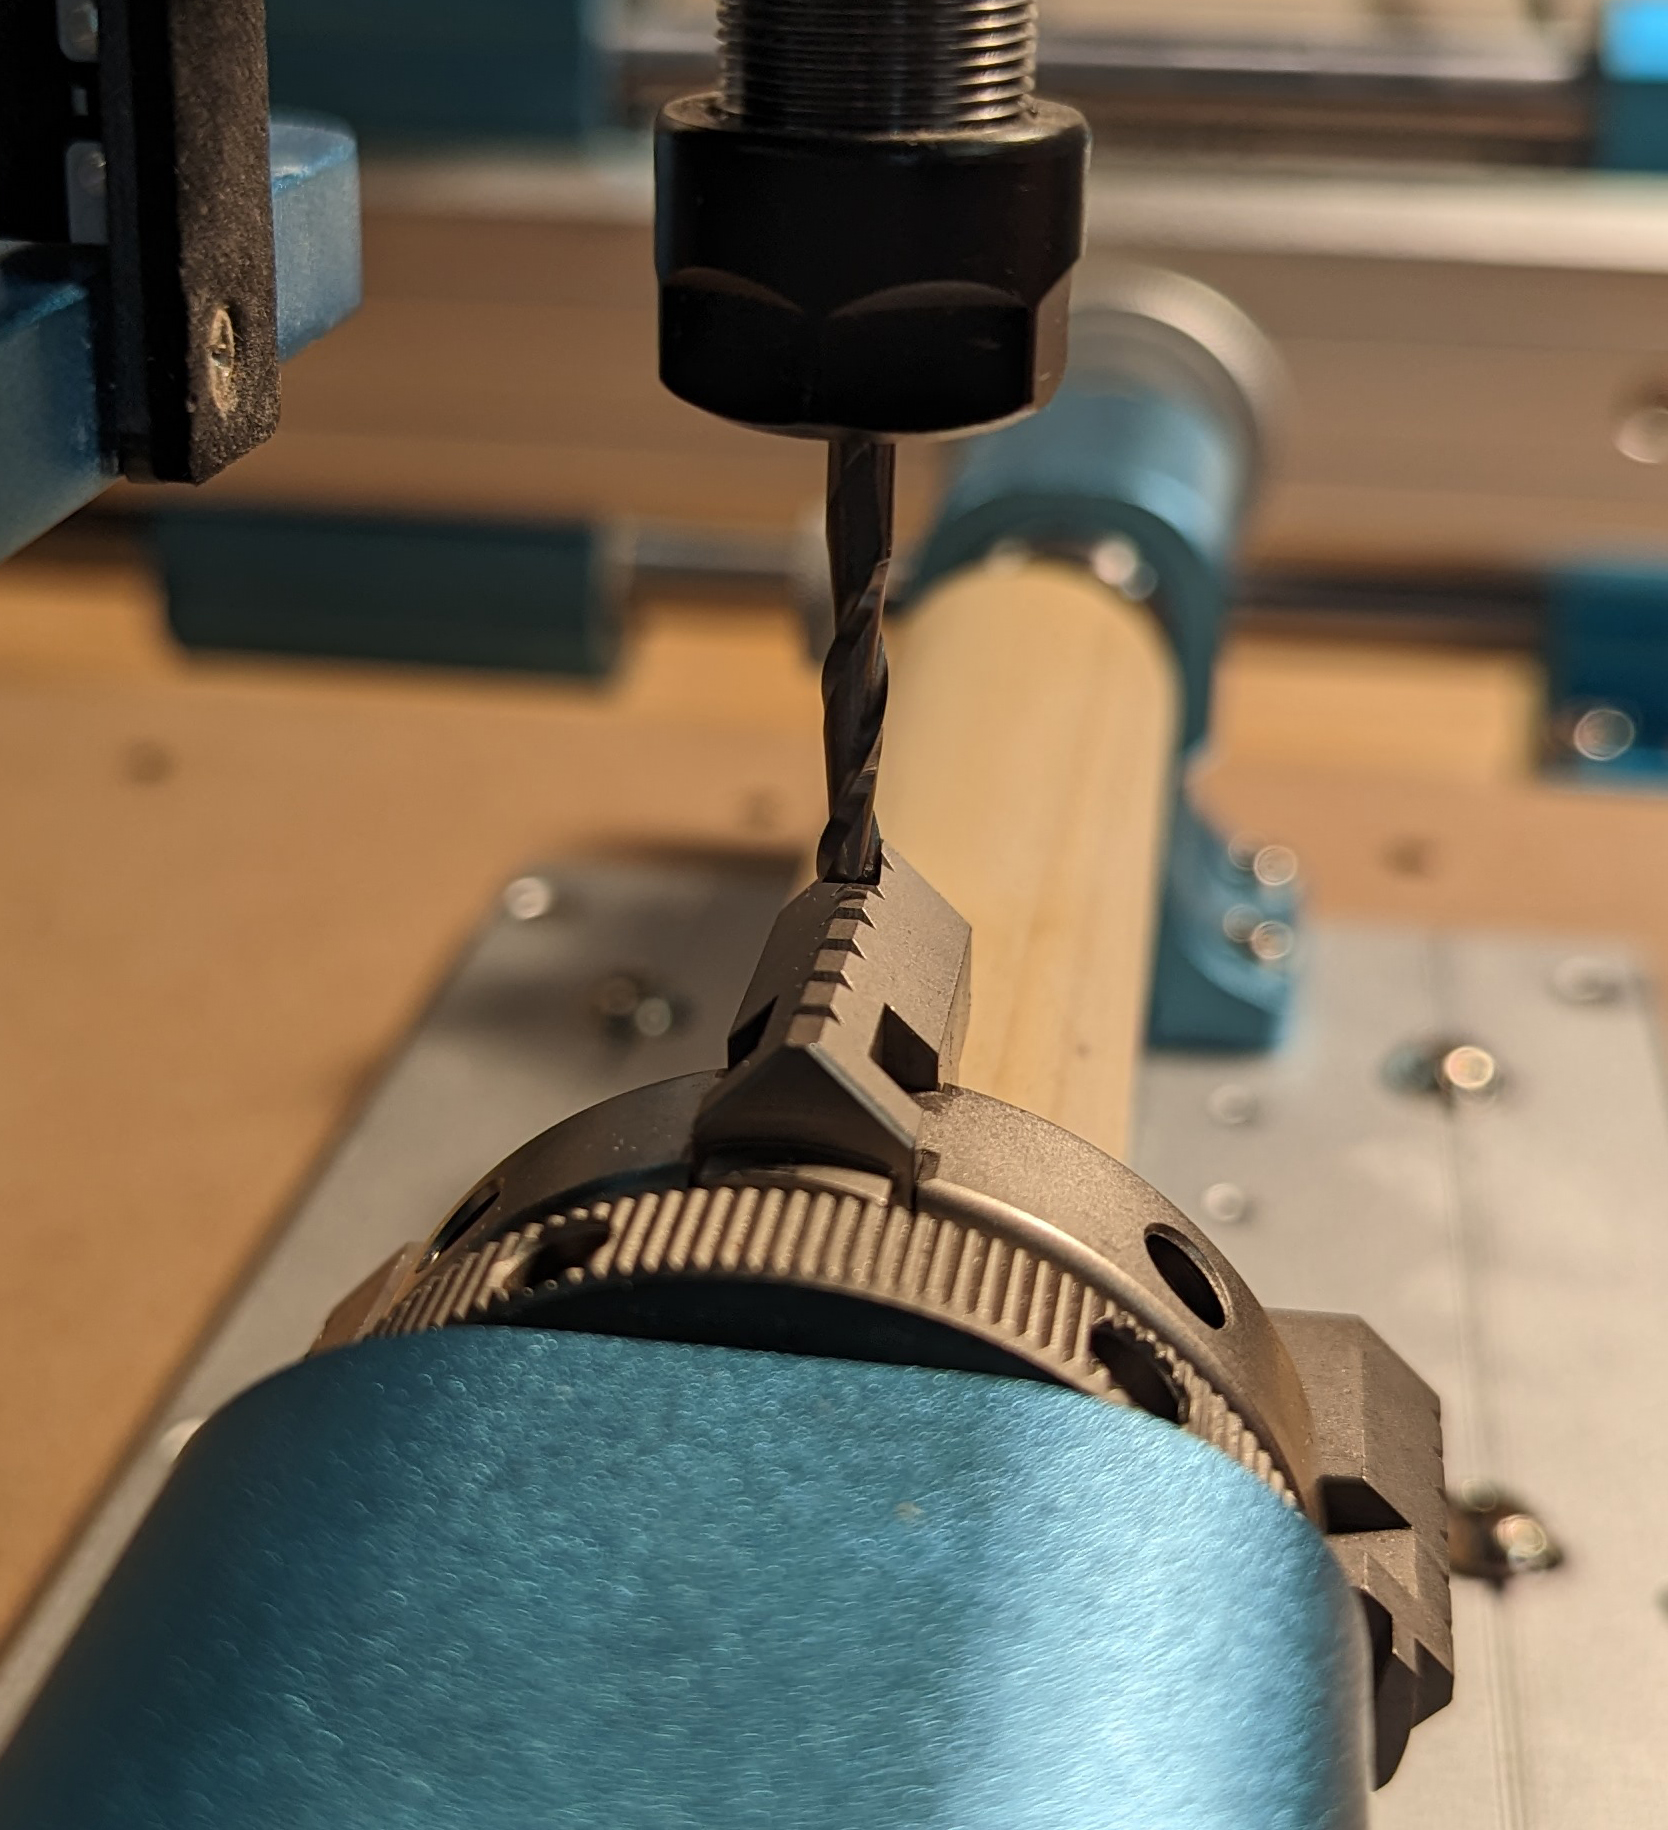
- In order to get the X axis in place, lift Z up slightly so that we make sure that the end mill will not collide with the chuck and then jog over the stock material. You want it to be as close to the chuck as possible with enough clearance for the width of the spindle collet so that no matter how low the Z axis drops, no part of your spindle shaft will collide with any of the teeth on the chuck. You can move your X-axis further to the right of this point if needed, but make sure that you have enough stock material to the right of X0 for your project. If you are using Candle or UGS you can now hit the "Zero X/Y" button. Both X and Y will now be zeroed.
- For the Z axis, you will want to drop it down until it is close to touching the stock material, and complete the zeroing process using the "Paper Method" by jogging your Z axis down, starting in increments of 1mm, then .1mm, and finally .01mm until the endmill is pinching a piece of paper between it and the stock. The paper should still be able to slide around, so if you try to slip the paper out and it won't move, or it tears, then the z-axis is too low. Zero your Z axis.
- If you are using the offline controller, you can Zero the A axis easily enough by selecting the button, but if you are using Candle, UGS, or other 3-axis control software you will need to send a command to zero instead. The command to do this is G92 A0 and make sure that you hit enter.
- All Axes are now zeroed and you can proceed with loading/running your file.
Zeroing Your Stock Material Option 2
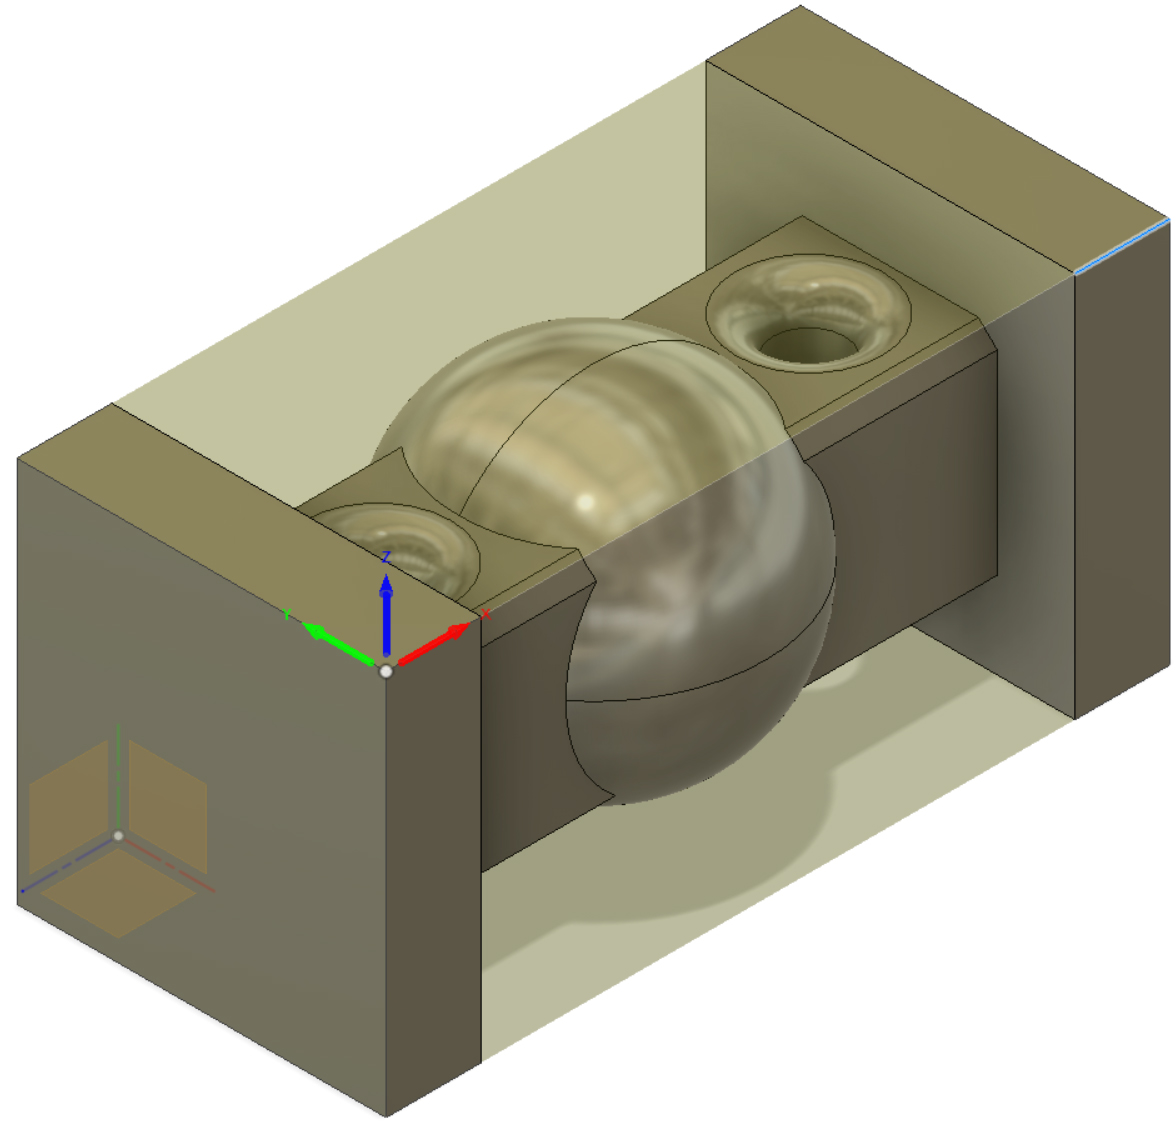
To many people this will look familiar to you, the reliable bottom-left corner of the project. It is really not suited for 4th axis projects, though. The one exception is if you are doing a "true" 4axis engraving like this where the Y axis is actively moving along with X, Z, and A:
This is a lot harder to program, the only way to do it that we are aware of at this time is with Fusion 360 and a lot of manual work stitching files together. A guide will be made on this eventually, but for the moment consider this sort of project to be very advanced.
With this setup, you will find that:
X: The X-axis is zeroed to the left of the project, with the center point of the endmill being the starting point
Z: The Z-Axis will be zeroed off of the top of the stock, from the center point of the Y-axis. If you try to zero your Z-axis while Y is off-center then your depth of cut will not be correct.
A: For those unaware, this is what we call the Rotary, or 4th-Axis. If you wanted to send commands to move this Axis it would have to send commands to A as well. For this configuration, you just need to zero the A axis wherever it is before you start the program. It is important to note with the A axis, that in conventional software like Candle and UGS you cannot zero the A axis with a button click, you need to send the command G92 A0 in order to do so.
- Home your CNC, always do this, it's a good habit to get into. It is vital if you need to run a second program after the first for any reason. For more information on this process, which works with the 4th axis, see this guide.
- Rotate your Rotary/4th Axis so that the squared stock material is level against the axis of rotation.
- Unlike the other option, it is best to start with the X axis for this one. Jog your X axis so that your endmill and close to, but clear of either the endmill or spindle shaft having any chance of colliding with the teeth of the chuck. You can move your X-axis further to the right of this point if needed, but make sure that you have enough stock material to the right of X0 for your project.
- Next is the Y-axis. Much more so than a 3-axis project, the exact position of your Y-Zero is really, really important. From the X-Zero position, Jog the Y-axis towards the forward edge of the stock material (towards the front of the CNC) and you will want to make every effort to zero the exact center of your endmill is over the precise edge of the squared stock material. If you go to do this without taking great care, when you go to rotate another side it will not match up with the previous or next. Doing this is a bit of an art form, and will take time. Once you have this setup, both your X and Y axis are in position and you can zero both.
- If you lowered the Z axis while setting up Y (it can help) raise it up again and jog the Y axis towards the center of the stock material. No need to be precise, just close to the center. You will want to drop the Z-axis down until it is close to touching the stock material, and complete the zeroing process using the "Paper Method" by jogging your Z-axis down, starting in increments of 1mm, then .1mm, and finally .01mm until the endmill is pinching a piece of paper between it and the stock. The paper should still be able to slide around, so if you try to slip the paper out and it won't move, or it tears, then the z-axis is too low. Zero your Z axis.
- All Axes are now zeroed and you can proceed with loading/running your file.