Mach3 Software Installation & Configuration

Introduction
Included with the CD/USB stick that came with your MX3 is a copy of the trial version of Mach 3. Should you be unable to find your CD, you can download the full contents here.
Installation
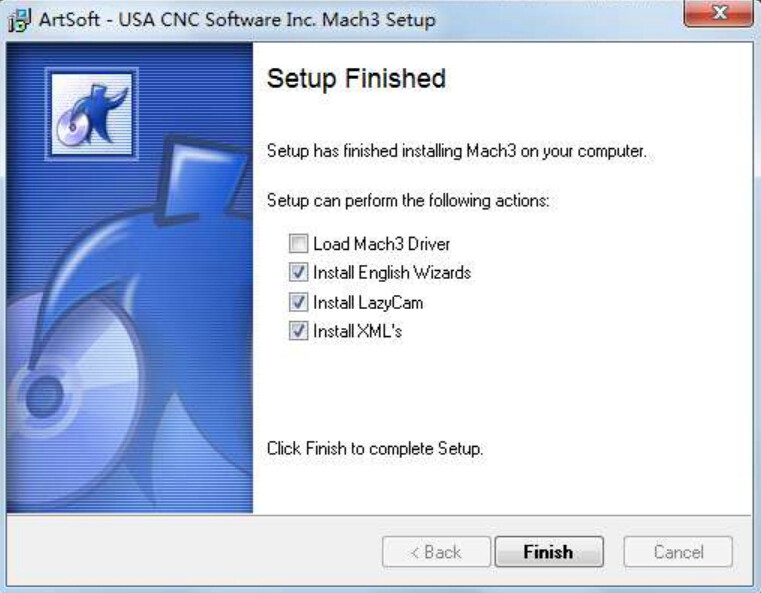
The file name you are looking for is Mach3VersionR3.041. You'll want to follow the usual process for installation, but please note that for 64-bit computers that you will need deselect LoadMach3Driver as it would cause installation errors.
Mach3 License
As mentioned, the mach3 software we provide is a trial version. It can only run up to 500 lines of G code, and does not enable the testing of machine functions. If you like it and want the full version, you can purchase it from us here or through the mach3 official website.
Mach3 Configuration & Plug-In Import
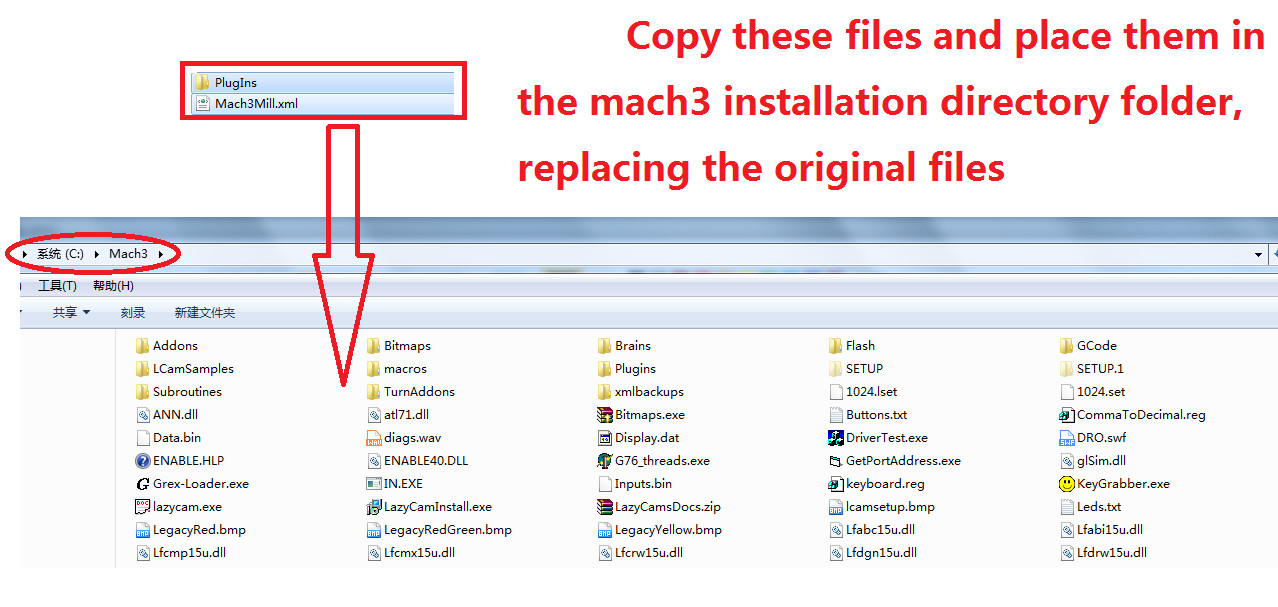
Copy the file Mach3Mill.xml and Plugins folder from CD, and use it to replace the file of the same name in the mach3 installation directory, as shown in the following figure:
Starting Mach3
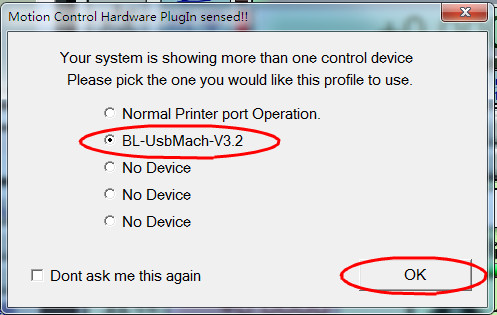
To launch the software, click the desktop icon that says Mach3Mill. When you do so a text box will pop up that asks you to select from a number of devices connected to your computer. select the BL-UsbMach-V3.2, you can also select “Don't ask me this again”.
Engraving Process Example:
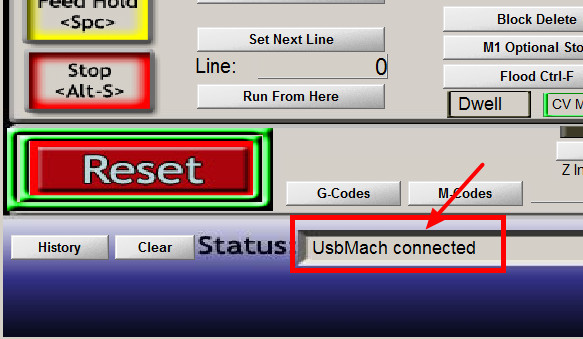
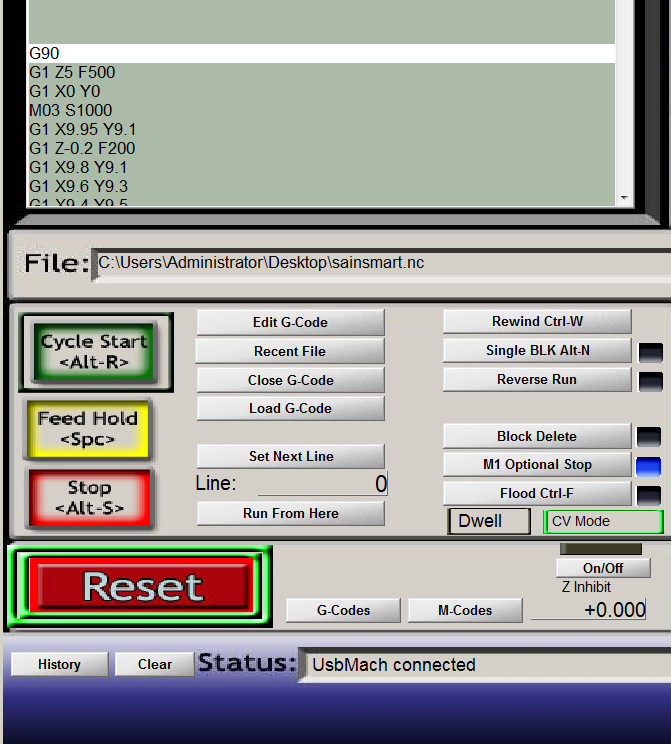
- Reset the software and make sure that the bottom status bar says "Usbmach connected" as shown here:
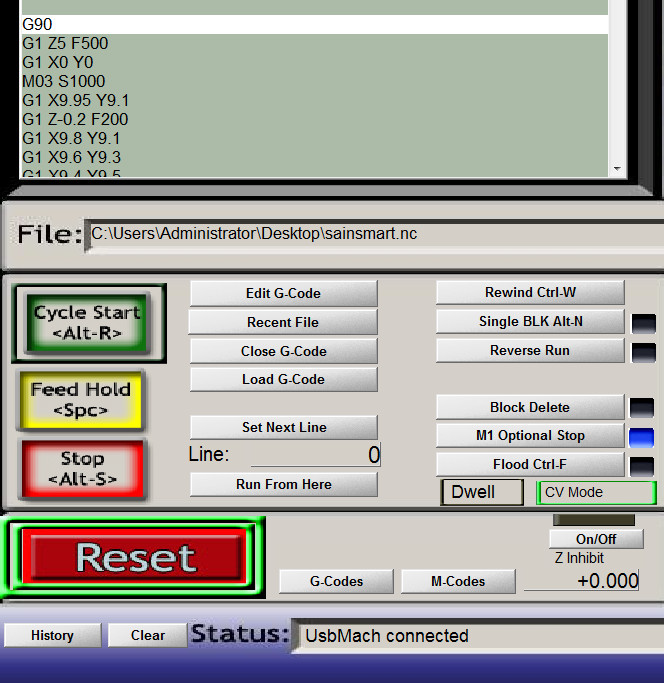
- Click "Load G-Code" to import the engraving code, for example, import the NC file in the CD: sainsmart.nc, as shown below:
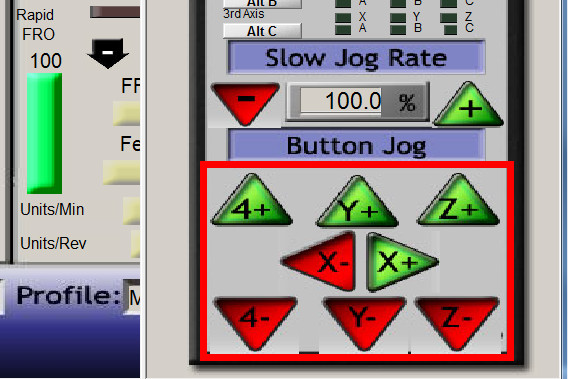
- Use the manual function to move the X Y Z axis to find the machining starting point/origin
- To do so, press Tab on your keyboard to bring up the virtual MPG interface (if you do not have a hand wheel) and click on X Y axis button to manually control the motor work, to find the machining start point of the workpiece,as shown below:
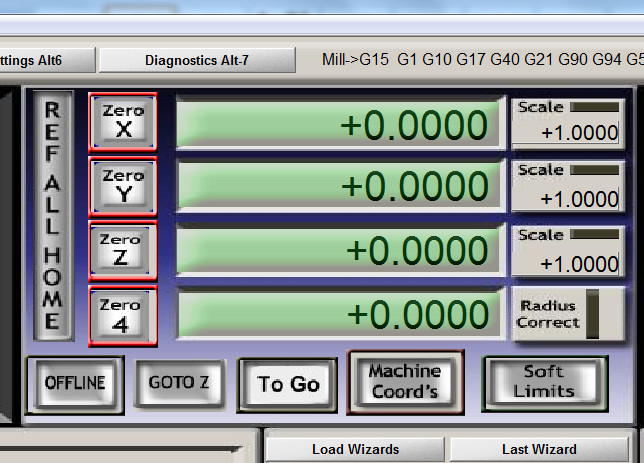
- Zero the X, Y & Z coordinates as shown with the buttons below:
- Press CycleStart in order to start your program. You can also use Feed Hold to pause the program and of course Stop to stop the program permanently.
Notes on Mach3 Features
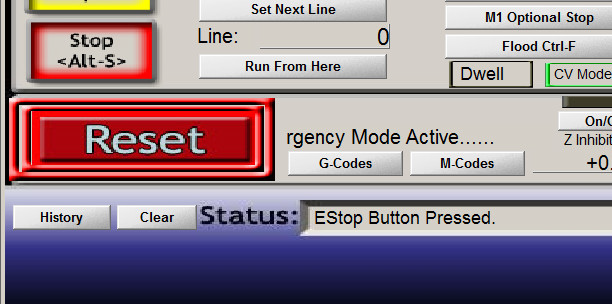
Reset Button
If "Reset" is flashing ,the software will not work. If it cannot be reset, please check if the motion control is connected, Check software input settings.
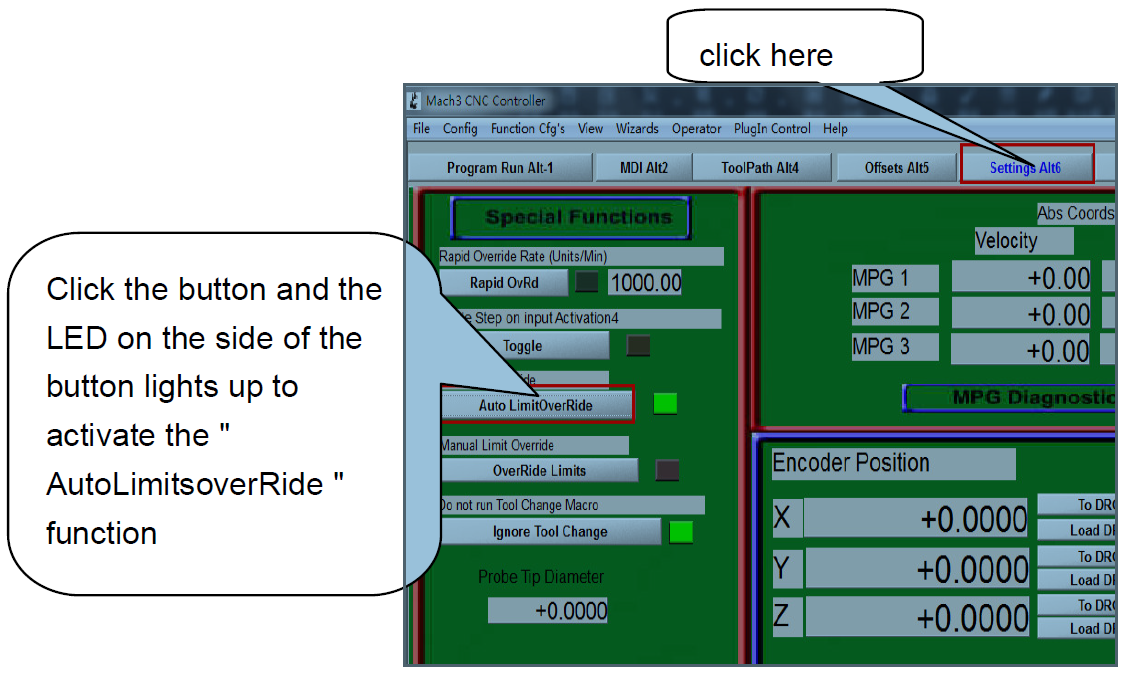
Limit Switch Release
After the limit trigger, the software can't do anything. At this time, the " Auto LimitsoverRide " function can be used to restore the manual operation function. Once you have moved your CNC so the limit switch is no longer triggered, you can release limit trigger as shown in the figure:
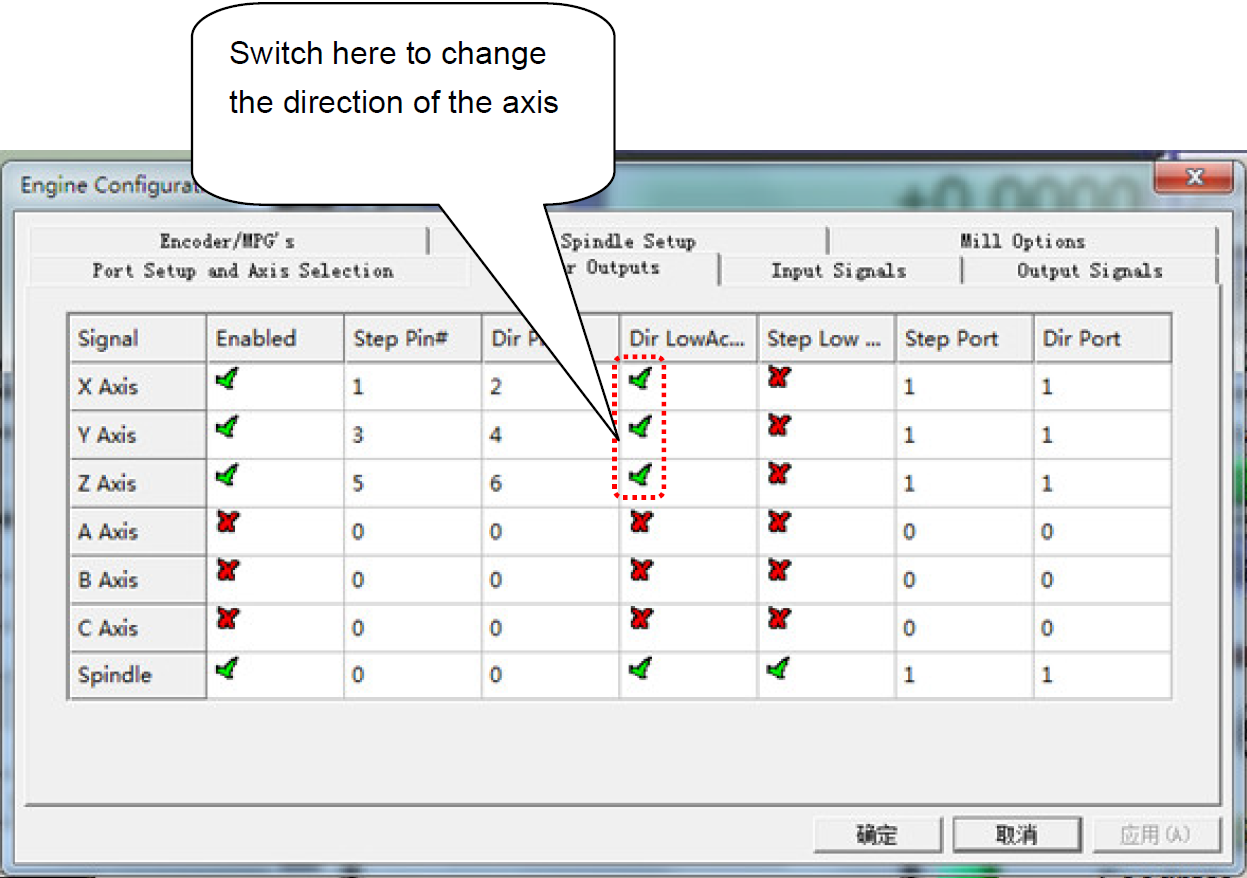
Inverting Axis Directions
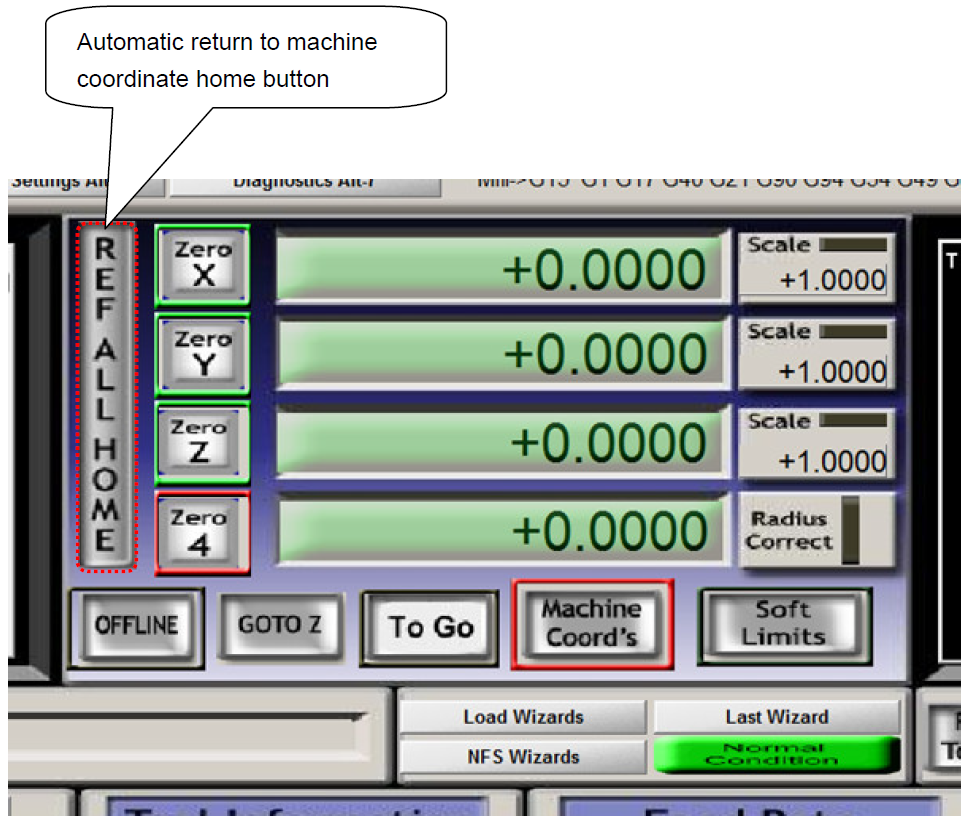
Returning CNC to Home
The limit switch can be used as the home coordinate switch, which can realize the automatic homing function. As shown in the figure below: