Genmitsu PROVerXL 4030 Offline Controller User Guide

This offline controller is sold separately from the PROVerXL 4030 (You can purchase it here) as an alternative to the traditional method of operating your GRBL based CNC through your computer. Through theuse of your offline controller you can control the router, move to and set the home, origin position etc. and then send the contents of the files directly to the router without needing a PC connected to it via a USB cable.
What You Get with your Offline Controller
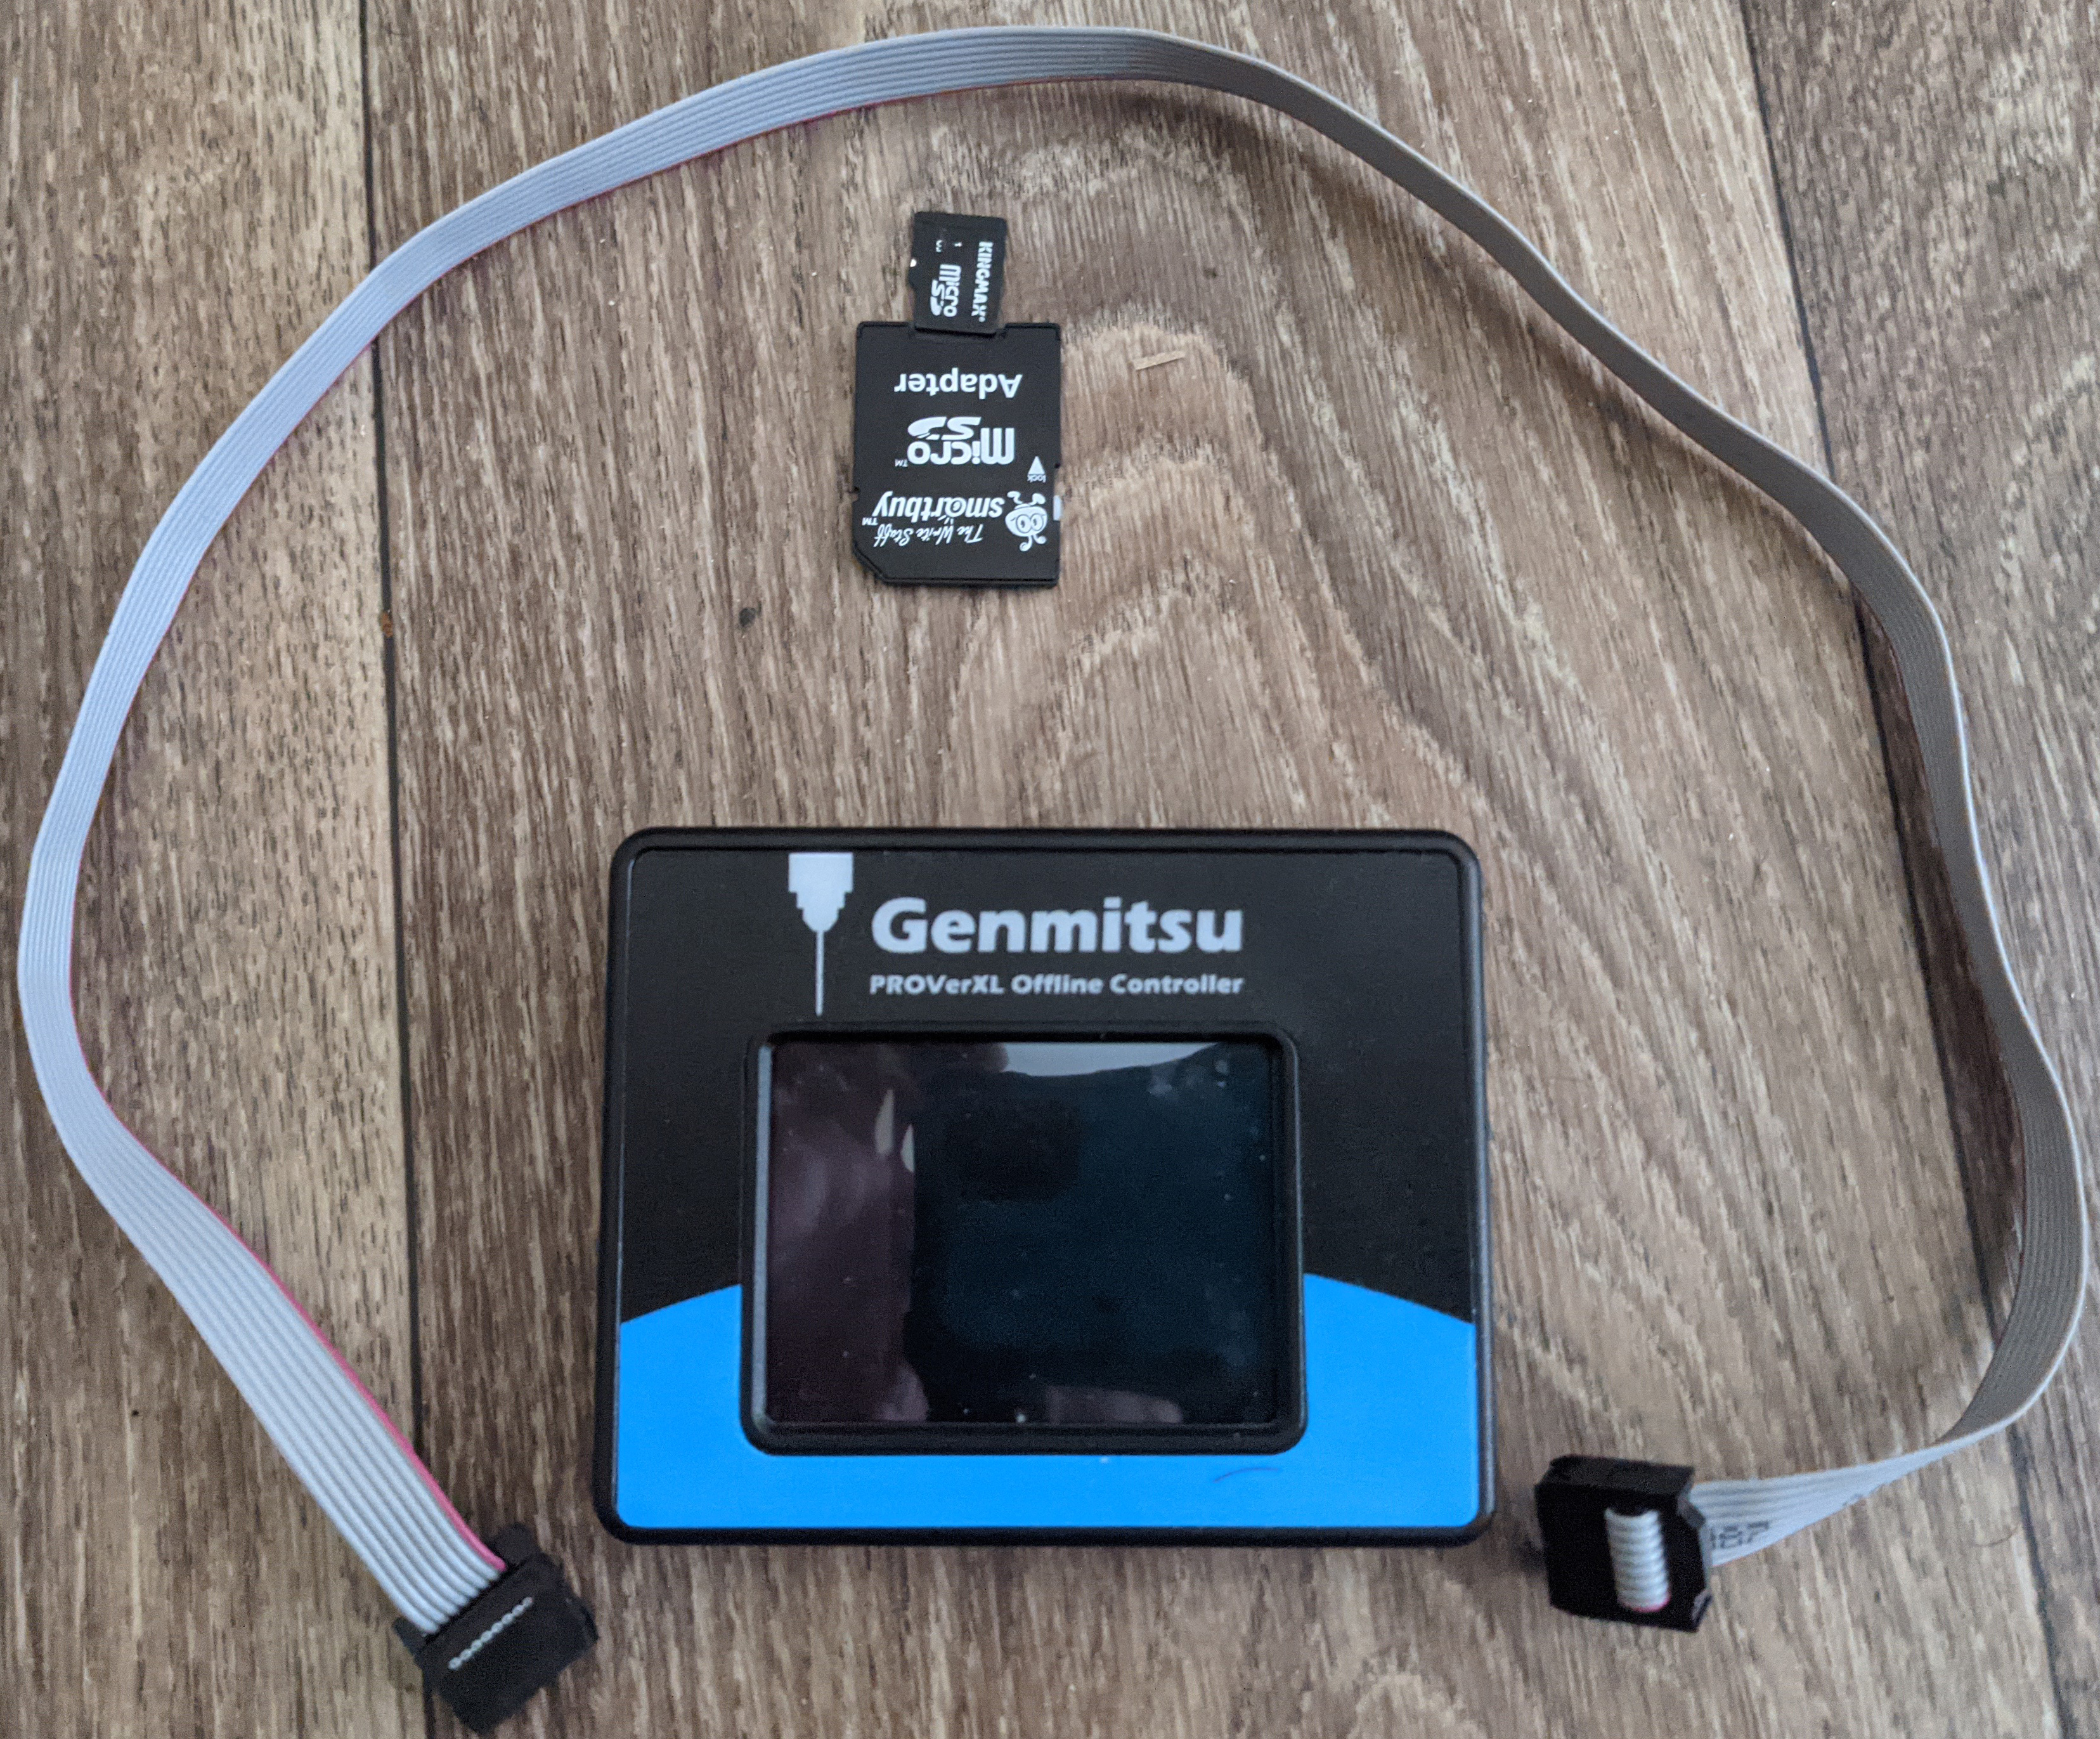
1x Touch Screen Offline Controller
1x Cable
1x Micro SD Card
1x SD Card Adapter for Micro SD Card
How it Works
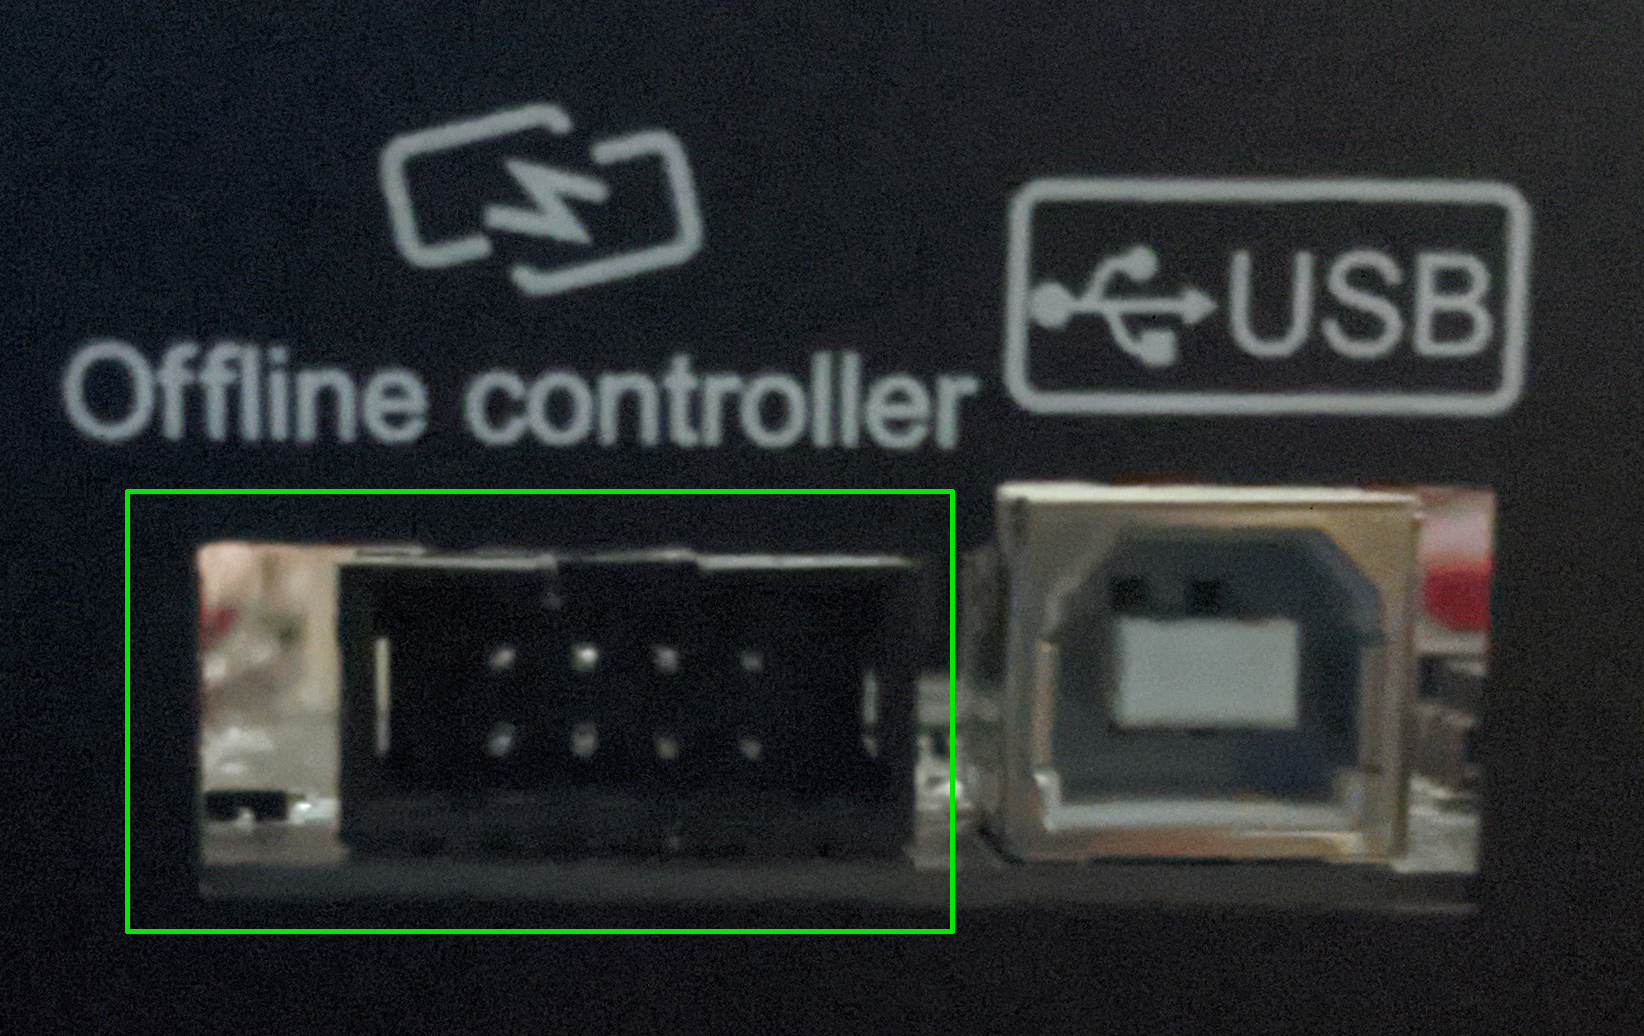
Your offline controller is meant to allow you to use your CNC anywhere with a suitable power source and does not need batteries or a separate power supply, and instead draws power from the CNC control box. You can connect your Offline Controller to the port, which is located in the green box shown below:
There is no way to make or design files/projects on the offline controller, just run them off of the Micro SD Card, so a computer will still be needed but it can be off-site from the CNC.
NOTE: The router cannot be connected to the Offline Controller and by a USB cable at the same time! Before connecting the Offline Controller disconnect the USB cable from the router and vice versa.
Supported Files:
- File Names: While files with long names are supported, please note that only 19 characters, including the extension, will be displayed on the offline controller.
- File Extension/Formatting: The Offline Controller will process a file regardless of the file extension but it must contain only valid G-Code with each line separated by a CR/LF (Carriage Return/Line Feed) Files generated by some software only separates the lines of G-Code by a single Line Feed character, before using they must be converted to standard files using a CR/LF sequence to separate each line.
- File Location on SD Card: While it is fine to have other files and folders on the Micro SD card, only files placed directly in the root directory will be visible and usable. If you do not see your file listed on the offline controller, you will need to remove the micro SD card move the file from your computer, and then re-insert it into the offline controller.
A tour of features on your Offline Controller
Main Menu
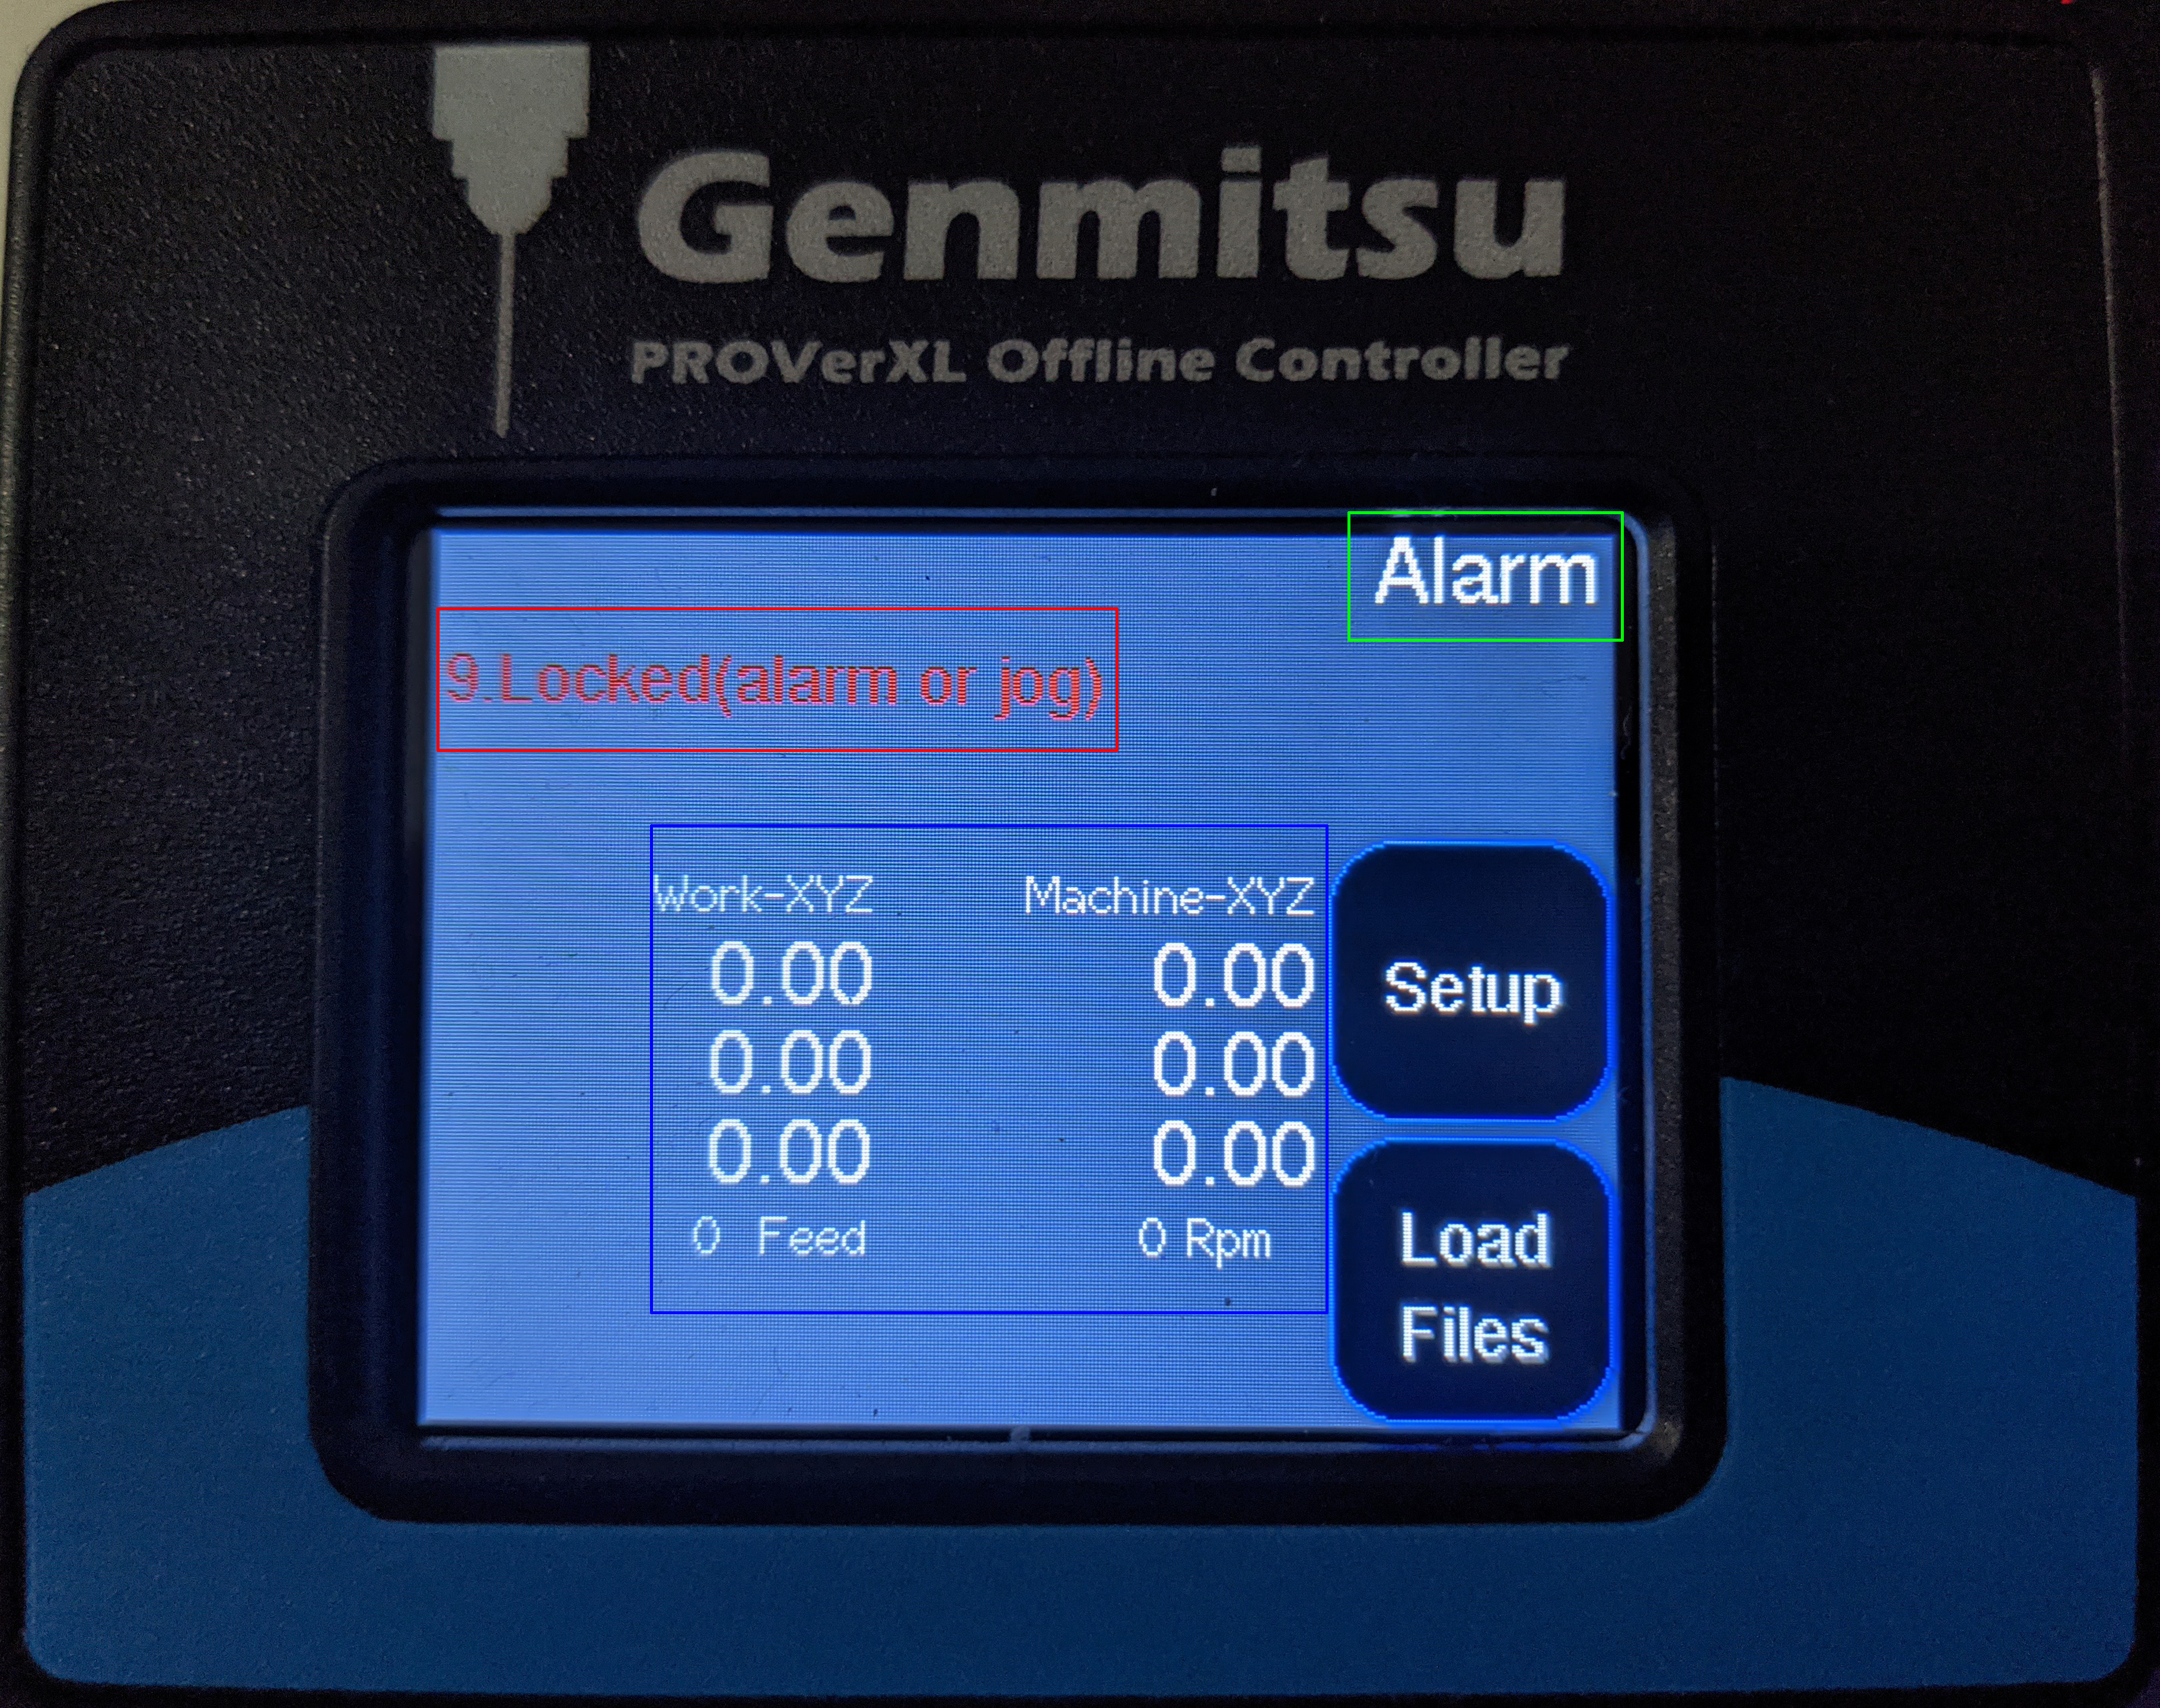
In The Green Box:
This tells you of the overall status of your CNC. Whenever you turn on your CNC the status will always be set to "Alarm" as a safety feature. Toi use and actively move your CNC around you will need to change the status from "Alarm" to "Idle" and we will show how to do this later on.
If you see $$ as the status, then the emergency stop button is engaged on your control box. Turn button according to arrows to disengage.
In The Blue Box:
This area relays the relative position of your CNC in reference to the work coordinates as well as the machine coordinates.
- Machine Coordinates: With the way your CNC works, your Machine coordinates shows the location of your CNC in reference to the position that it was in when you turned to the CNC (assuming the offline Controller was plugged in prior to doing so)
- This is largely a feature for advanced users and diagnostic purposes and can be ignored by the vast majority of users.
- Work Coordinates: The work coordinates will mirror the Machine coordinates when you turn on your CNC, but these will reset to 0 when you pick the location you want to machine and press the set home button. This process will be shown later.
In The Red Box:
If everything is going well, you should never see anything in the red box. This box is where error codes will be shown when something is not working properly. If you ever see something here, make sure to take note of the number shown (9 in the case above) and compare it to this list of errors.
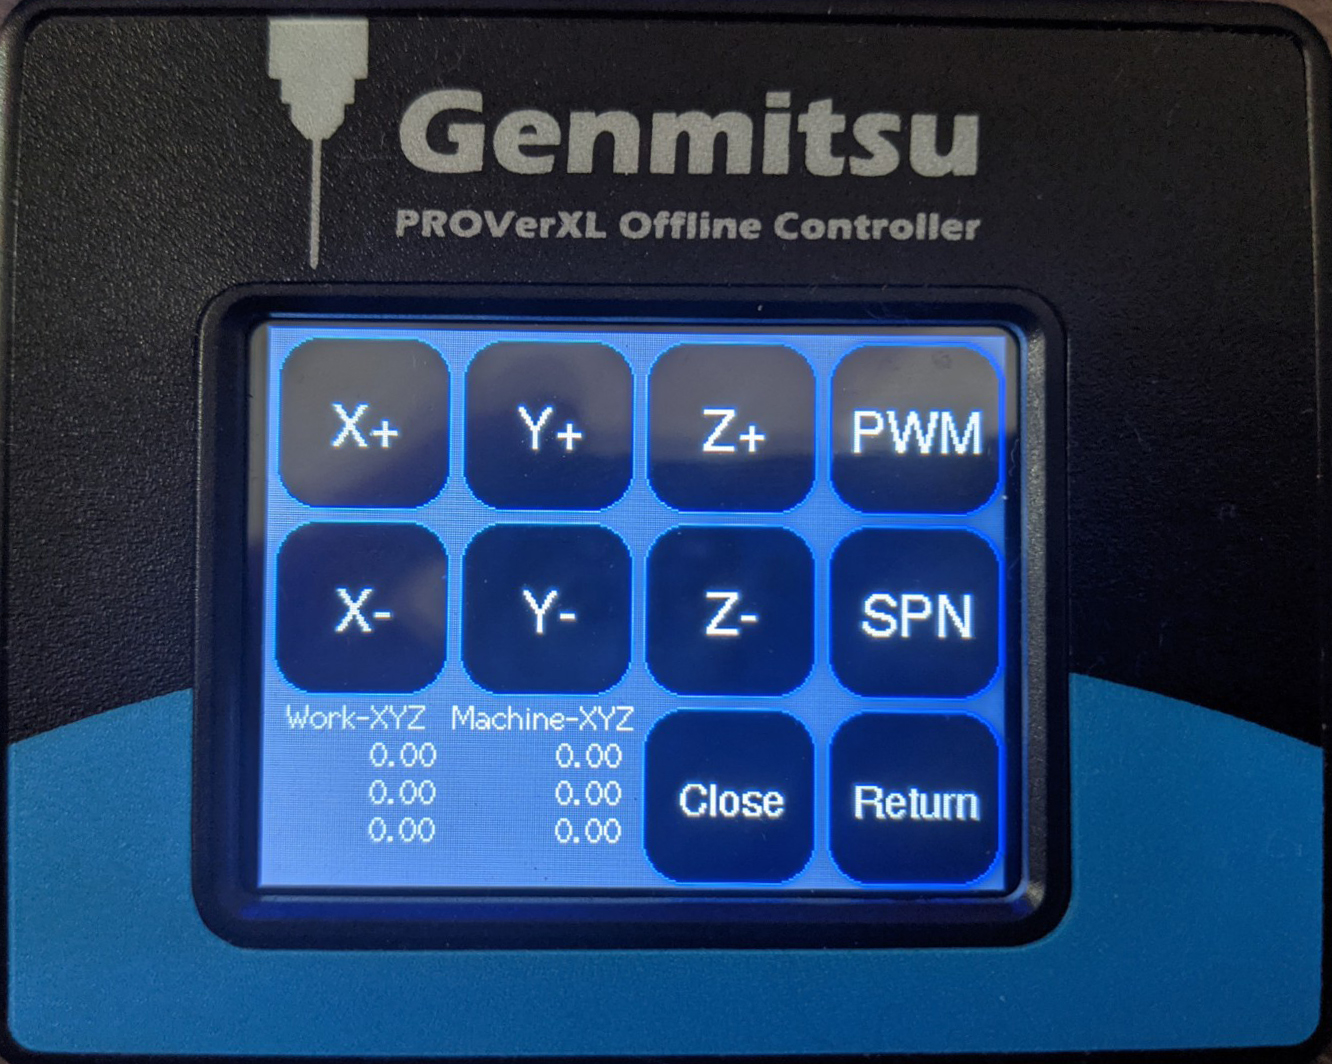
Buttons:
Setup Button: This button takes you to the setup menu screen where you can interact with, and set up the CNC for a project.
Load Files Button: This button will take you to the File Menu where you can load in files from your SD card and run them.
Setup Menu

Buttons:
Home: This button sends the command $H which Homes your CNC.
Unlock Motors: This button sends the $X command, which overrides the "Alarm" status and allows you to jog your CNC.
Set Probe: This lets you set a value that needs to be equal to the height of your Z probe pad. It is important to measure your own probe for best results but it should be somewhere around 20mm
Reset: This triggers a soft reset of the CNC
File Menu
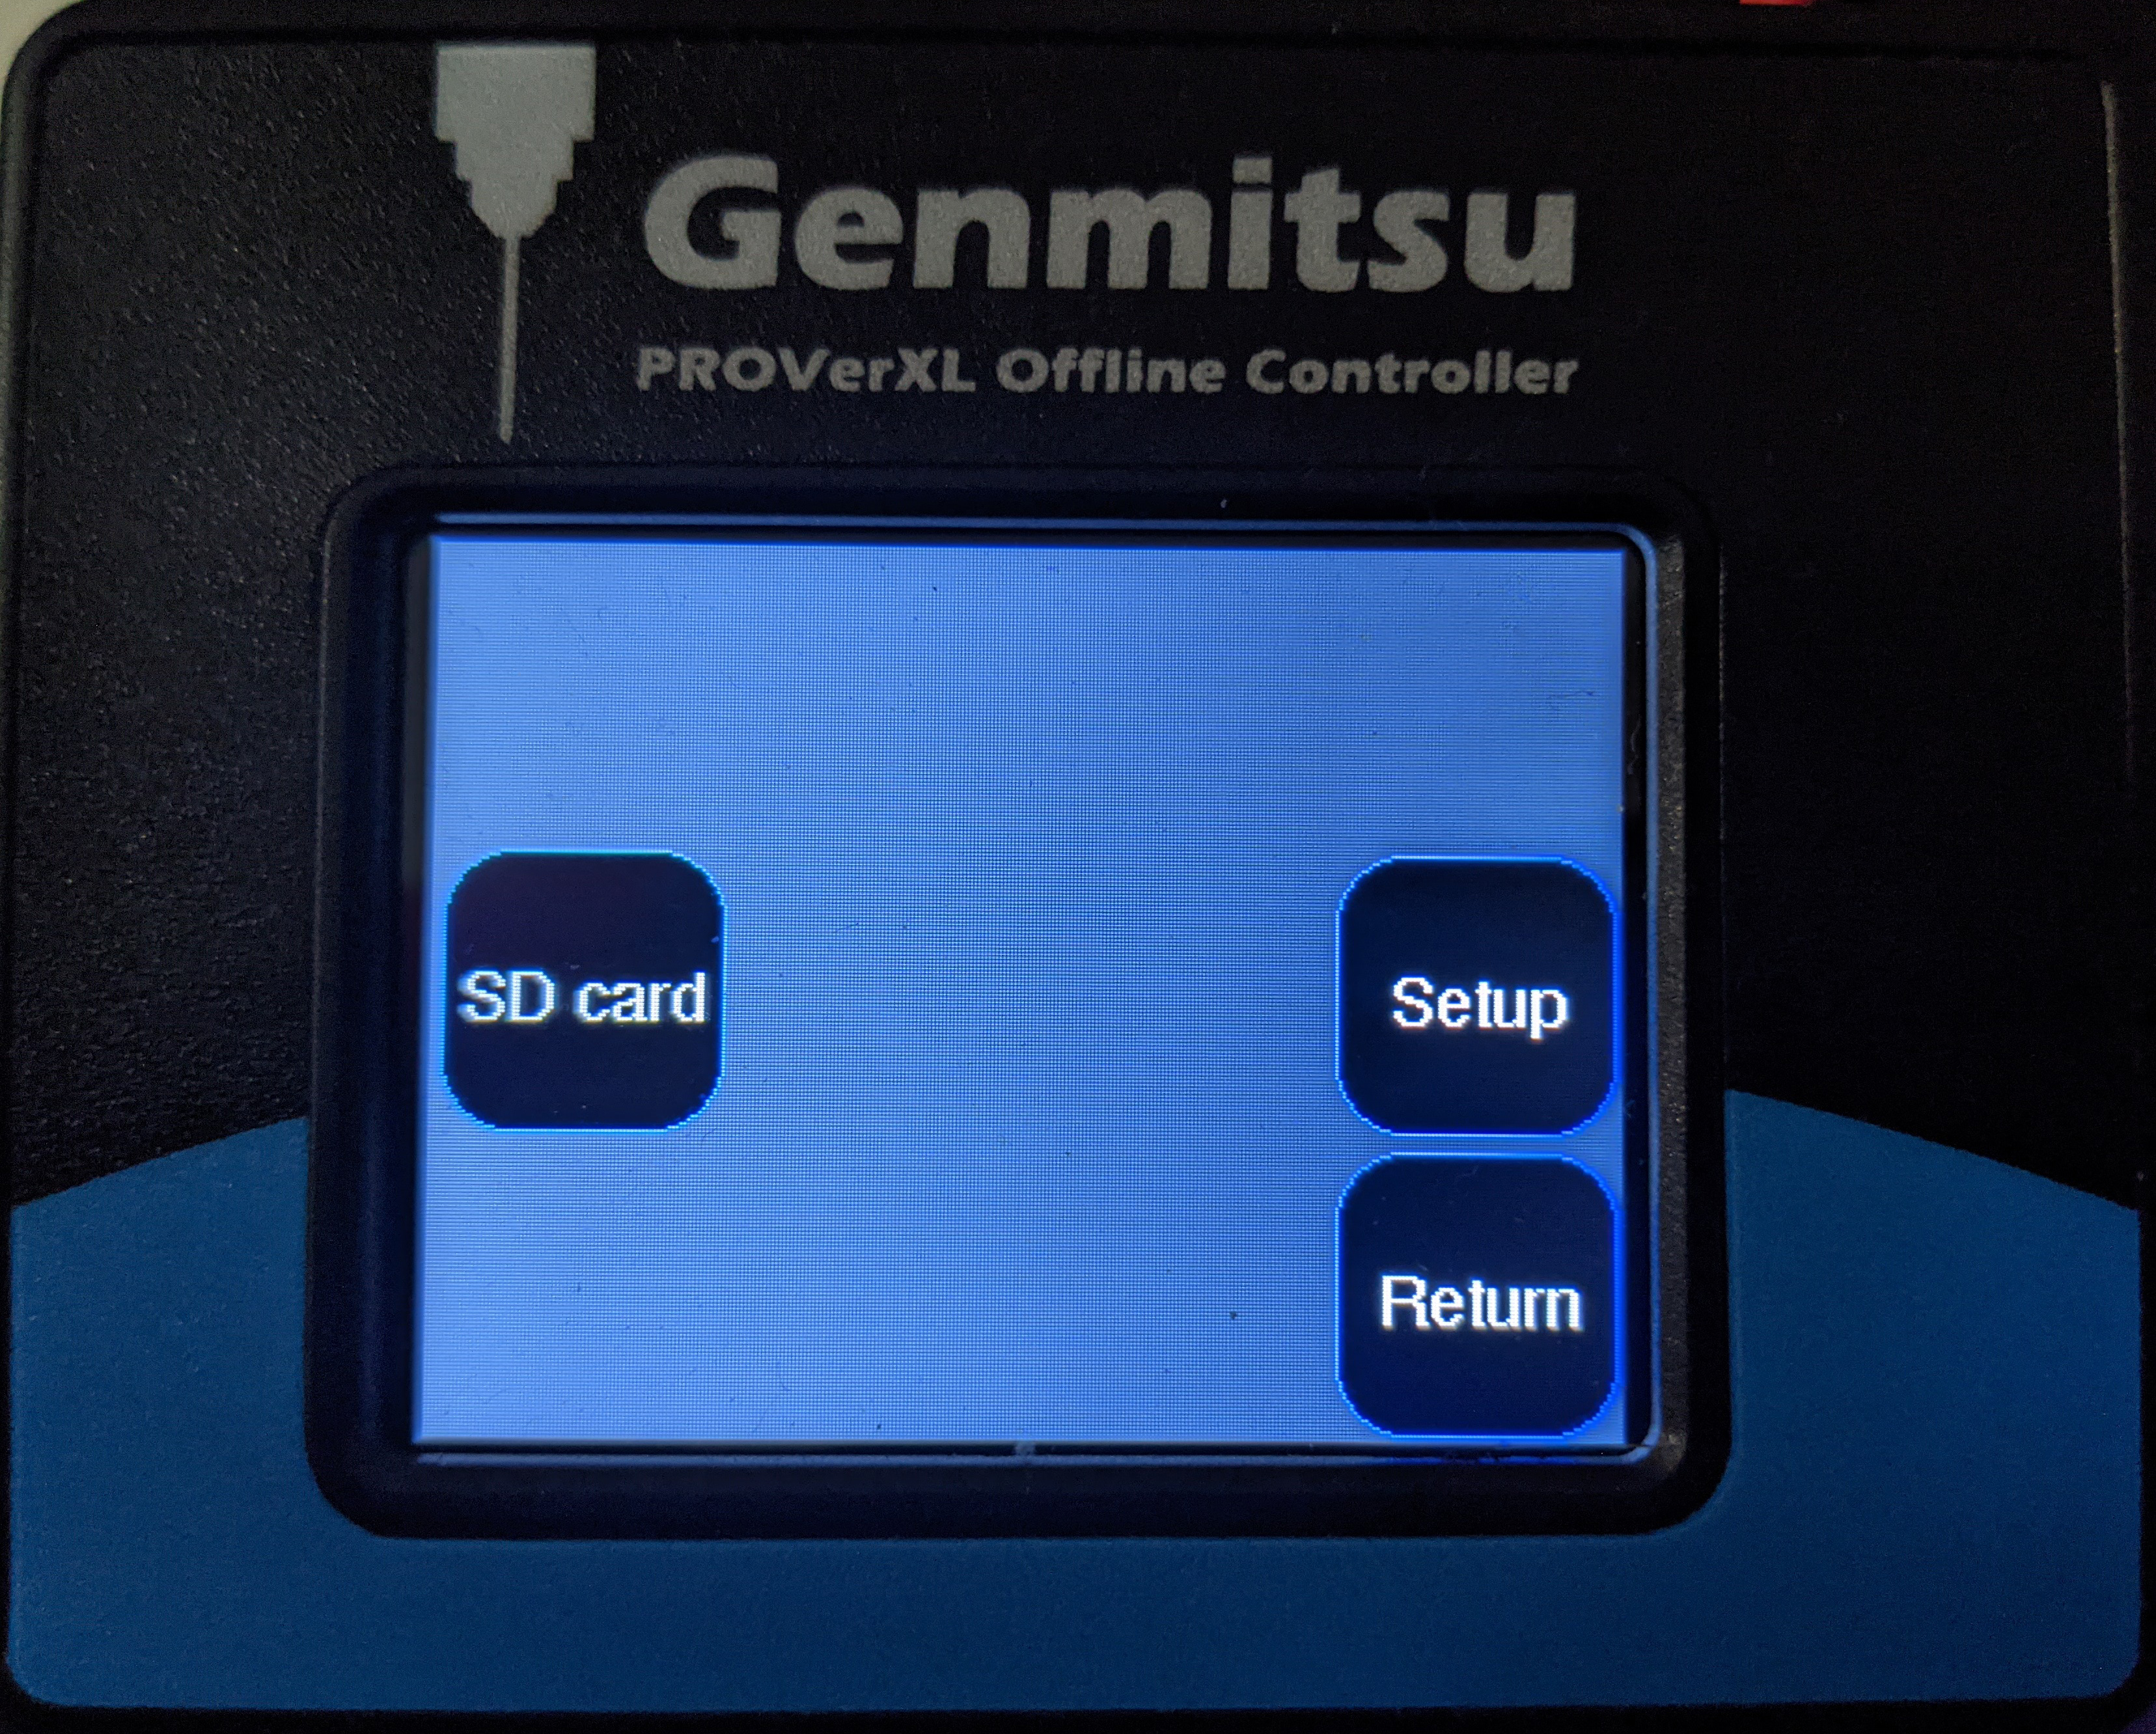
Buttons:
SD Card: Leads to the SD card Menu
Setup: Leads to the Setup Menu
Return: Brings you back to the Main Menu
How to Run Your First Offline Project
Step 1: Connect your Micro SD Card to your PC and load files
Find the file you made and exported in Carveco Maker, Easel or another program and drag and drop it into the primary directory of your Micro SD card. Once the file has been transferred, eject your card from the computer and plug it into your offline controller through the SD card adapter.

Step 2: Set Up Your CNC
- From the Main Menu, press the button for the Setup Menu.
- In the Setup Menu Reset your CNC and then Unlock Motors.
- Home your CNC.
- Install your desired bit/end mill into the CNC.
- Using the Jog Menu, guide your CNC to the desired X-Y workplace origin. If you are unfamiliar with what this is, please see this guide on Zeroing Your CNC in Theory and in Practice.
- In the Jog Menu, you can toggle movement speed by pressing the Close button. This button controlls the movement distance when you Jog and if pressed repeatedly will toggle between Close -> 0.05 -> 0.10 -> 1.00 -> 10 and the values are in mm. So, for example, if you set Close to 1, and then click the X+ button then the CNC will move forward 1mm on the X-axis.
- Press the Return Button.
- Once you are at your desired workplace origin, press the Set Home Button to access the Set Home Menu
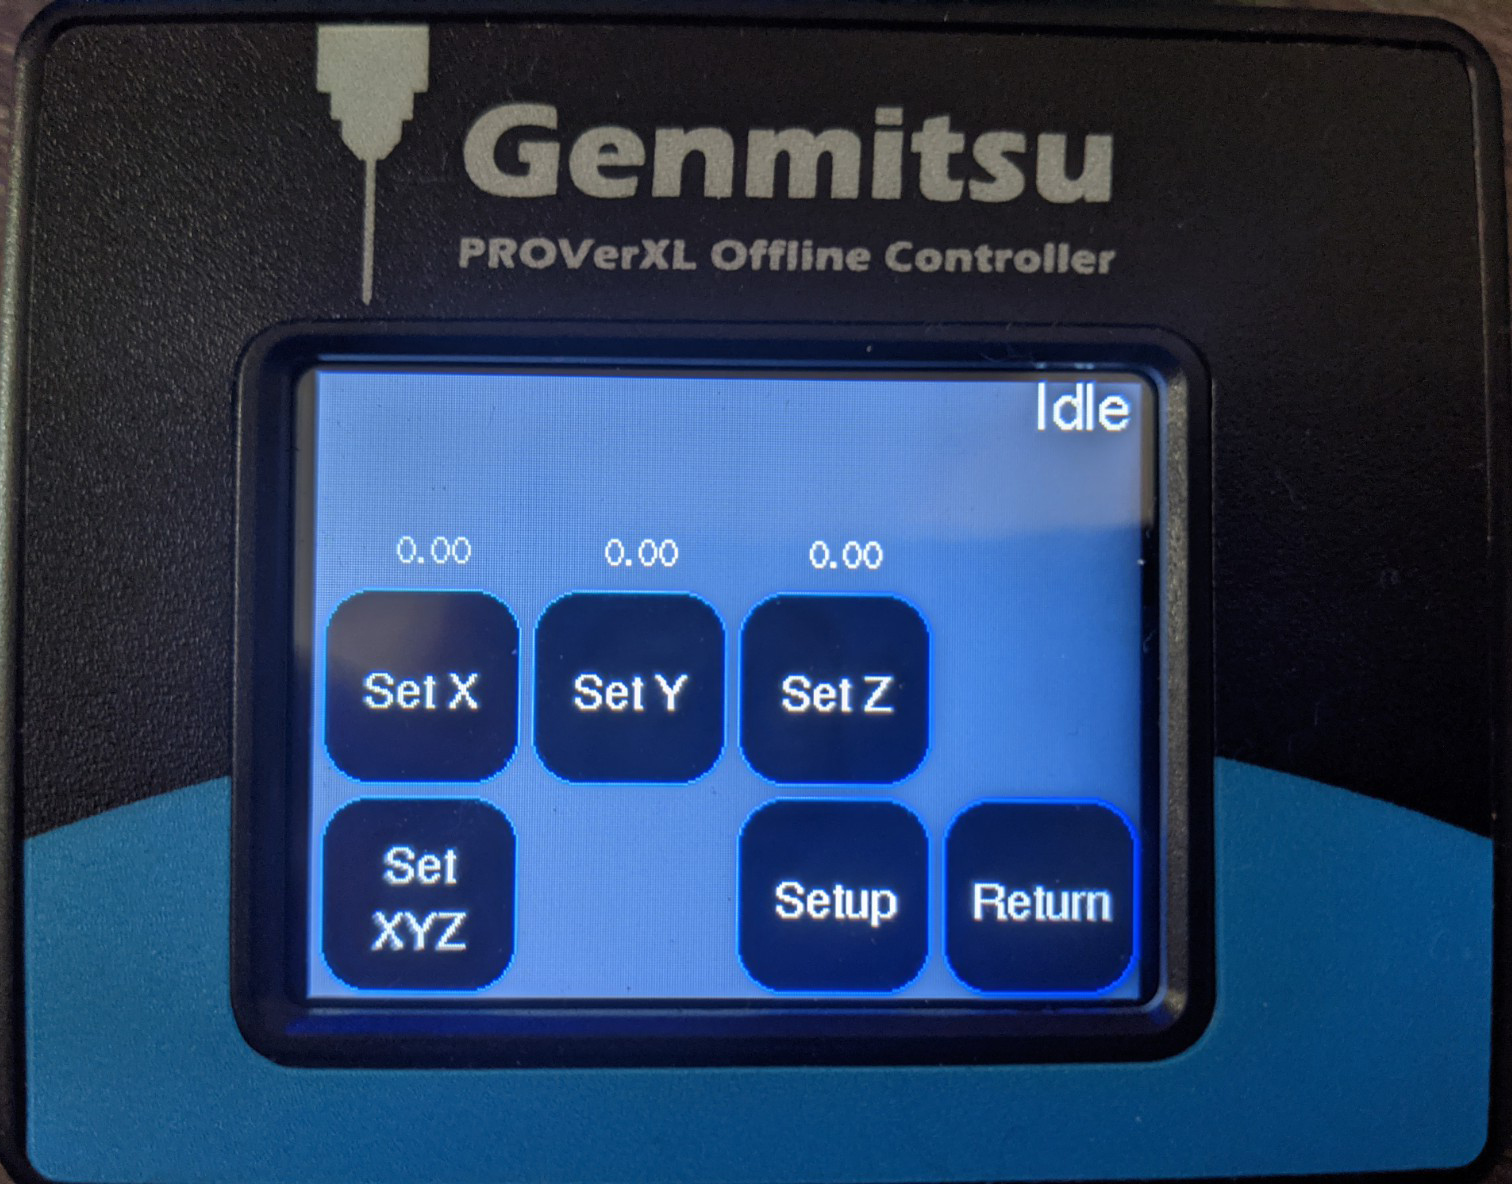
- Press the Set X button and the Set Y button and hit Return.
- Back in the Setup Menu, take a moment to set up your Z probe as shown starting on page 34 of the User Manual. Once it is set up, press the Probe button to automatically zero the Z axis. With this your workplace origin will be set.
- Don't forget to uninstall your probe, move it out of harms way.
- Return to the Main Menu, go to the File Menu, and then press the SD Card Button. You should see this the SD Card Menu:
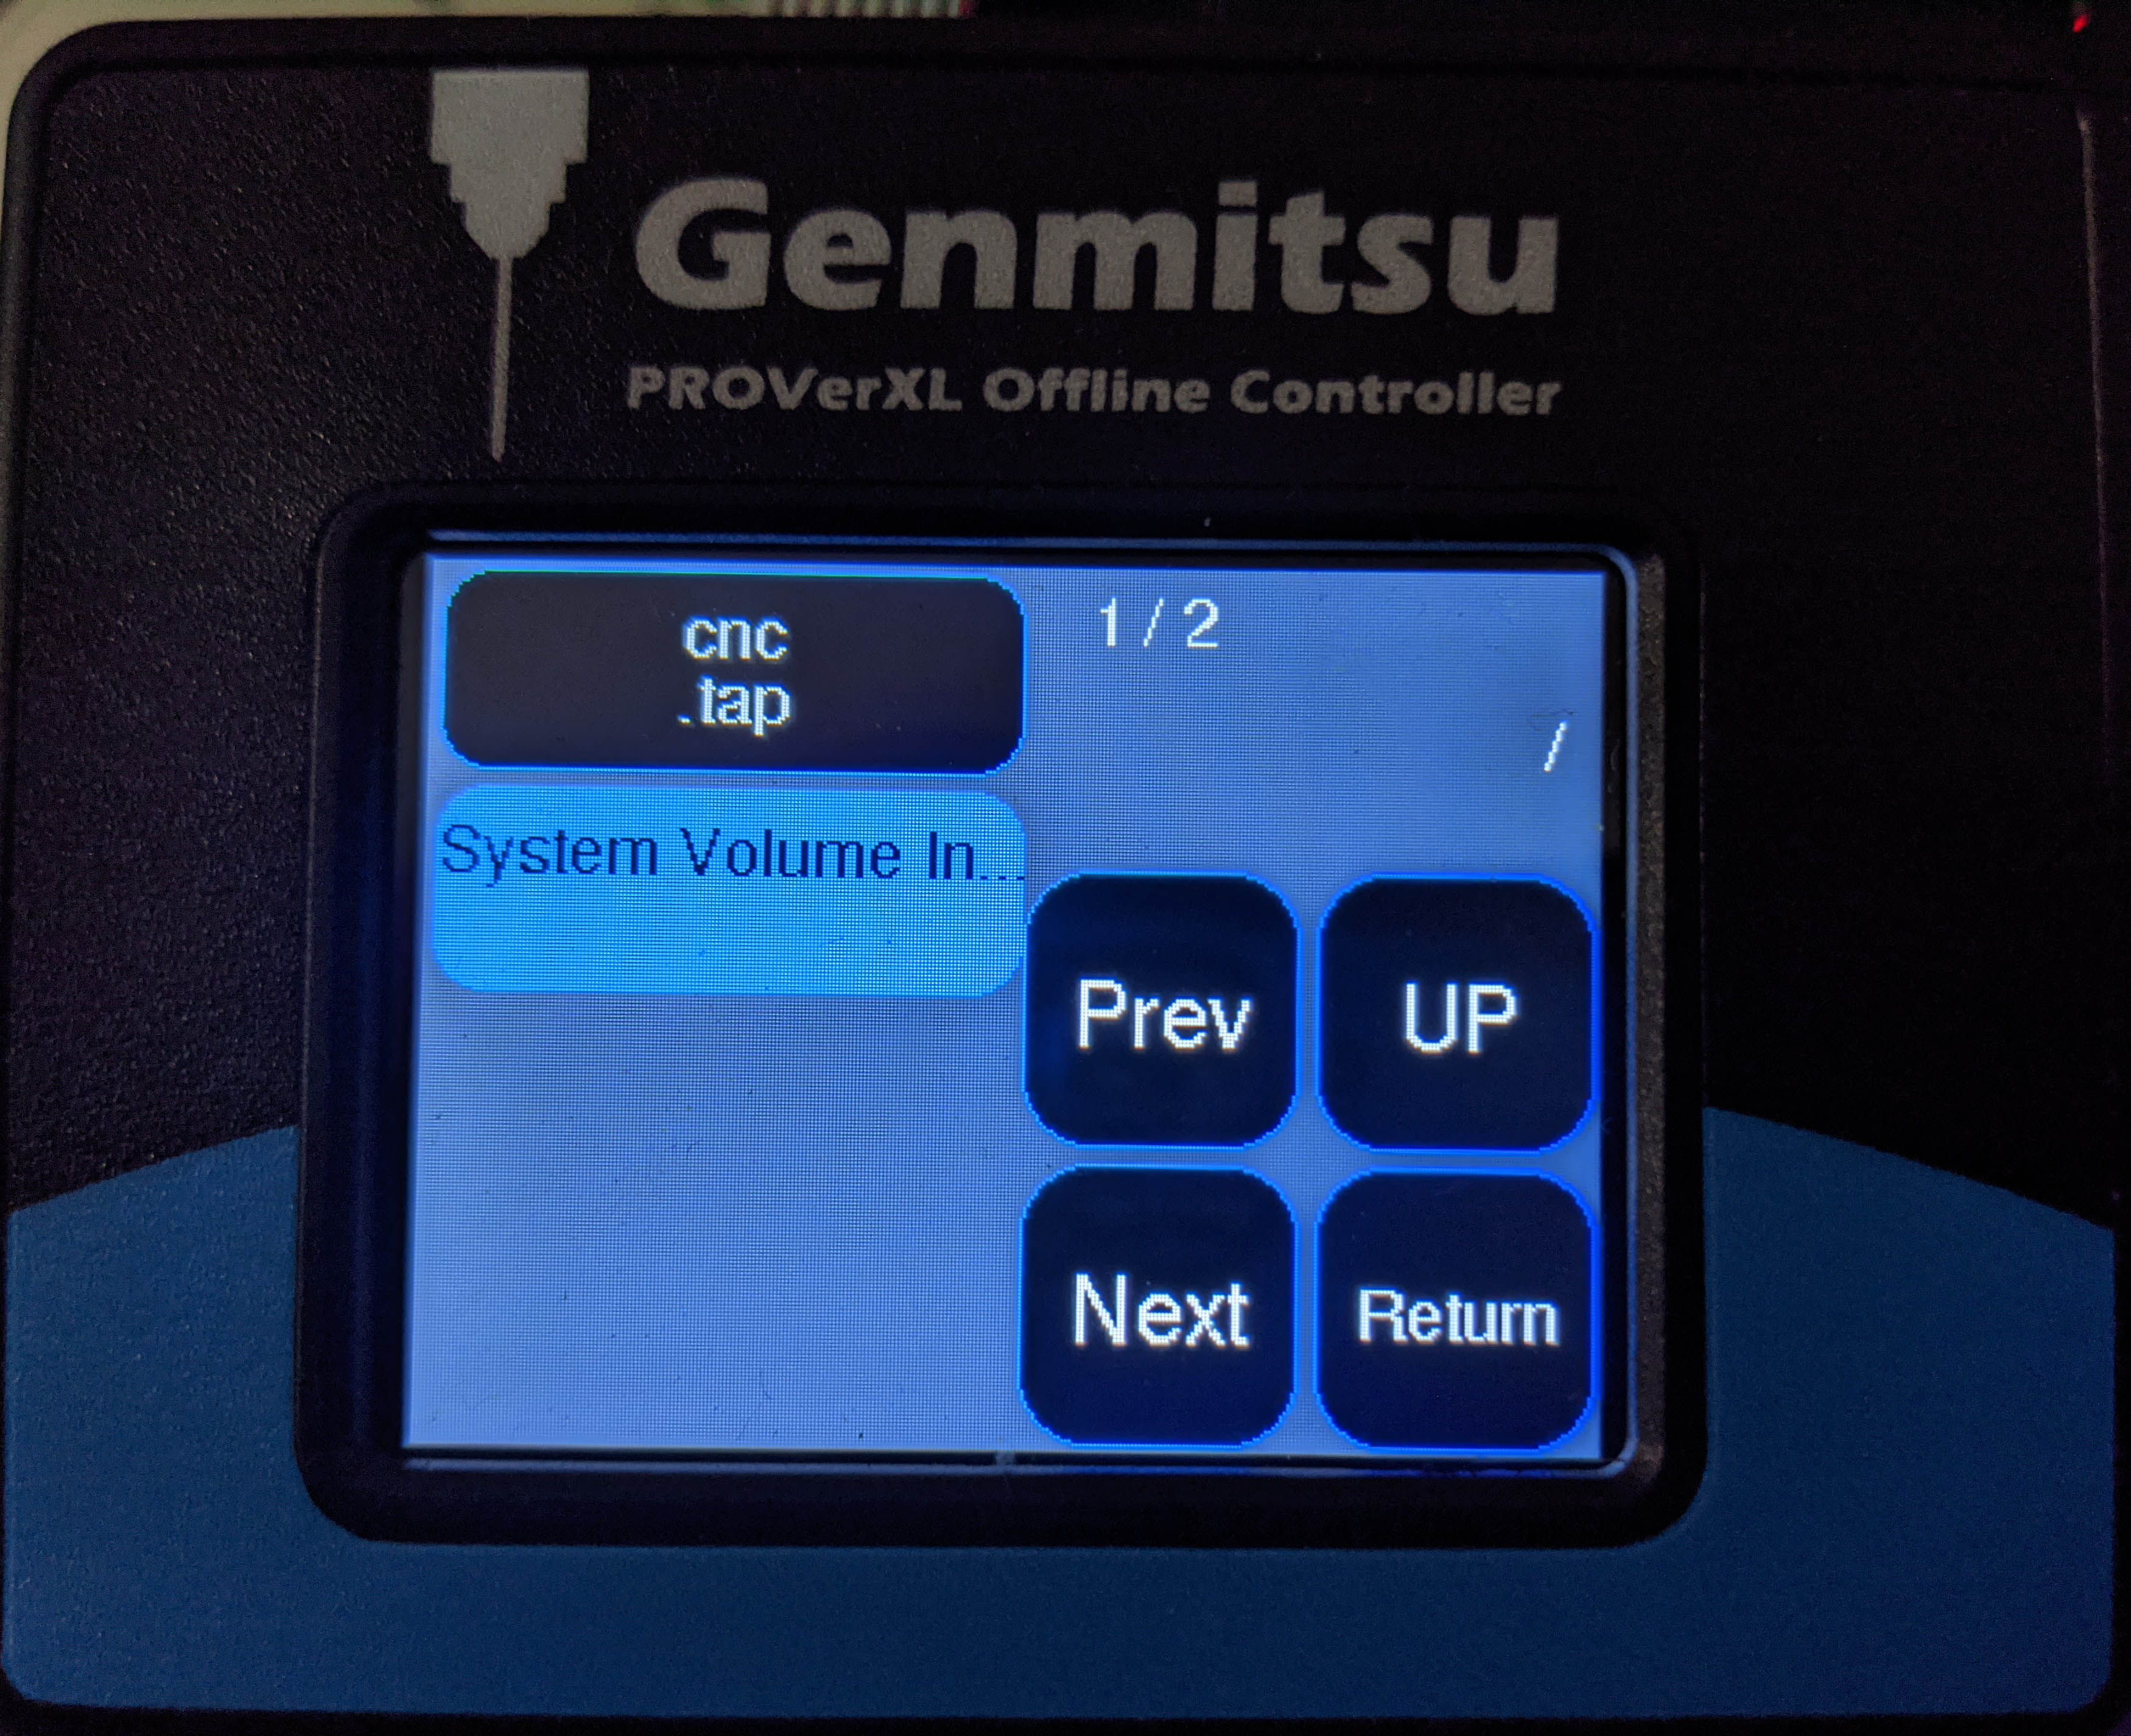
- Select the file you want to run on the left, and in the next menu hit the Resume Button to start engraving.
Troubleshooting
- Some users have found that files that work in Candle without issue, will have problems with the 4030 offline controller, such as going from 0 to over 100% completion instantly, without cutting anything. In order to resolve this, open up your file in a text editor and insert G90 in the first line of your program without deleting anything else already there. Save the modified file and re-upload it into your CNC and it should now run as expected.