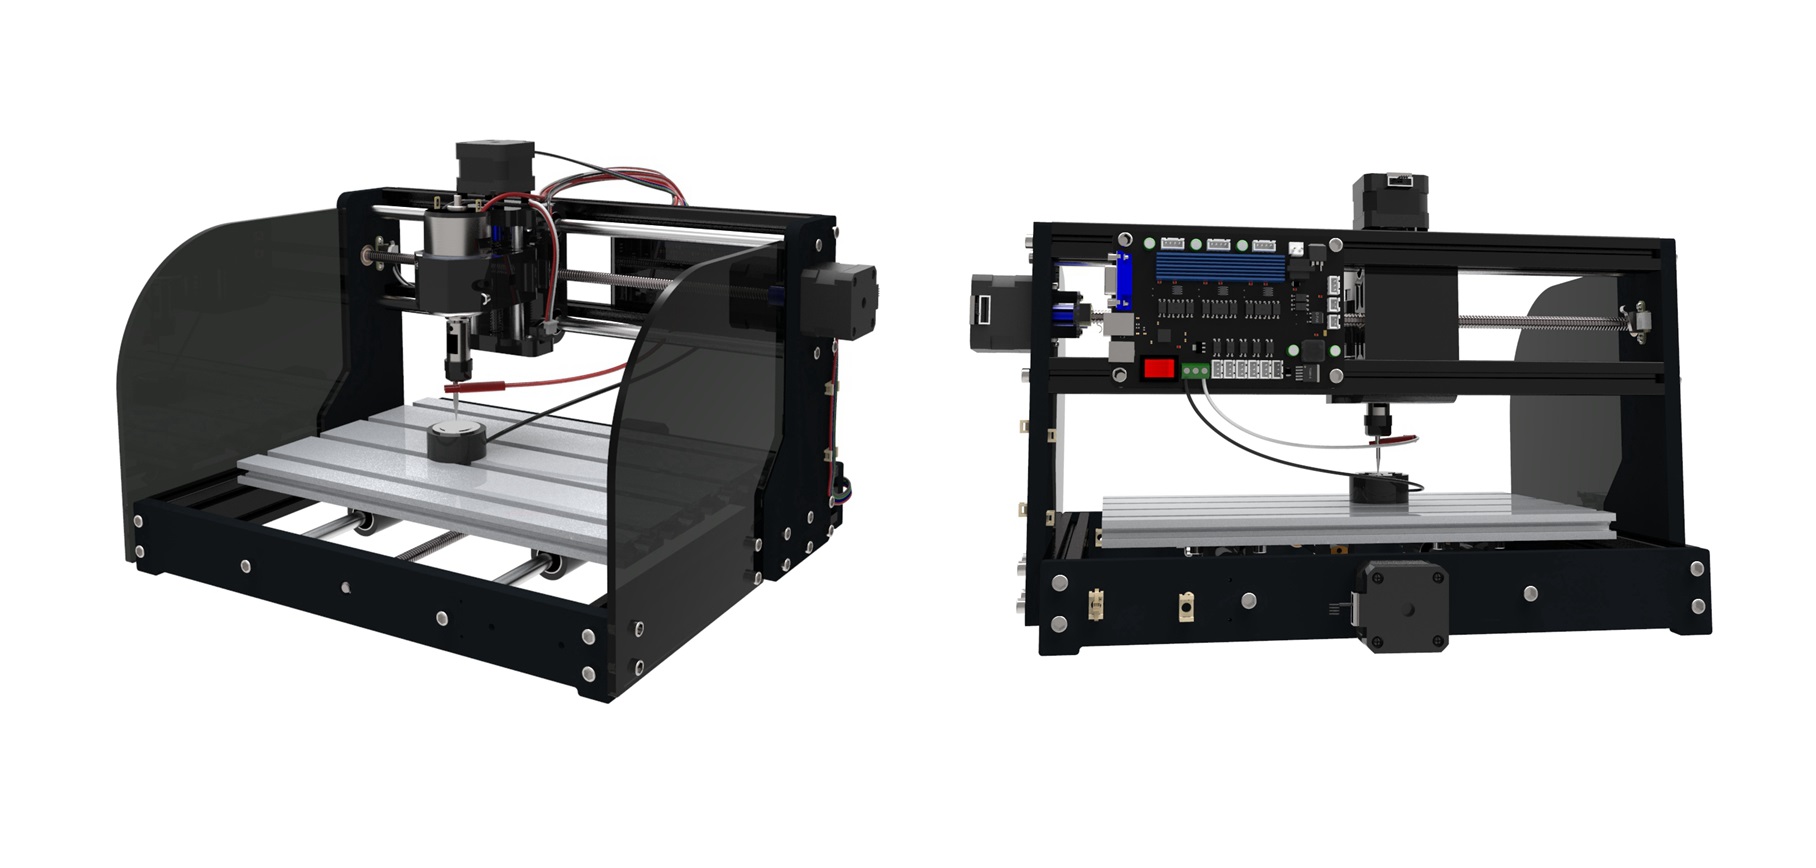
Genmitsu MX3 Z-Probe Setup & Operation

Mach3 Software Setup
- With Mach3 open, click the Operator tab and from the drop down menu you will want to select Edit Button Script.

- Buttons that you are able to edit will, at this point, start flashing, and you will want to select the Auto Tool Zero button shown below:

- A blank script editor pate will appear. Copy and paste the contents below into the script editor, but Do Not Save & Close until going through the next step.
'Rem Probe Down by PEU (Based on Erniebro Work)
FeedCurrent = GetOemDRO(818) 'Get the current settings
ZCurrent = GetDro(2)
Code "G4 P1" 'Pause 1 second to give time to position probe plate
Code "F100" 'slow feed rate to 10 MM/MIN
GageH = GetOEMDRO (1002)
Rem Probe Down by PEU (Based On Erniebro Work)
FeedCurrent = GetOemDRO(818) 'Get the current settings
ZCurrent = GetOemDro(802)
Code "G4 P1" 'Pause 1 second to give time to position probe plate
Code "F100" 'slow feed rate to 10 MM/MIN
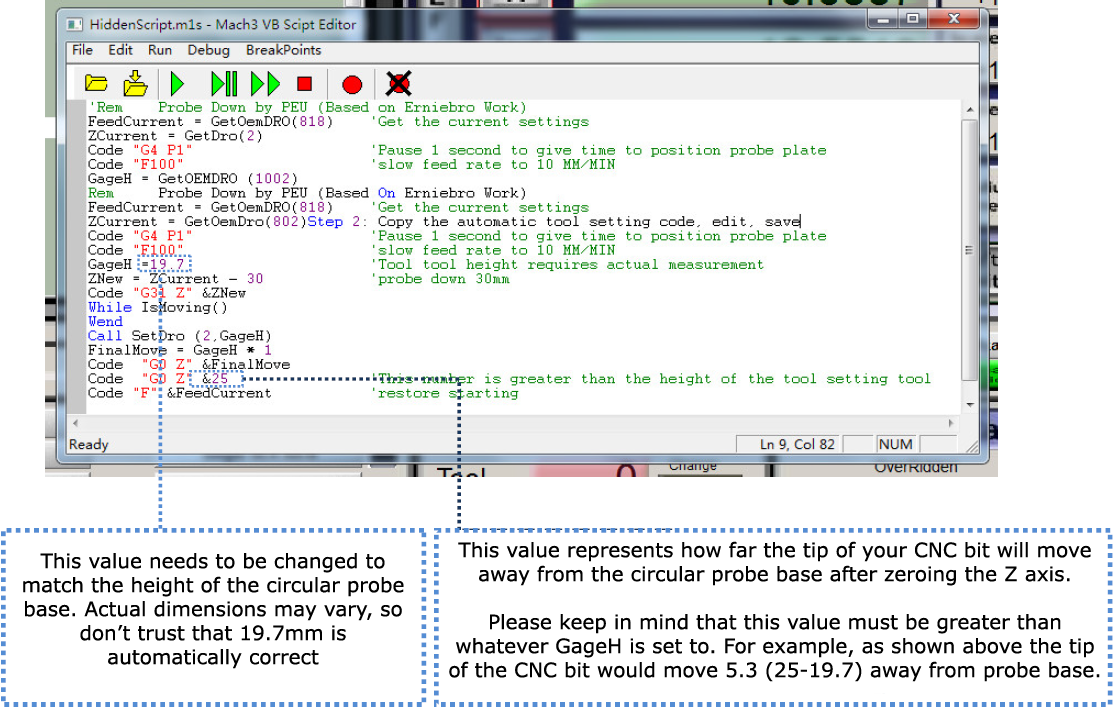
GageH =19.7 'Tool tool height requires actual measurement
ZNew = ZCurrent - 30 'probe down 30mm
Code "G31 Z" &ZNew
While IsMoving()
Wend
Call SetDro (2,GageH)
FinalMove = GageH * 1
Code "G0 Z" &FinalMove
Code "G0 Z" &25 'This number is greater than the height of the tool setting tool
Code "F" &FeedCurrent 'restore starting
- Edit the two lines shown below, based on the below instructions. Once you have done so, save and exit the script editor.

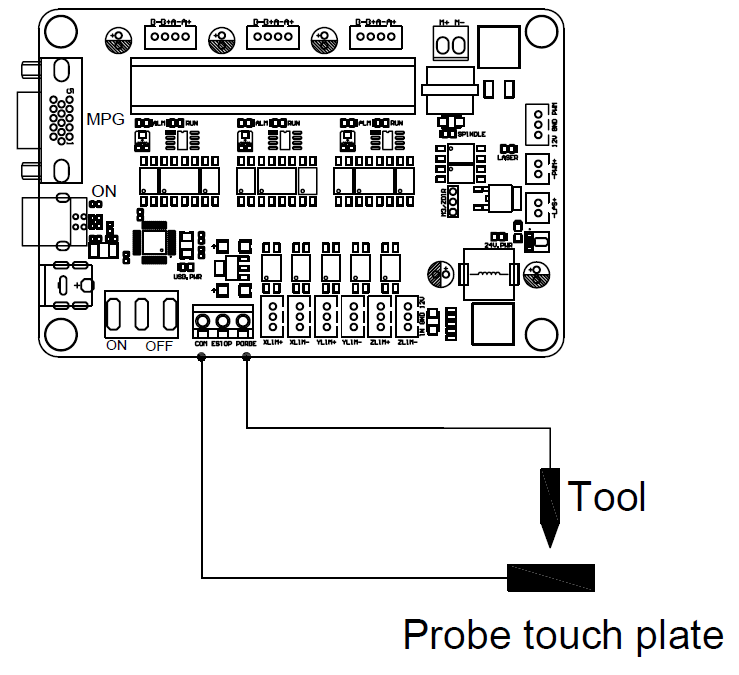
- Connect the Z-Probe Tool as shown below:


Operation
- Attach the Alligator Clip connected to the white wire, and firmly attach it to the bit/end mill that you are planning to engrave with.
- Plave your stock material on your CNC bed. Once secured and in place. put the circular probe base with the metal side up on top of your stop material.
- Using Mach 3, jog your CNC so the spindle is over your stock material and probe base.
- Click the Auto Zero Tool button.
