How to Wire and Use a 3018 PROVer Laser Module to Your 4030 PROVerXL CNC

What you will need:
Overview
The onboard power supply is enough to take care of the laser module power needs, so regardless of whether you are using the 3018 Pro module, or the 3018 PROVer module, we will be using the 3 pin connector port that is on the laser driver boards.
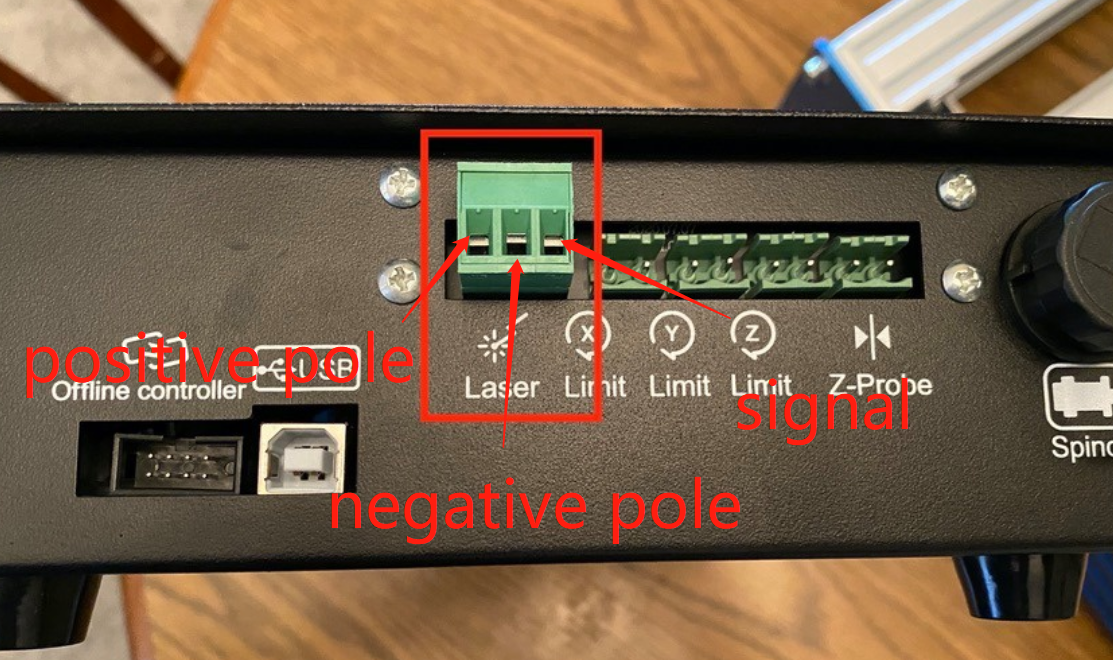
It is important to note the pin assignment on your laser driver boards, as they differ depending on which model you have, and the pins here absolutely must match or you will risk damaging your CNC and laser module.
PROVer Board: 12V - GND - PWM (Fixed-Focus may look slightly different, but this is not a issue)
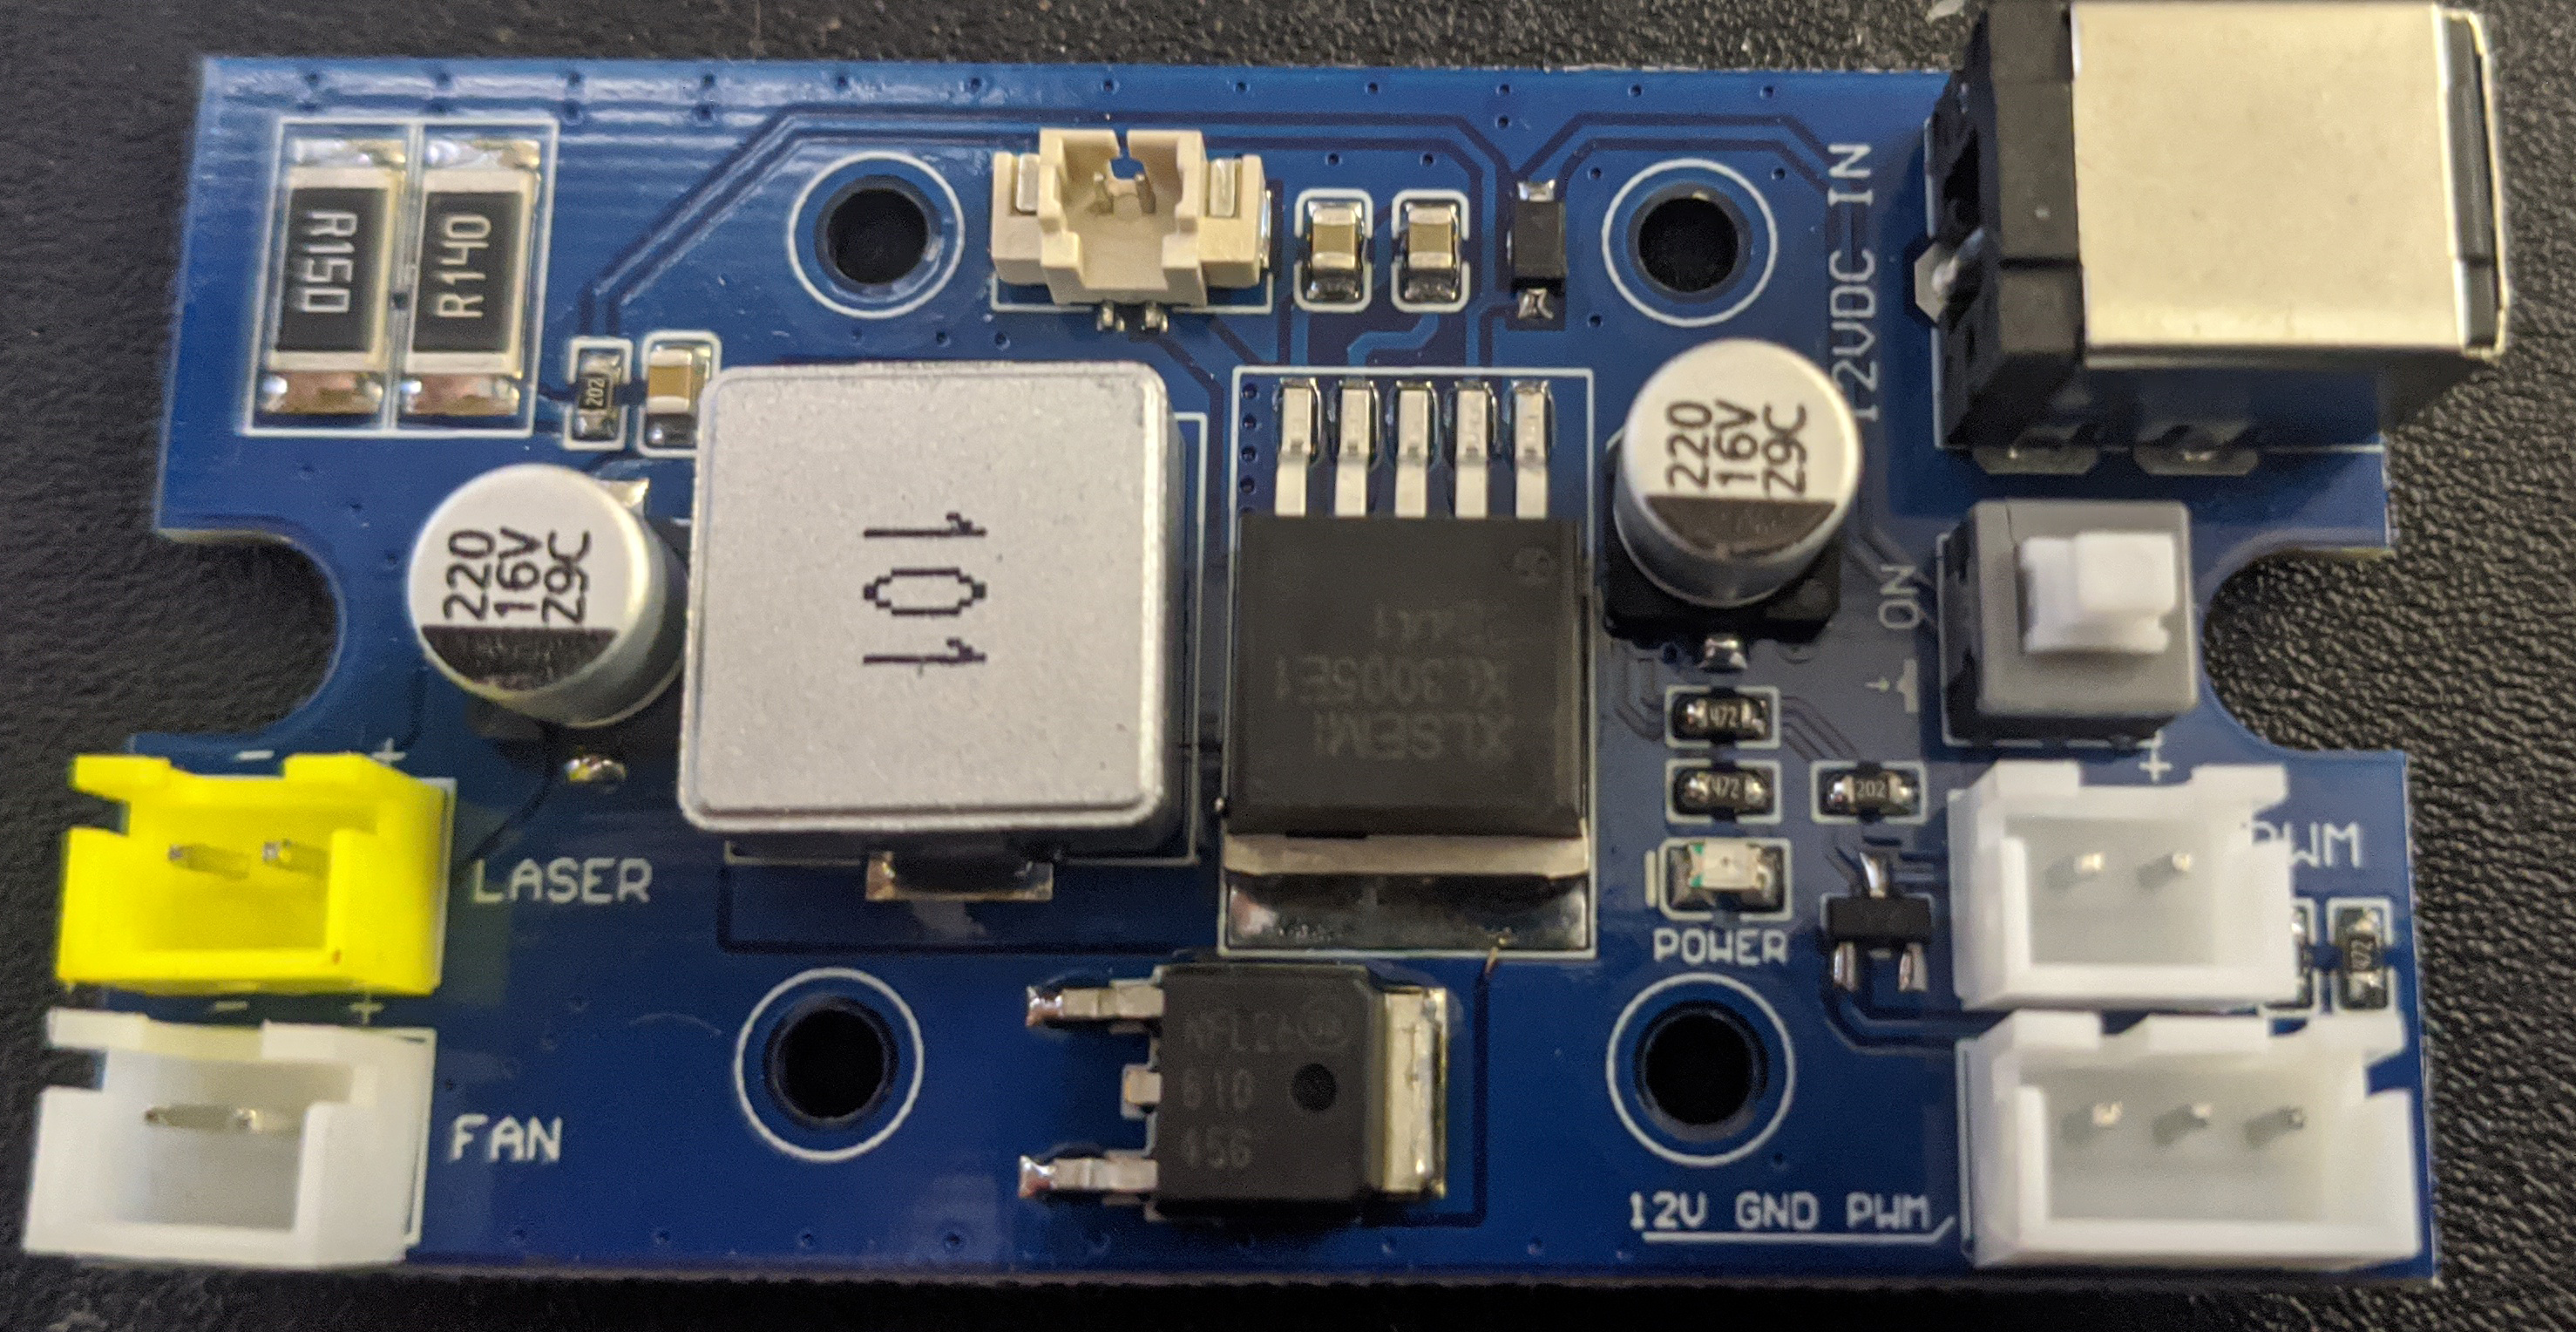
4030 Control Board: 12V - GND - PWM
Preparing Your Cable
The 4030 is a much larger CNC than the 3018 which your laser module was originally designed for. As a result, on top of the mounting bracket, purchasing a longer cable is an absolute must. You will have to source your own. For best results we suggest making sure that you have at least 5 feet of wire after all is said and done.
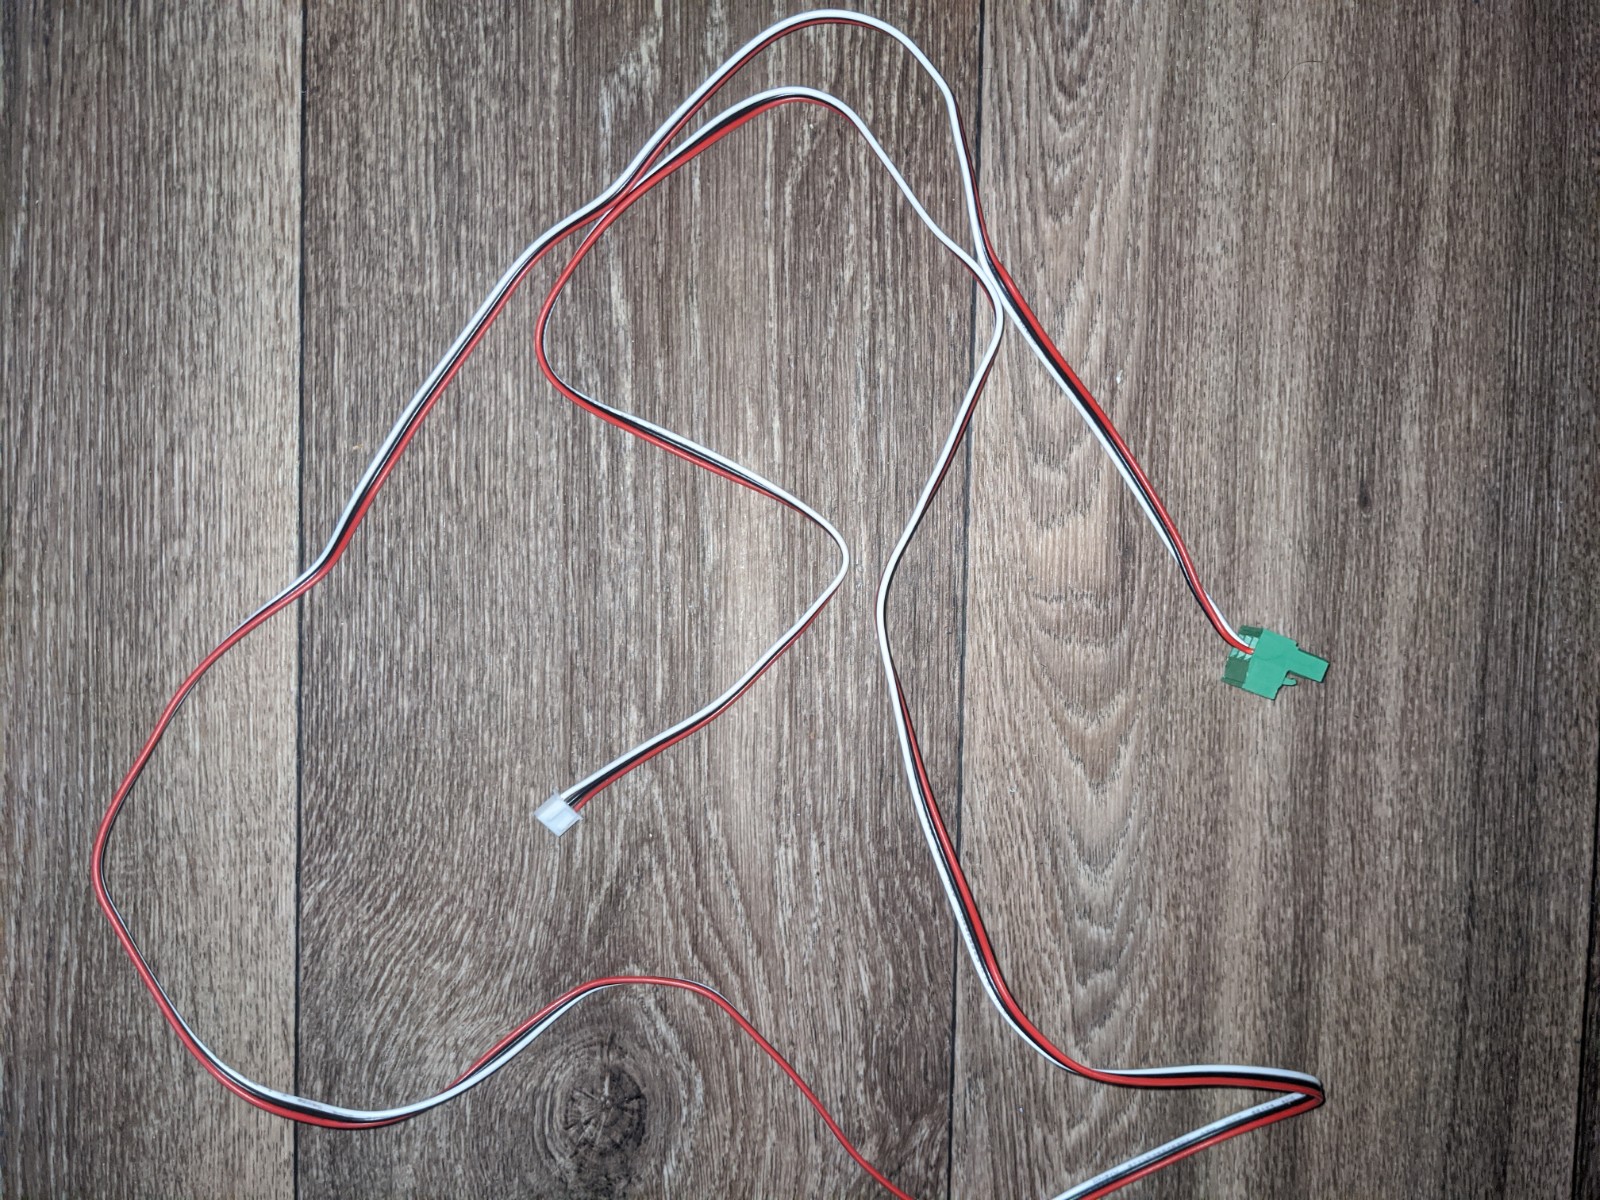
You'll see that there are connectors on each end that looks like this:
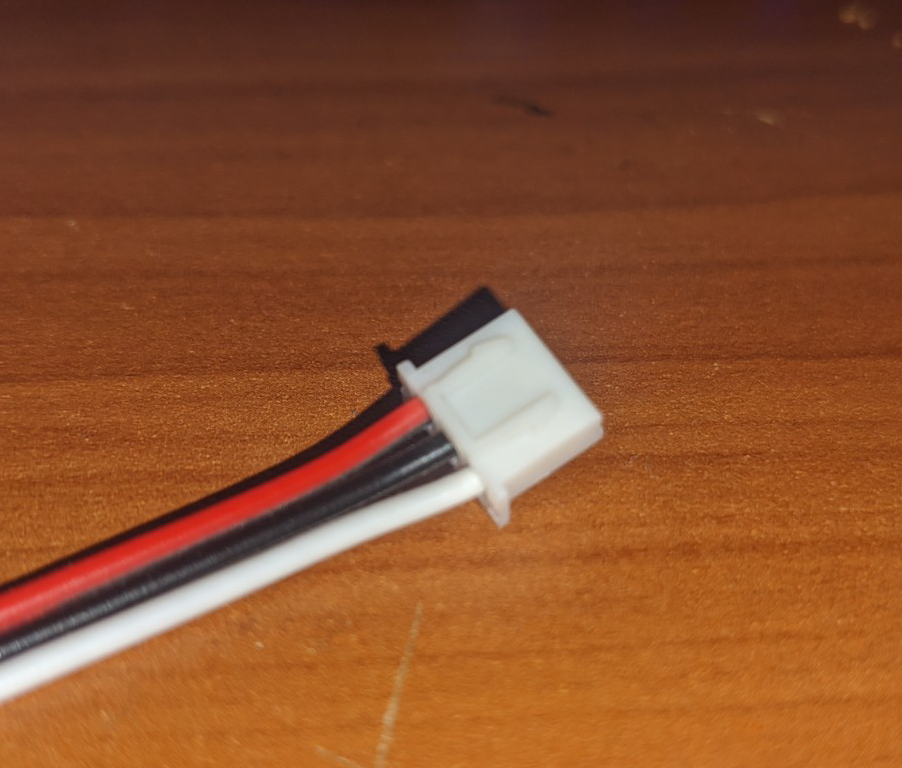
You will want to keep one side like that, and then go ahead and cut the other connector off; once you have done so you will want to strip each individual of around 5-7mm of insulation, exposing the copper strands underneath.
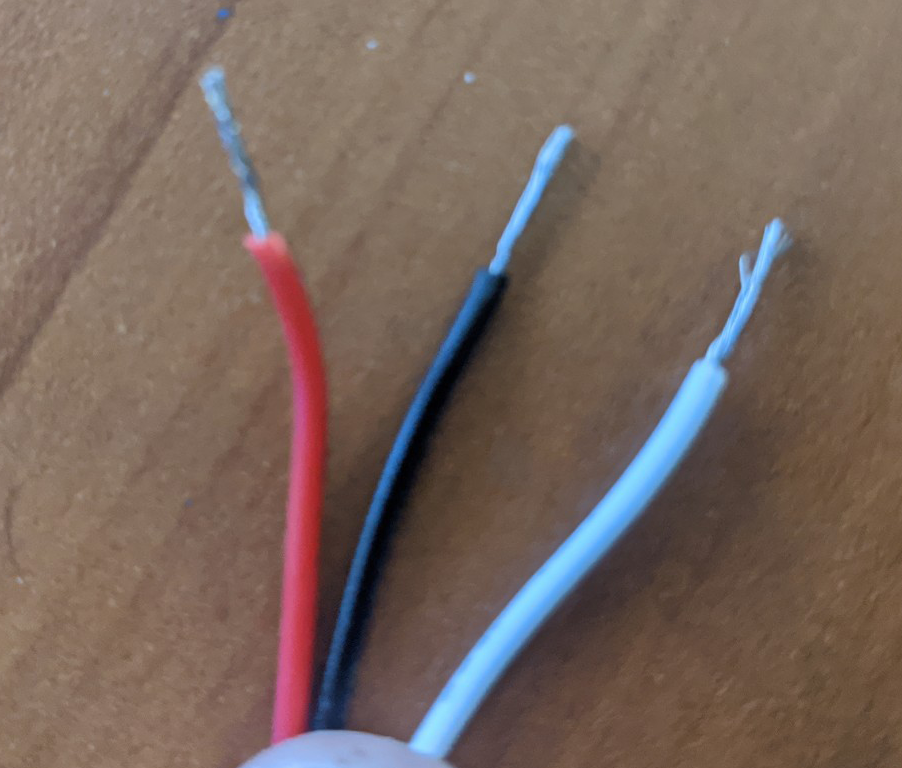
Take a moment to twist the copper strands together so that they are not frayed, and then insert them into the detachable laser port:
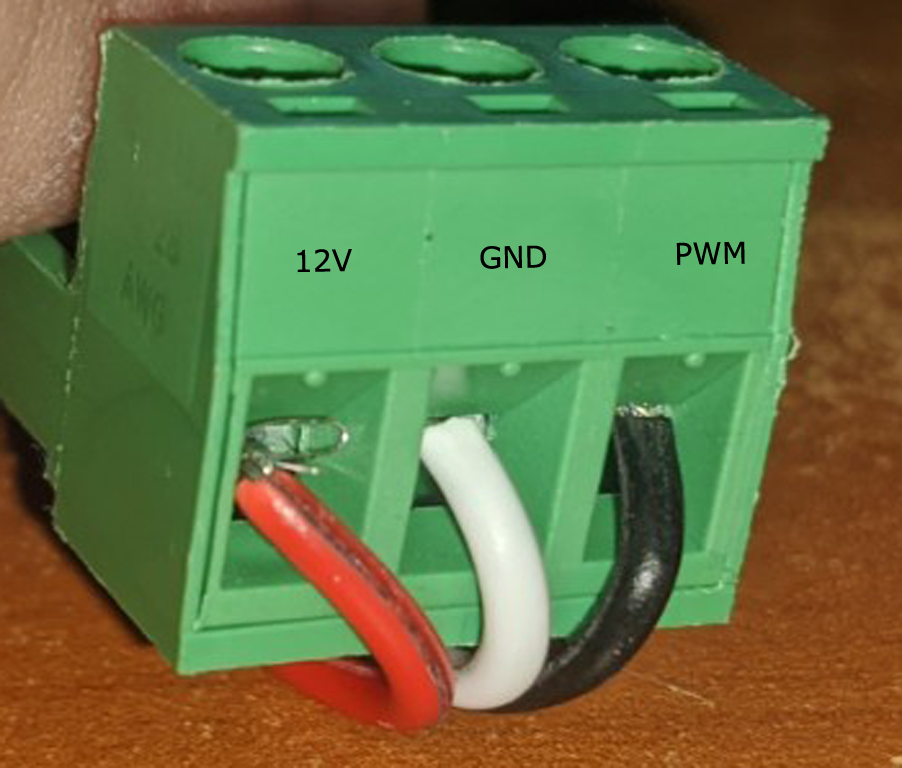
In order to do this, you will need to use a small flat head screwdriver to unscrew each of the three terminals. Once you have done so, you will want to screw the terminals back in, effectively clamping down on each of the wires. Make sure to take extra time to double-check yourself and confirm the pins on your laser control board match the terminals shown above. Don't trust the wire colors!!!
Once you're done, it will look something like this:
Installing Your Laser Module
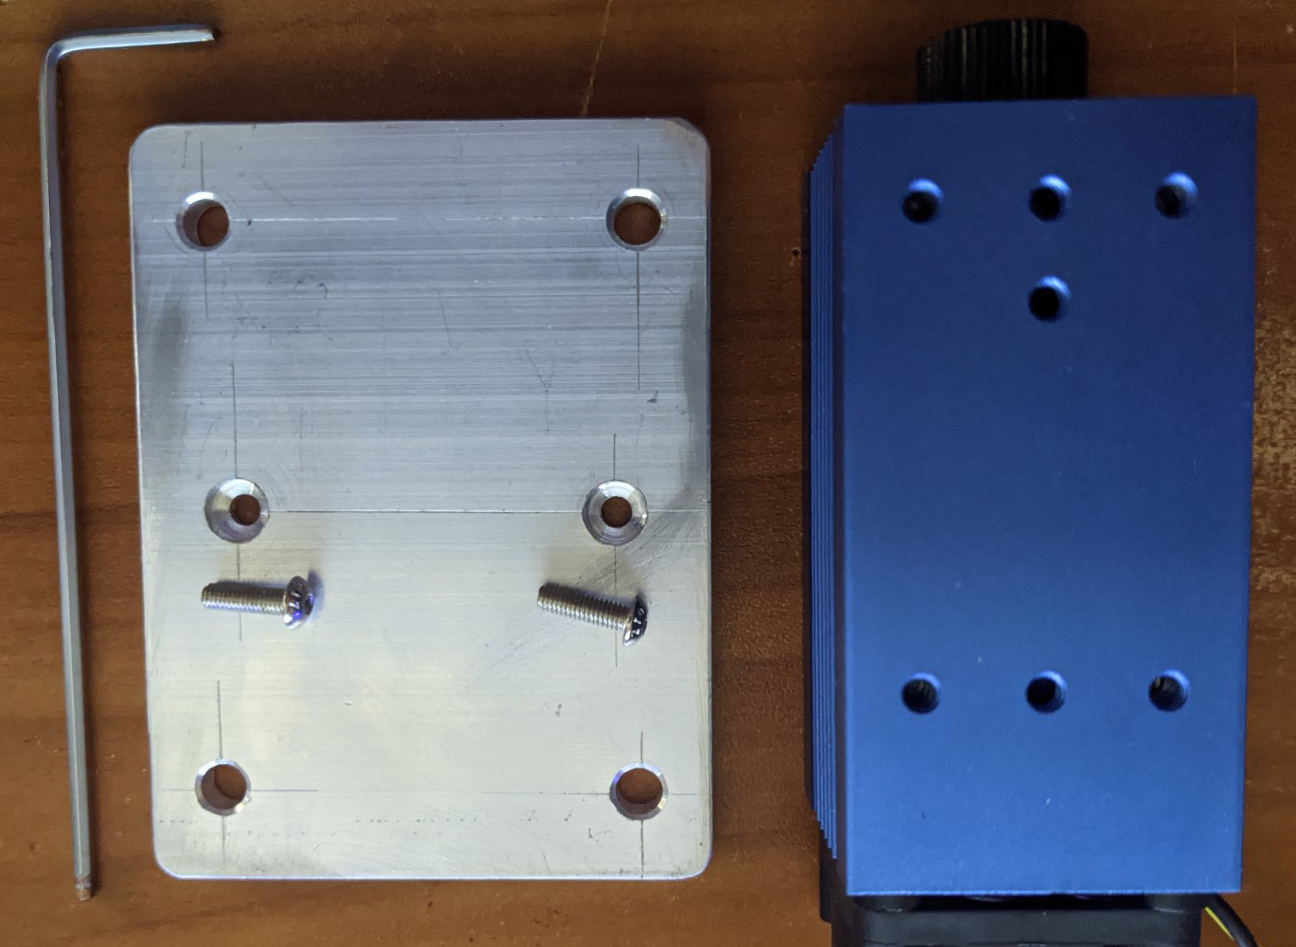
Please note that at this time we do not have a laser mount avalible for sale, so this component will need to be designed and fabricated by you prior to the conversion.
The below is just an example of how we did this during testing.
Joining the Laser with the Mount
Because of how the laser mount is designed, you will need to install the laser into the mount before bringing it over to the 4030 for final installation. Using the correct Allen wrench that came with your 4030 CNC, you will want to install the two extra screws that came with your laser module at the time of purchase.
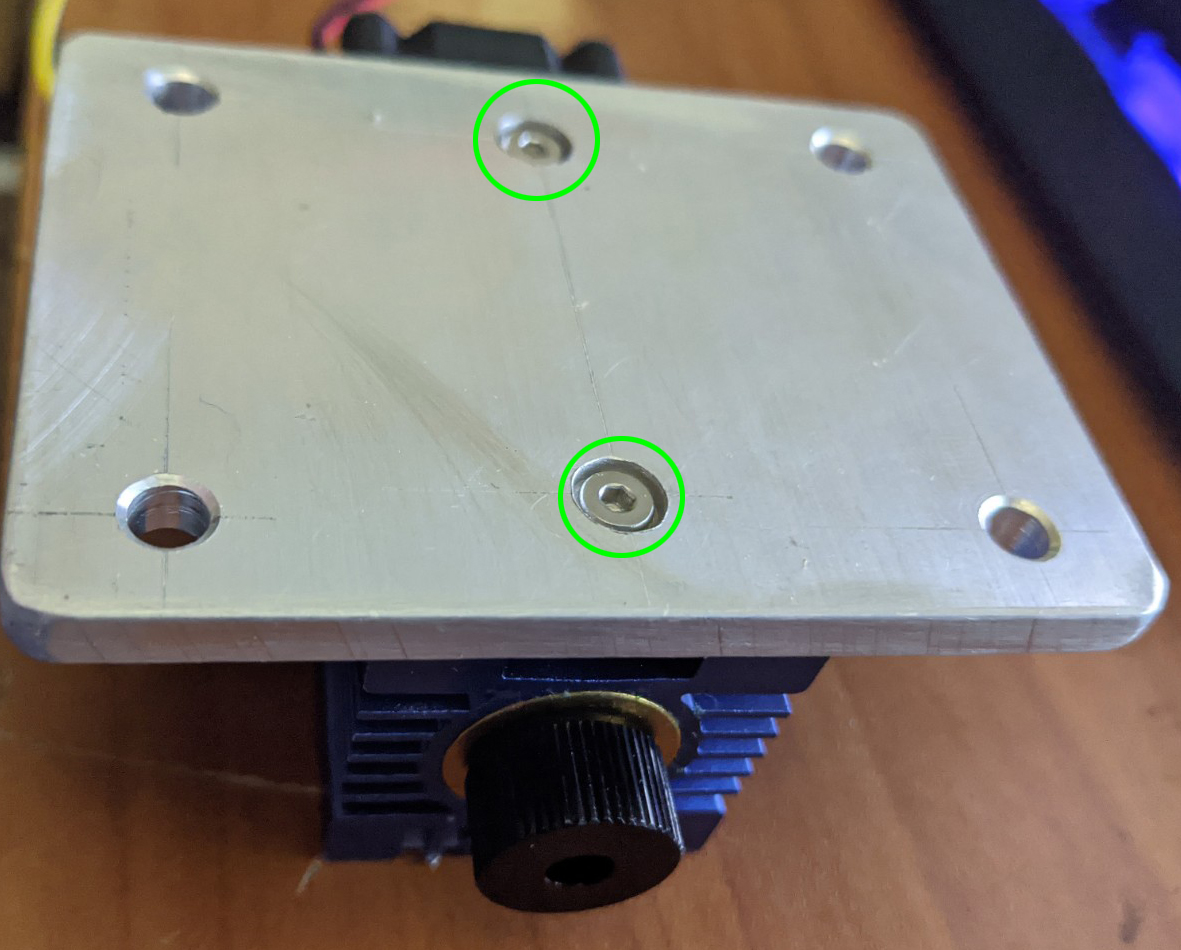
As shown above, you will want to install the screws so that they are flush or below the surface so not to cause any obstruction.
Final Installation
To begin the final installation, you will want to start by removing the spindle and spindle holder from your CNC, it should look something like this afterwards:
Using the same 4 screws that you just removed from your spindle mount, you will want to use them to install the mounted laser. Before tightening the screws fully, make sure to slide the laser mount as far down as it will go.
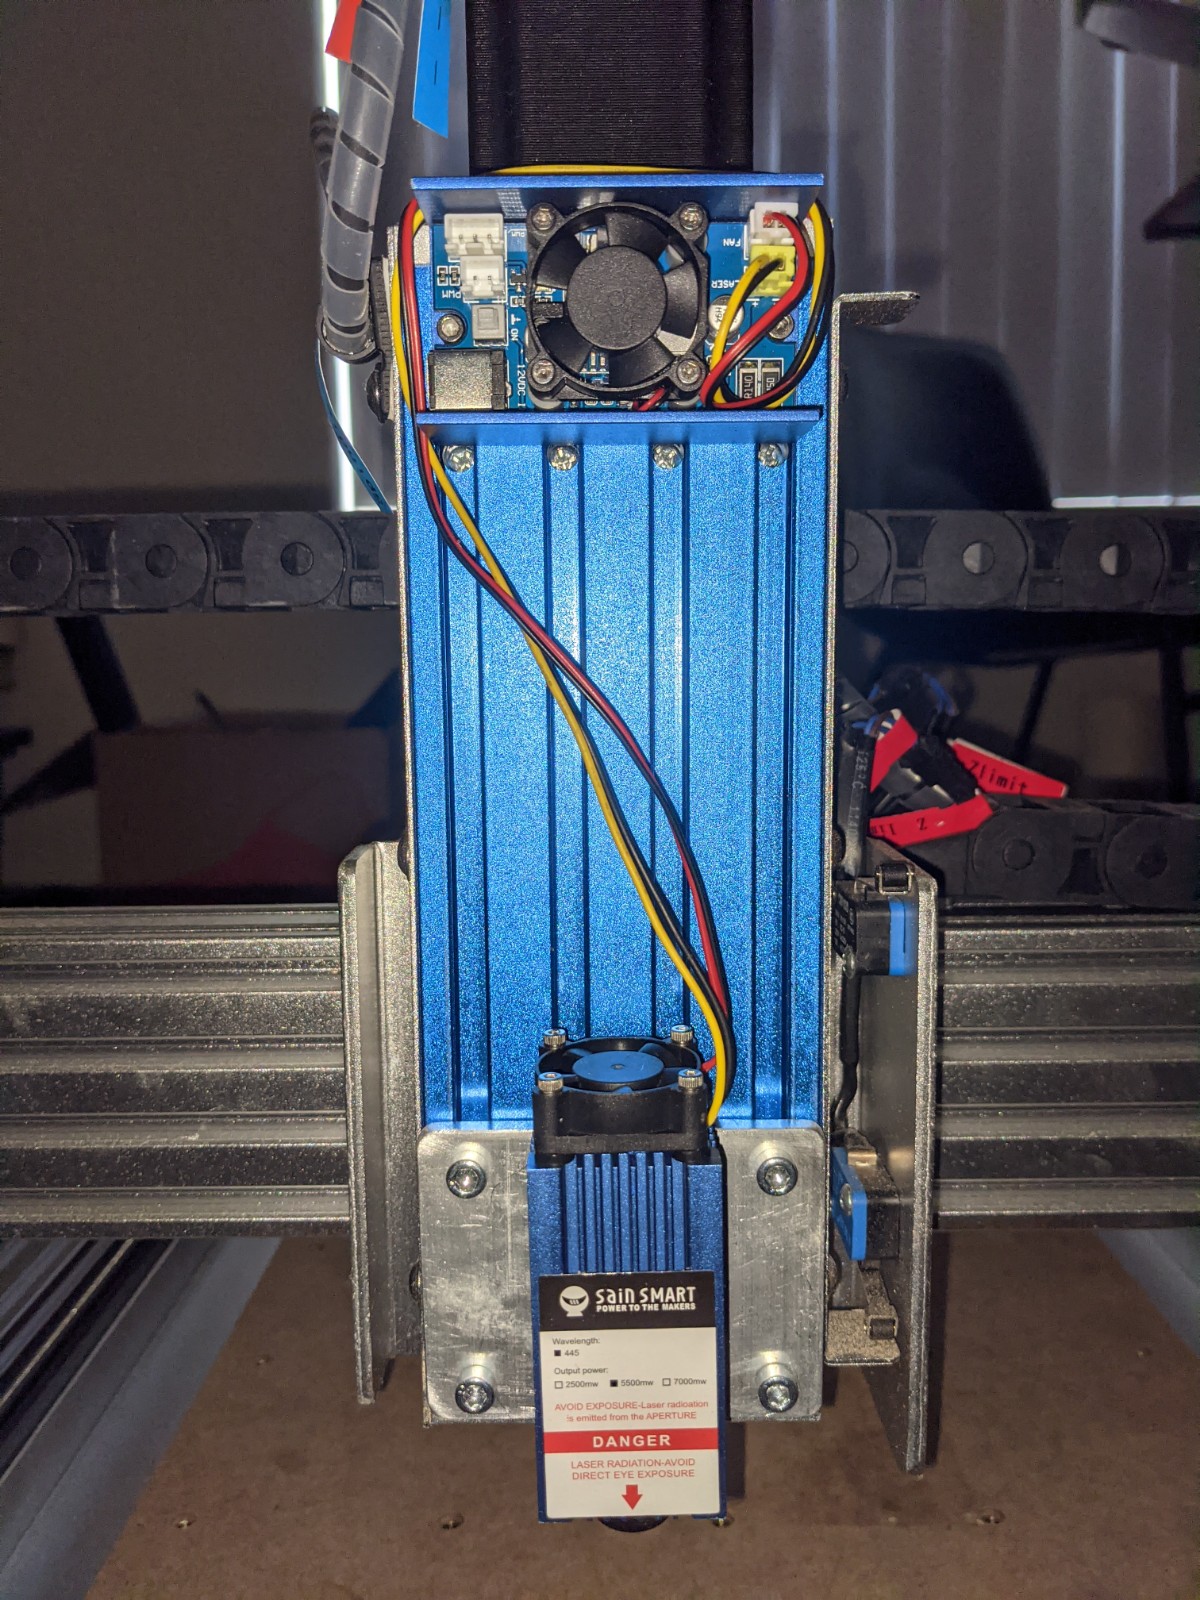
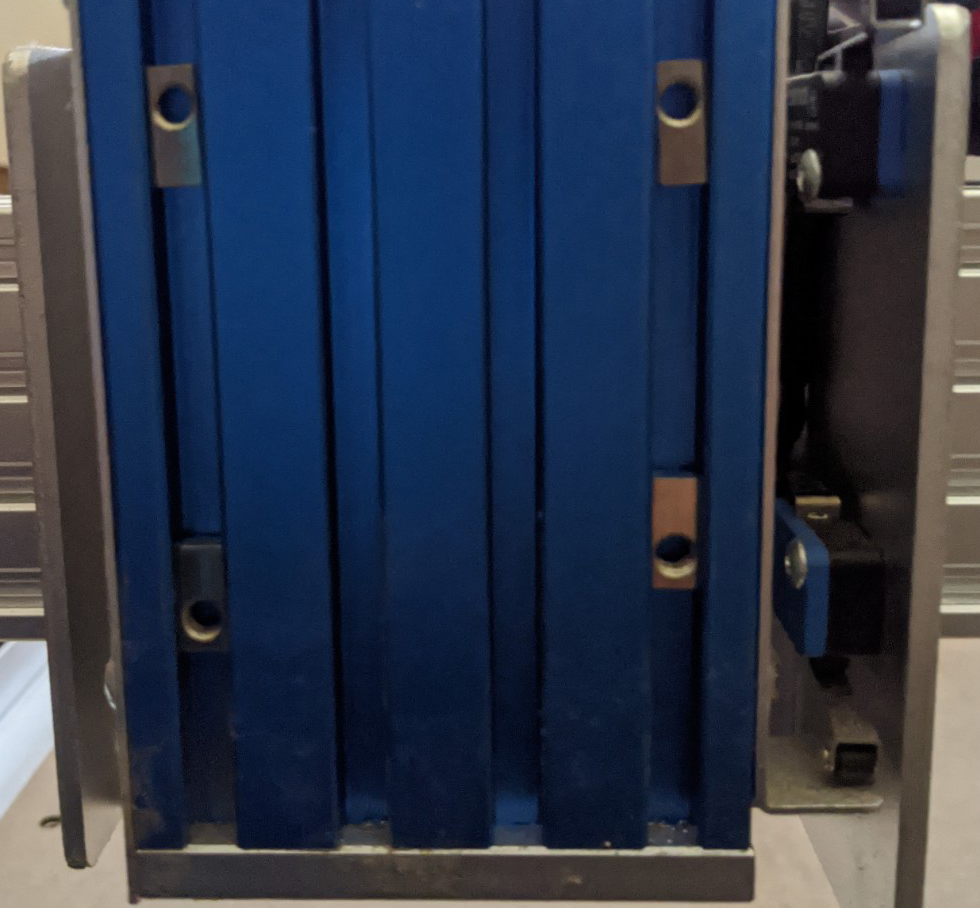
Finally, using the same 2 T nuts that came with your laser module, install the laser driver board all the way at the top of the Z-axis mount, and after tightening take a moment to manage your wires so that they won't get in the way as shown above.
Before powering your CNC
This is very important: For your own safety, please make sure that the white button below is not toggled to the ON position:
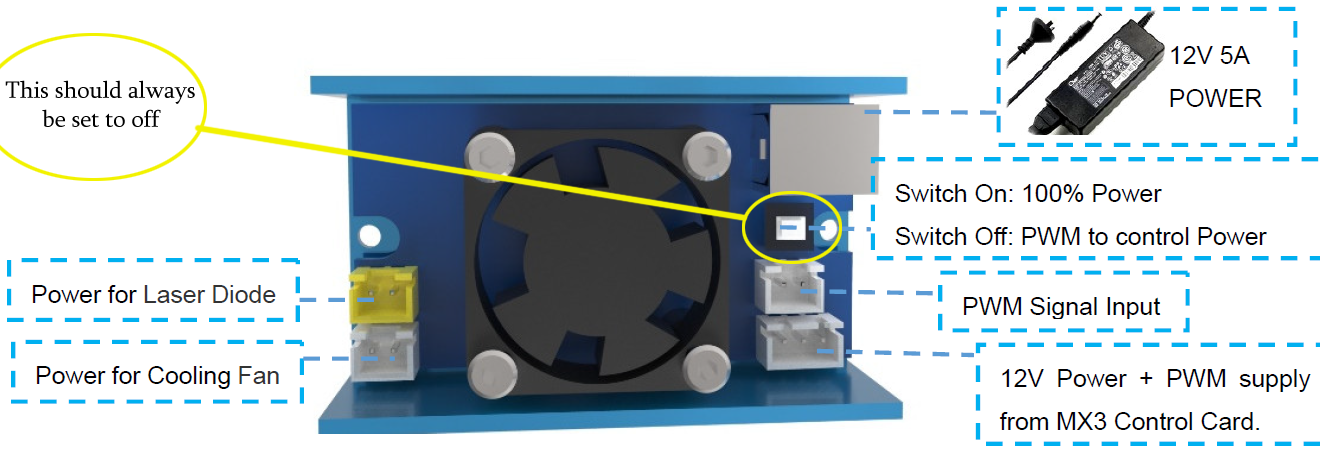
If this button is pressed when you turn your CNC on, the laser may automatically fire at full power. This is because this button disables PWM mode. While useful for diagnostic purposes, the button has no other use and should not be touched as long as it is in the correct position.
All you have to do after this use the cable you prepared to connect your laser driver to your CNC controller and you are now good to go! When you turn your CNC on after this, the fans on both the laser and laser driver should spin up as well. If this is not the case, please double-check that you have the correct wires in the correct terminals.
Installing LaserGRBL
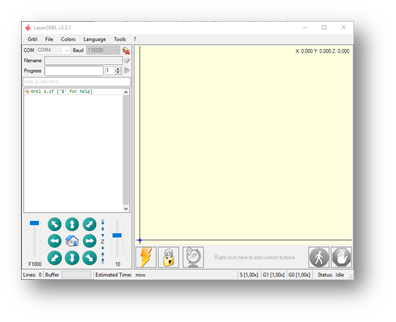
LaserGRBL is a free program that works with Grbl based routers fitted with Lasers and Laser Engravers. It will be used here to assist with setting the Laser Focus though is capable of both sending GCode and converting images to GCode for Laser Engraving It can be downloaded from https://lasergrbl.com/download/
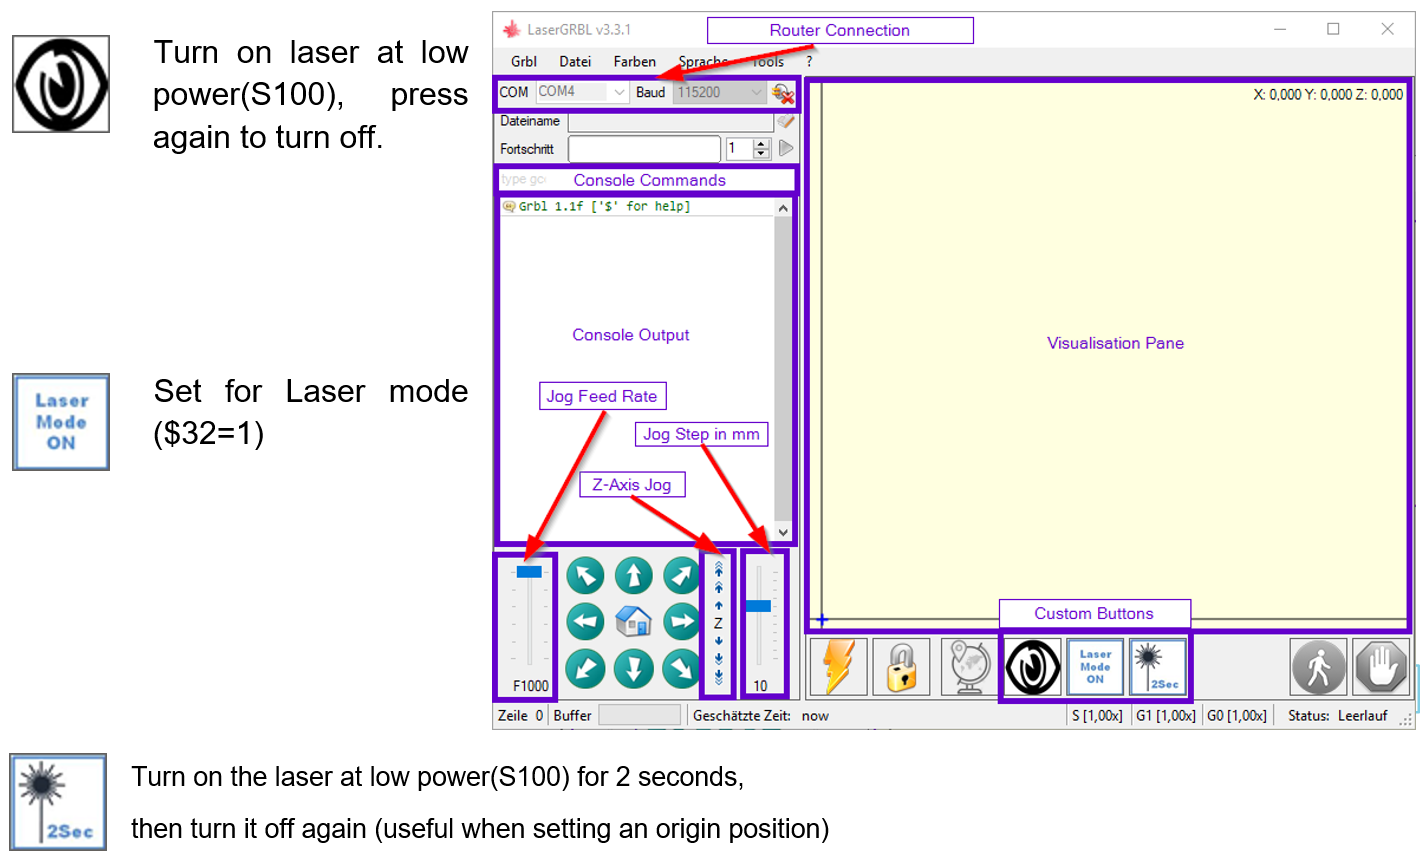
After installation and connecting to the router the screen should look like this:
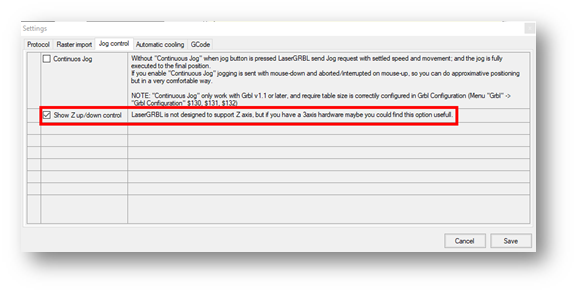
Enable Z-Axis Jog
This feature is disabled by default, but it is useful for Genmitsu CNC's because it already has a Z-axis. To do so, select ‘Grbl' > ‘Settings” and click on the ‘Jog Control' Tab. Make sure the "Show Z up/down control” box is ticked and save.
Adding Custom Buttons
Download the file CustomButtons.gz from this page.
Right-click on the text ‘Right click here to add custom buttons in the Buttons pane and select ‘Import Custom buttons’. In the Open Window select the downloaded file and click Open. The dialog box for Importing custom button will appear.

In the ‘Open’ window, select the downloaded file and click the ‘Open’ button. Now a short dialog is displayed for each of the three additional buttons. You can now select for each individual button contained in the archive file whether it should be imported or not. Select ‘Yes’ for each button.
The LaserGRBL window should now look like this:
Enabling Laser Mode
When using a laser in conjunction with a GRBL based CNC router such as the 3018 Pro, there is an important setting in GRBL which lets the CNC know what mode you want to be in. This setting is $32 and it can be edited in your command console by typing $32=1 to turn on Laser Mode, and can be turned off by typing $32=0.
Clicking the middle custom button ‘Laser Mode On’ will also toggle Laser Mode between being on and off. This is permanently stored on the 3018-PRO motherboard until it is specifically changed, so make sure to turn it off when you are done.

The major effect of setting Laser mode on is that the router will turn off the laser when it is making positional moves. If not set this can result in unwanted lines on your engraving as the Laser is positioned to the next cutting point.
Focusing The Laser
If you have a variable focus laser, such as the older 3018 PROVer Laser Module, or the current 3018 Pro Laser Module:
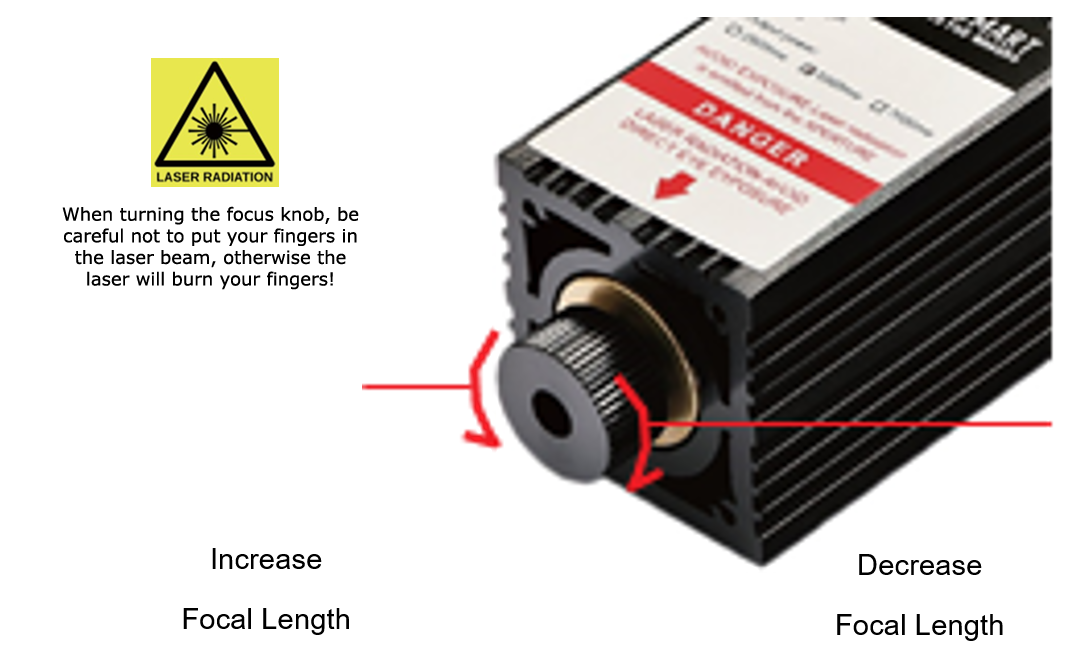
To cut or engrave efficiently we want the laser beam to be tightly focused into the smallest possible point at the top of the stock. Make sure the On/Off button on the laser module is set to ‘ON/PWM” (depressed). Do not forget to wear the Safety Googles.
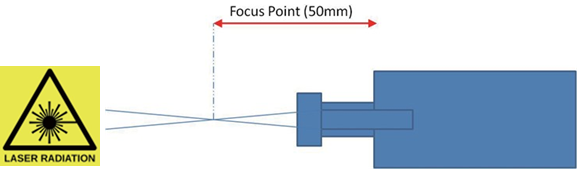
Place something of known thickness above the stock which will not burn and jog the Z axis so the bottom of the Laser Head Heat sink is 60mm from the top. This measurement will make it easier to repeat the focusing on different stock heights or after remounting the Laser of the stock. Or allow the positioning of the laser on the Z axis to avoid having to refocus every time. Focus is adjusted by turning the focusing knob to move the lenses in the shaft in and out of the Laser Head.
Next use this button to turn on the laser at low power:

With the laser on at low power, you can turn the focusing knob on the laser head as shown below to decrease or increase the focal length:
Adjust the focusing knob to create the smallest possible dot at the center of the laser beams contact point. The left image is not focused, the right one is focused:
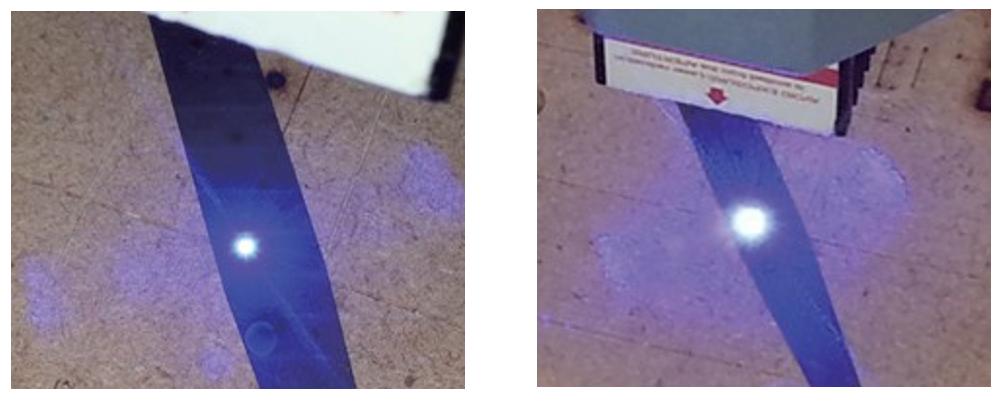
With your laser focused, pressed the Laser Fire button again to turn it off.
If you have a fixed-focus laser module such as the current 3018 PROVer Laser Module:
As the name implies, the fixed-focus laser module can not be focused by rotating the lense to adjust the focal length. Instead, you must move the Z-axis of your CNC up and down to find the correct focal length.
In order to assist with this, your laser comes with a focusing tool that is 20mm tall. If you place the focusing tool on your project and jog the Z-axis down until it looks like this:
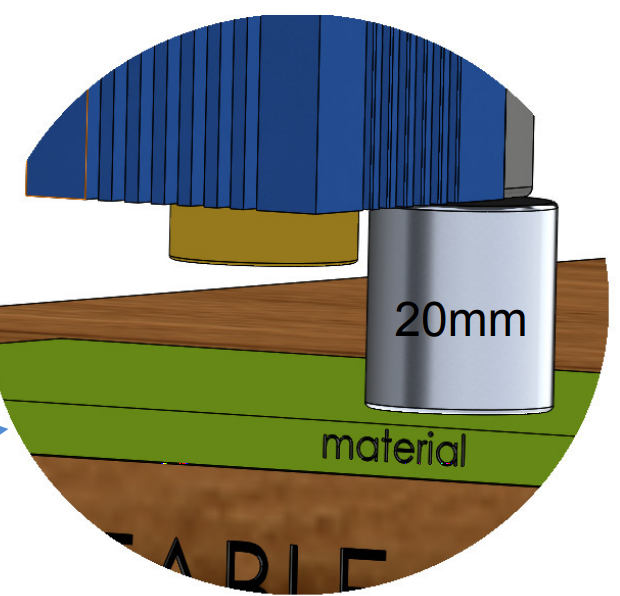
This is a quick and easy way to focus your laser.