How to install the Laser Rotary Roller in the 4030 CNC

What you will need:
- SainSmart Genmitsu 4030 PROVer XL CNC
- 3018 PROVer Laser Module (Installing the laser is covered here)
- Laser Rotary Roller
Step 1: Wiring
Part A: Freeing up a Terminal
There is no spare port for you to use on the 4030 and keep dedicated to the Laser Rotary Roller, so you must instead repurpose one of the existing axes. Because the Z-axis will be needed for focusing your laser, and the Y-axis has two steppers paired together, we must use the X-Axis by process of elimination.
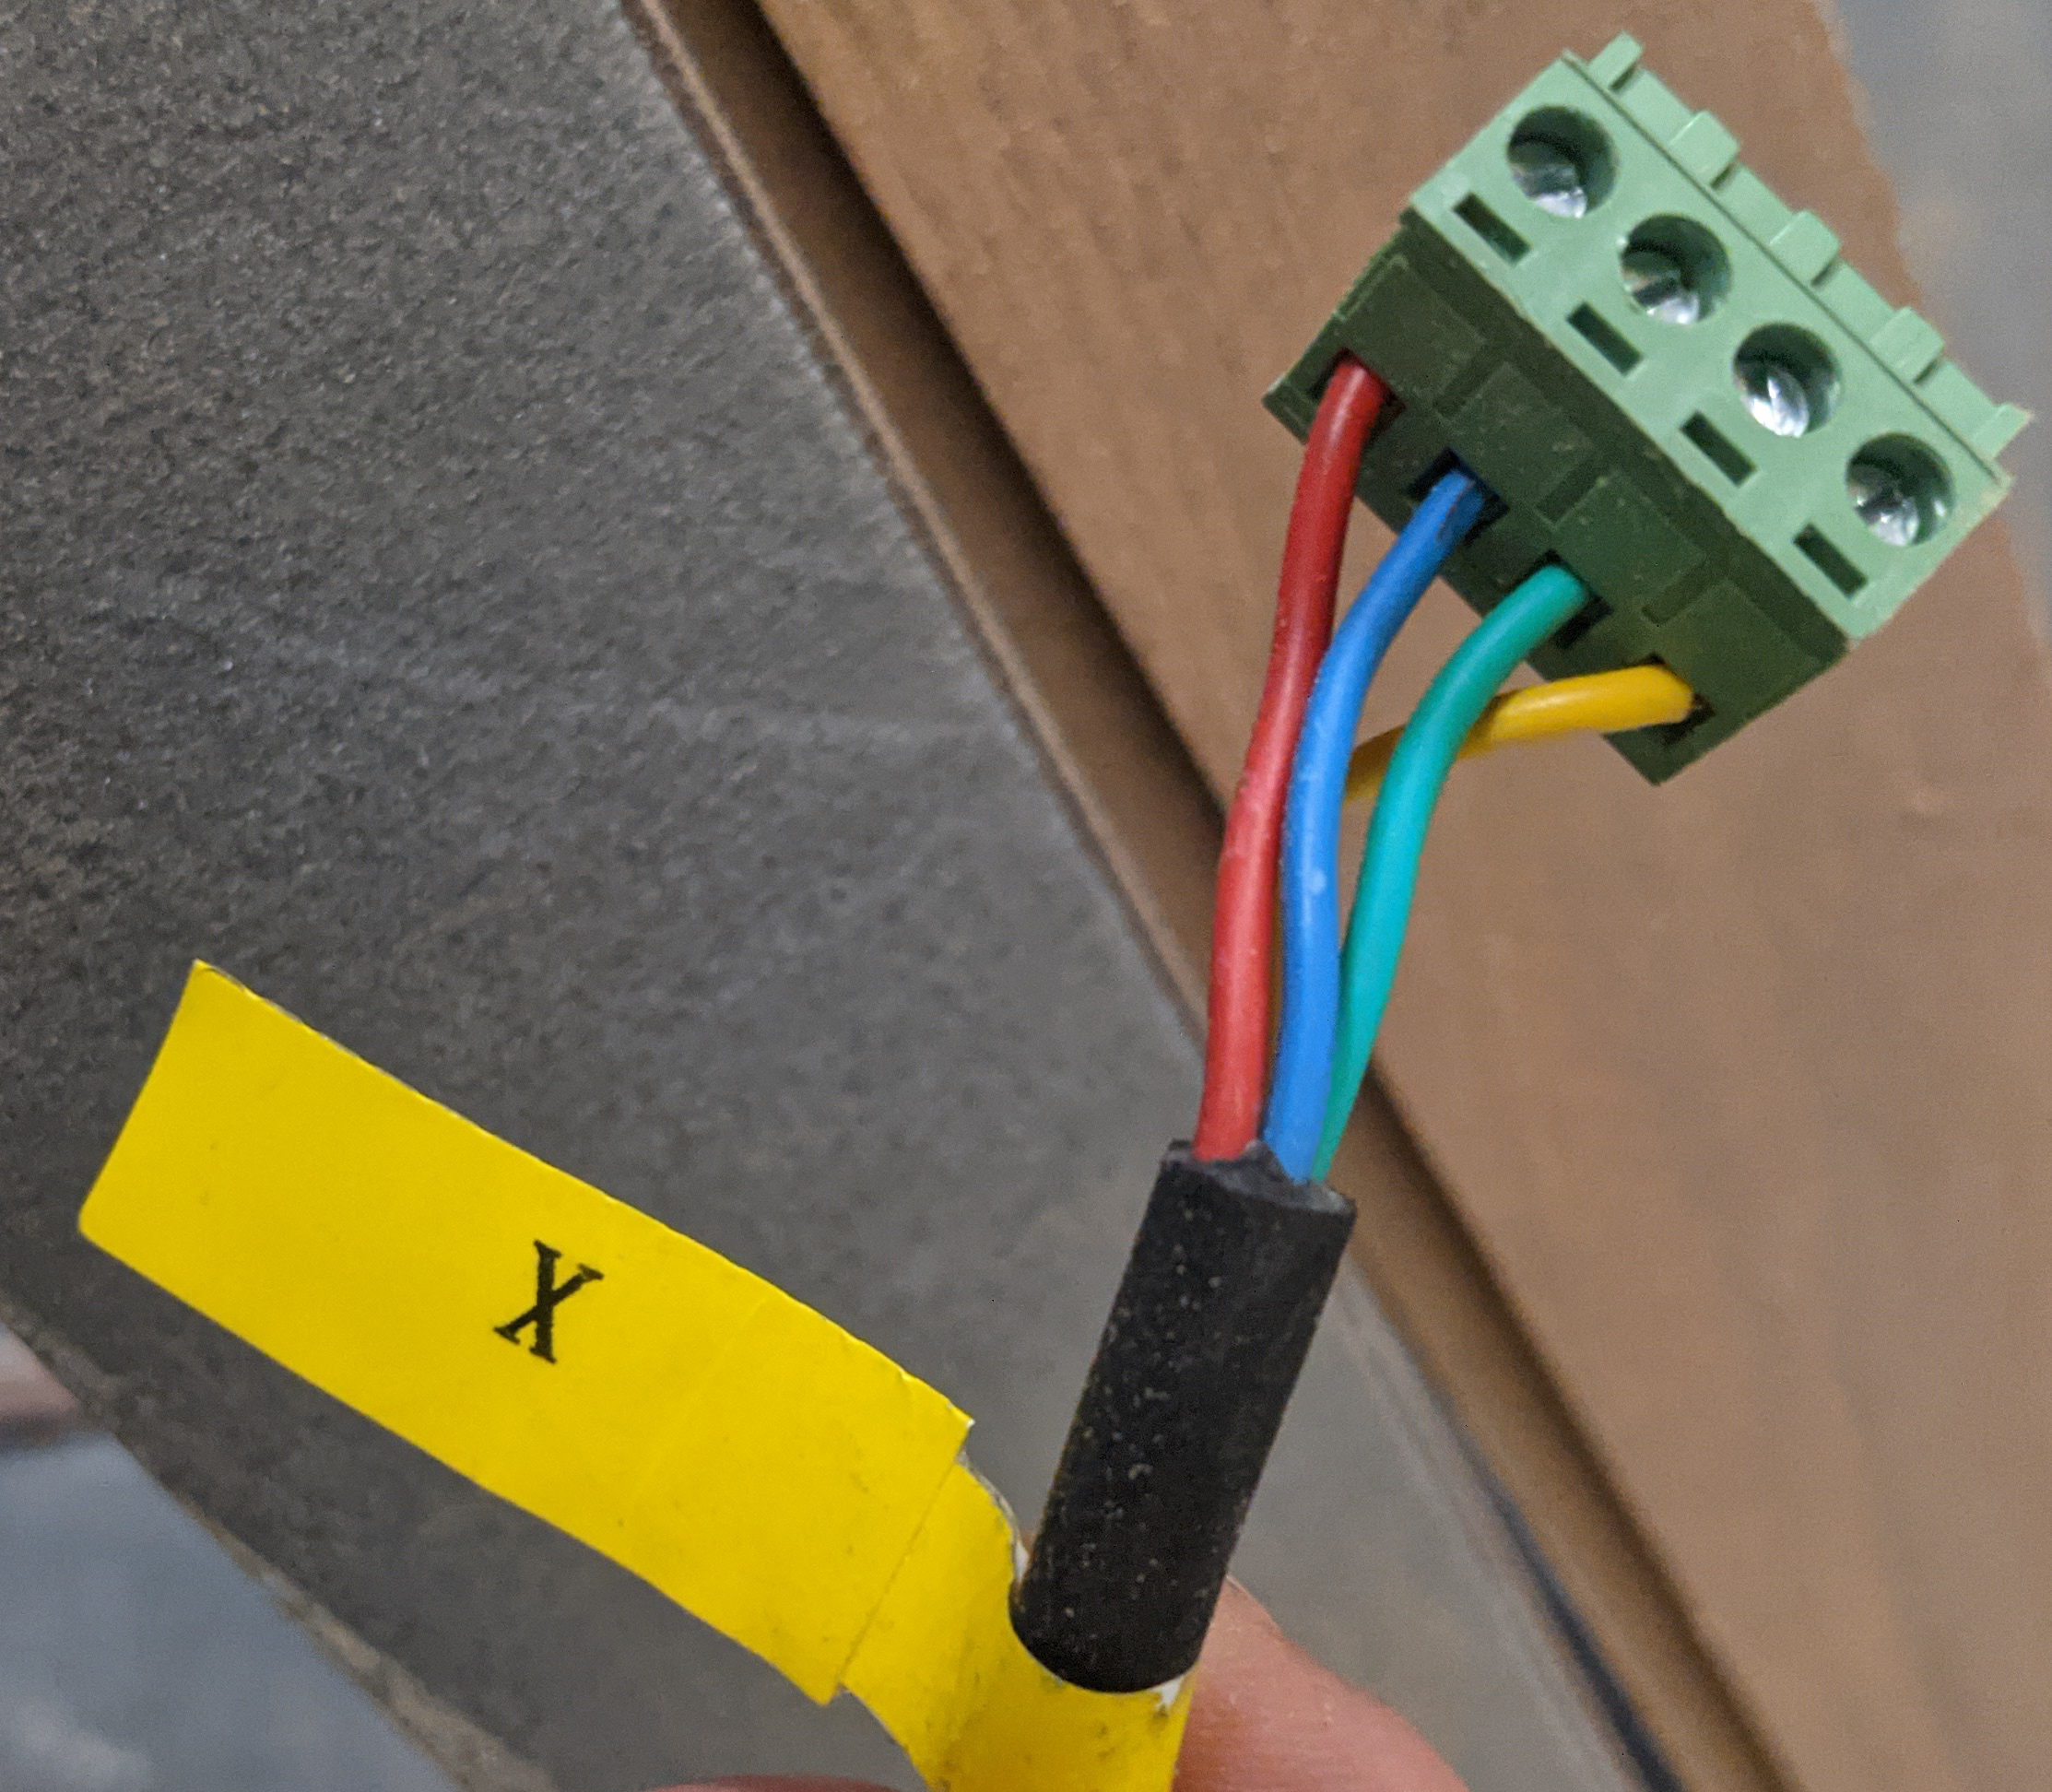
Note: Just in case your wire coloring does not match the one shown above, make sure to take a picture of your X-Axis terminal so that you can know how to re-wire things back up later.
You will need to find a small flathead screwdriver to unscrew each terminal until it can slide out freely; do so for each of the 4 wires and hold onto the terminal.
Part B: Wiring Laser Rotary Roller to the Terminal
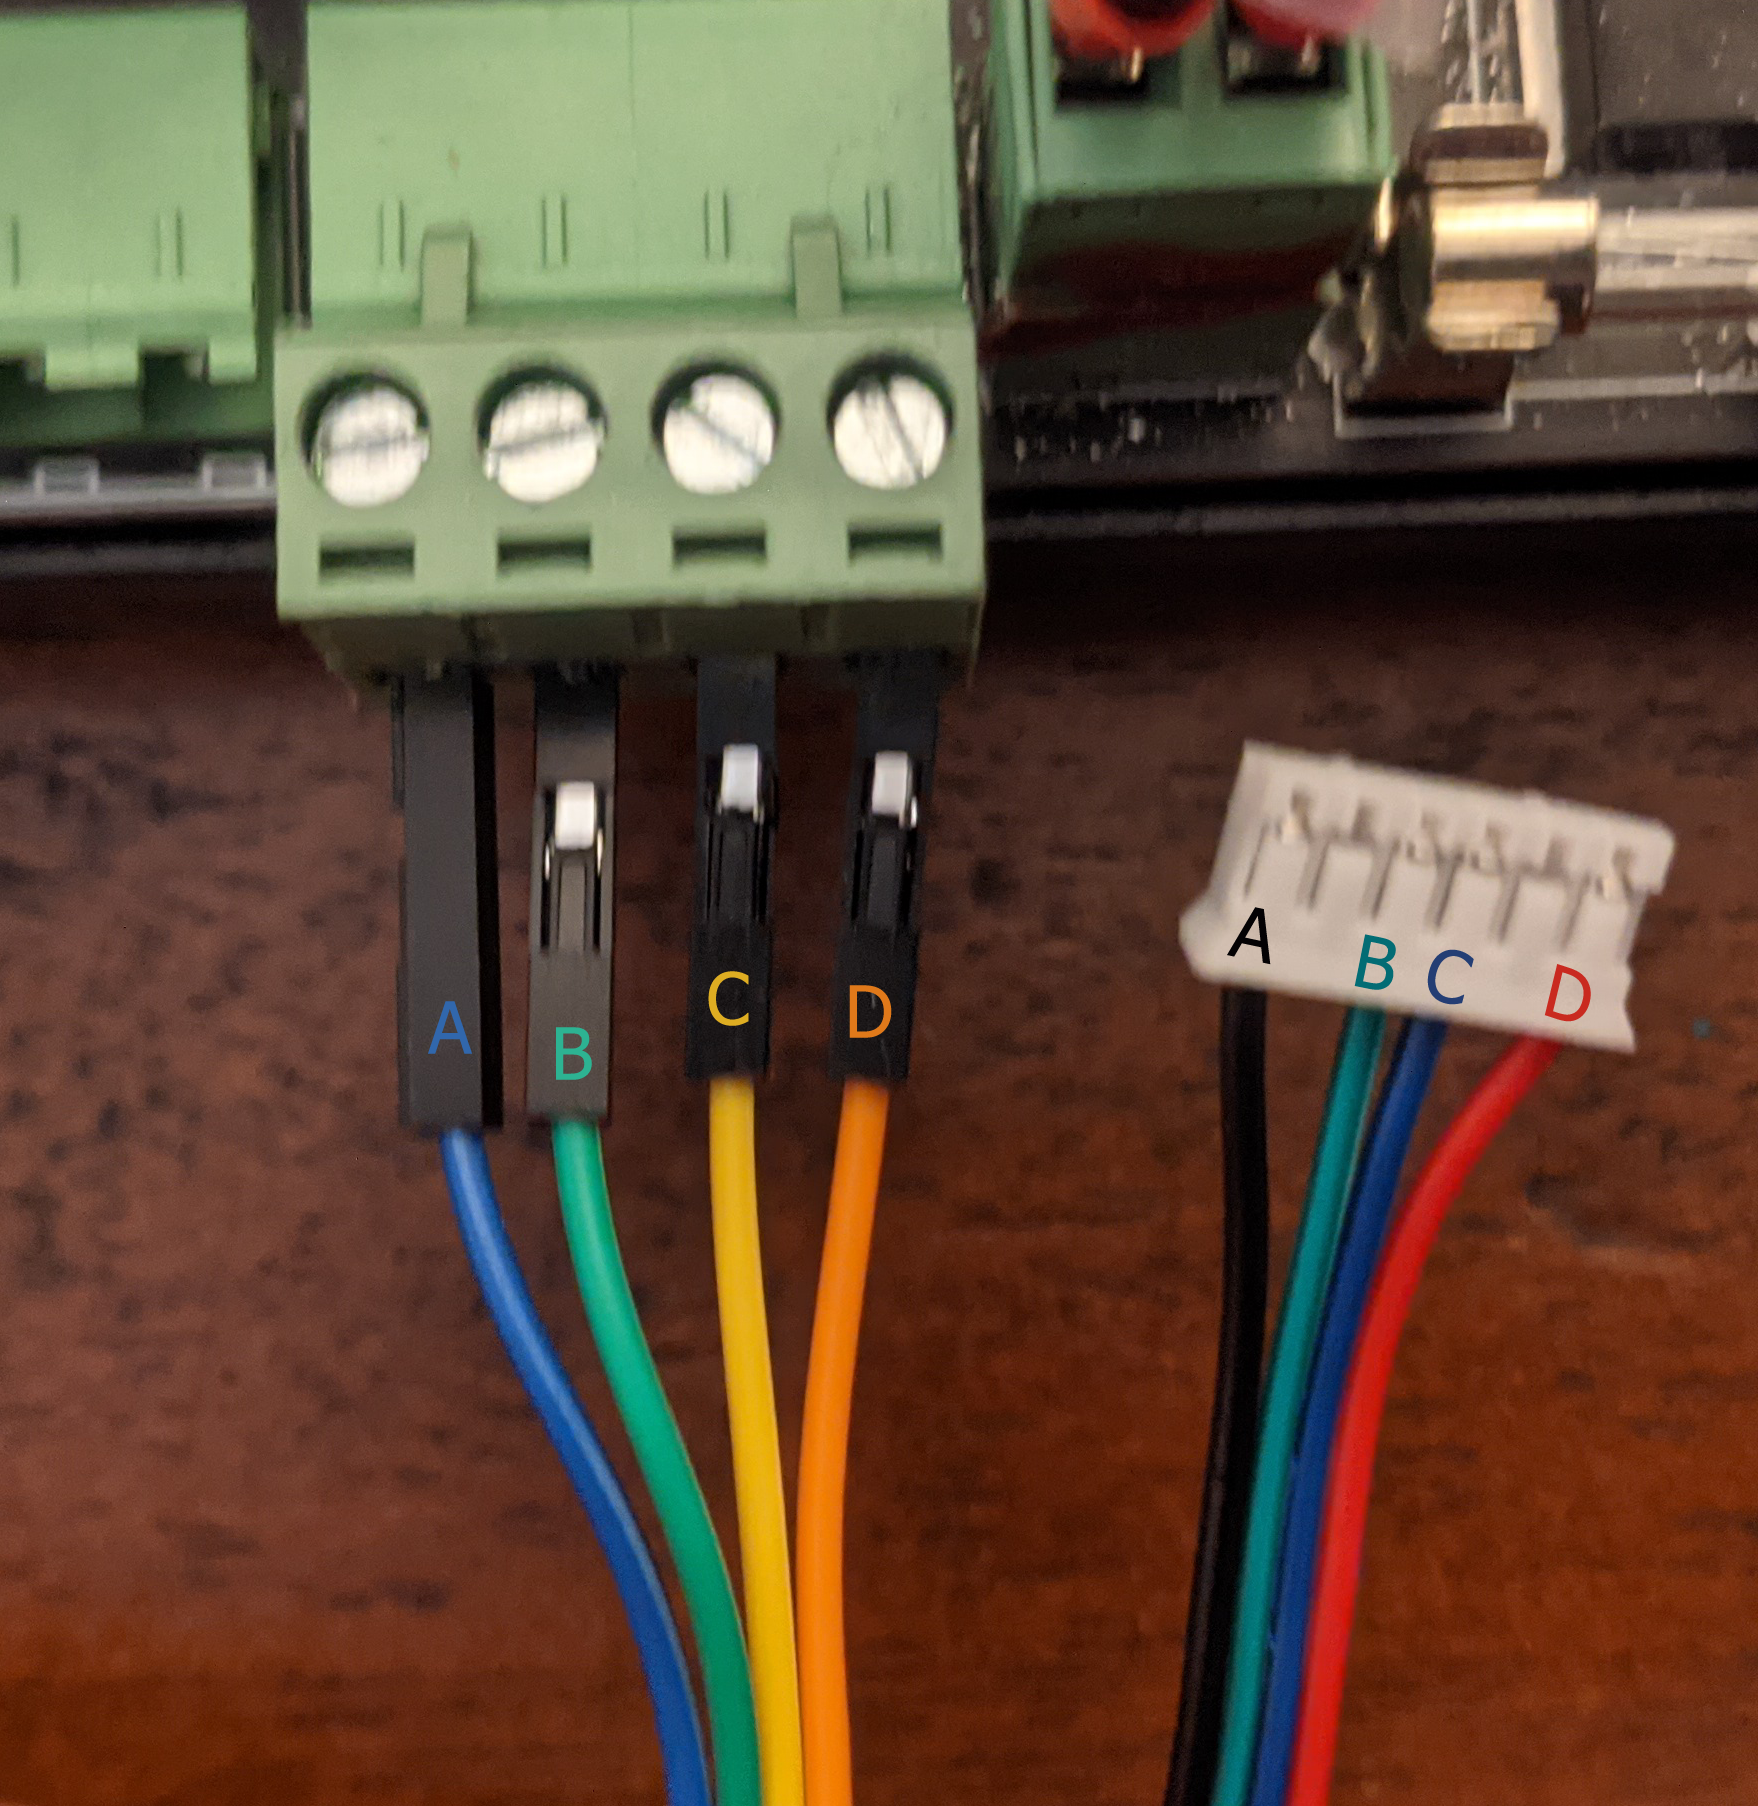
Before getting into the how of making this happen, it is important to understand that the cable that comes with the laser rotary roller is not long enough for the 4030 by default. It is strongly suggested that you source a longer one for this purpose, the longer the better, or just use some jumper cables (such as those linked here) to extend it as shown above.
The only thing to really be concerned about during this process is the order of the individual wires in the cable, but as long as you keep every wire in the cable in a row (in the same order) from beginning to end, things will work out. Even if it is reversed from ABCD to DCBA, as long as the order is maintained the stepper will just move in the reverse direction, but since you are engraving circular objects, it isn't the end of the world.
Step 2: Adjusting the Stepper Driver
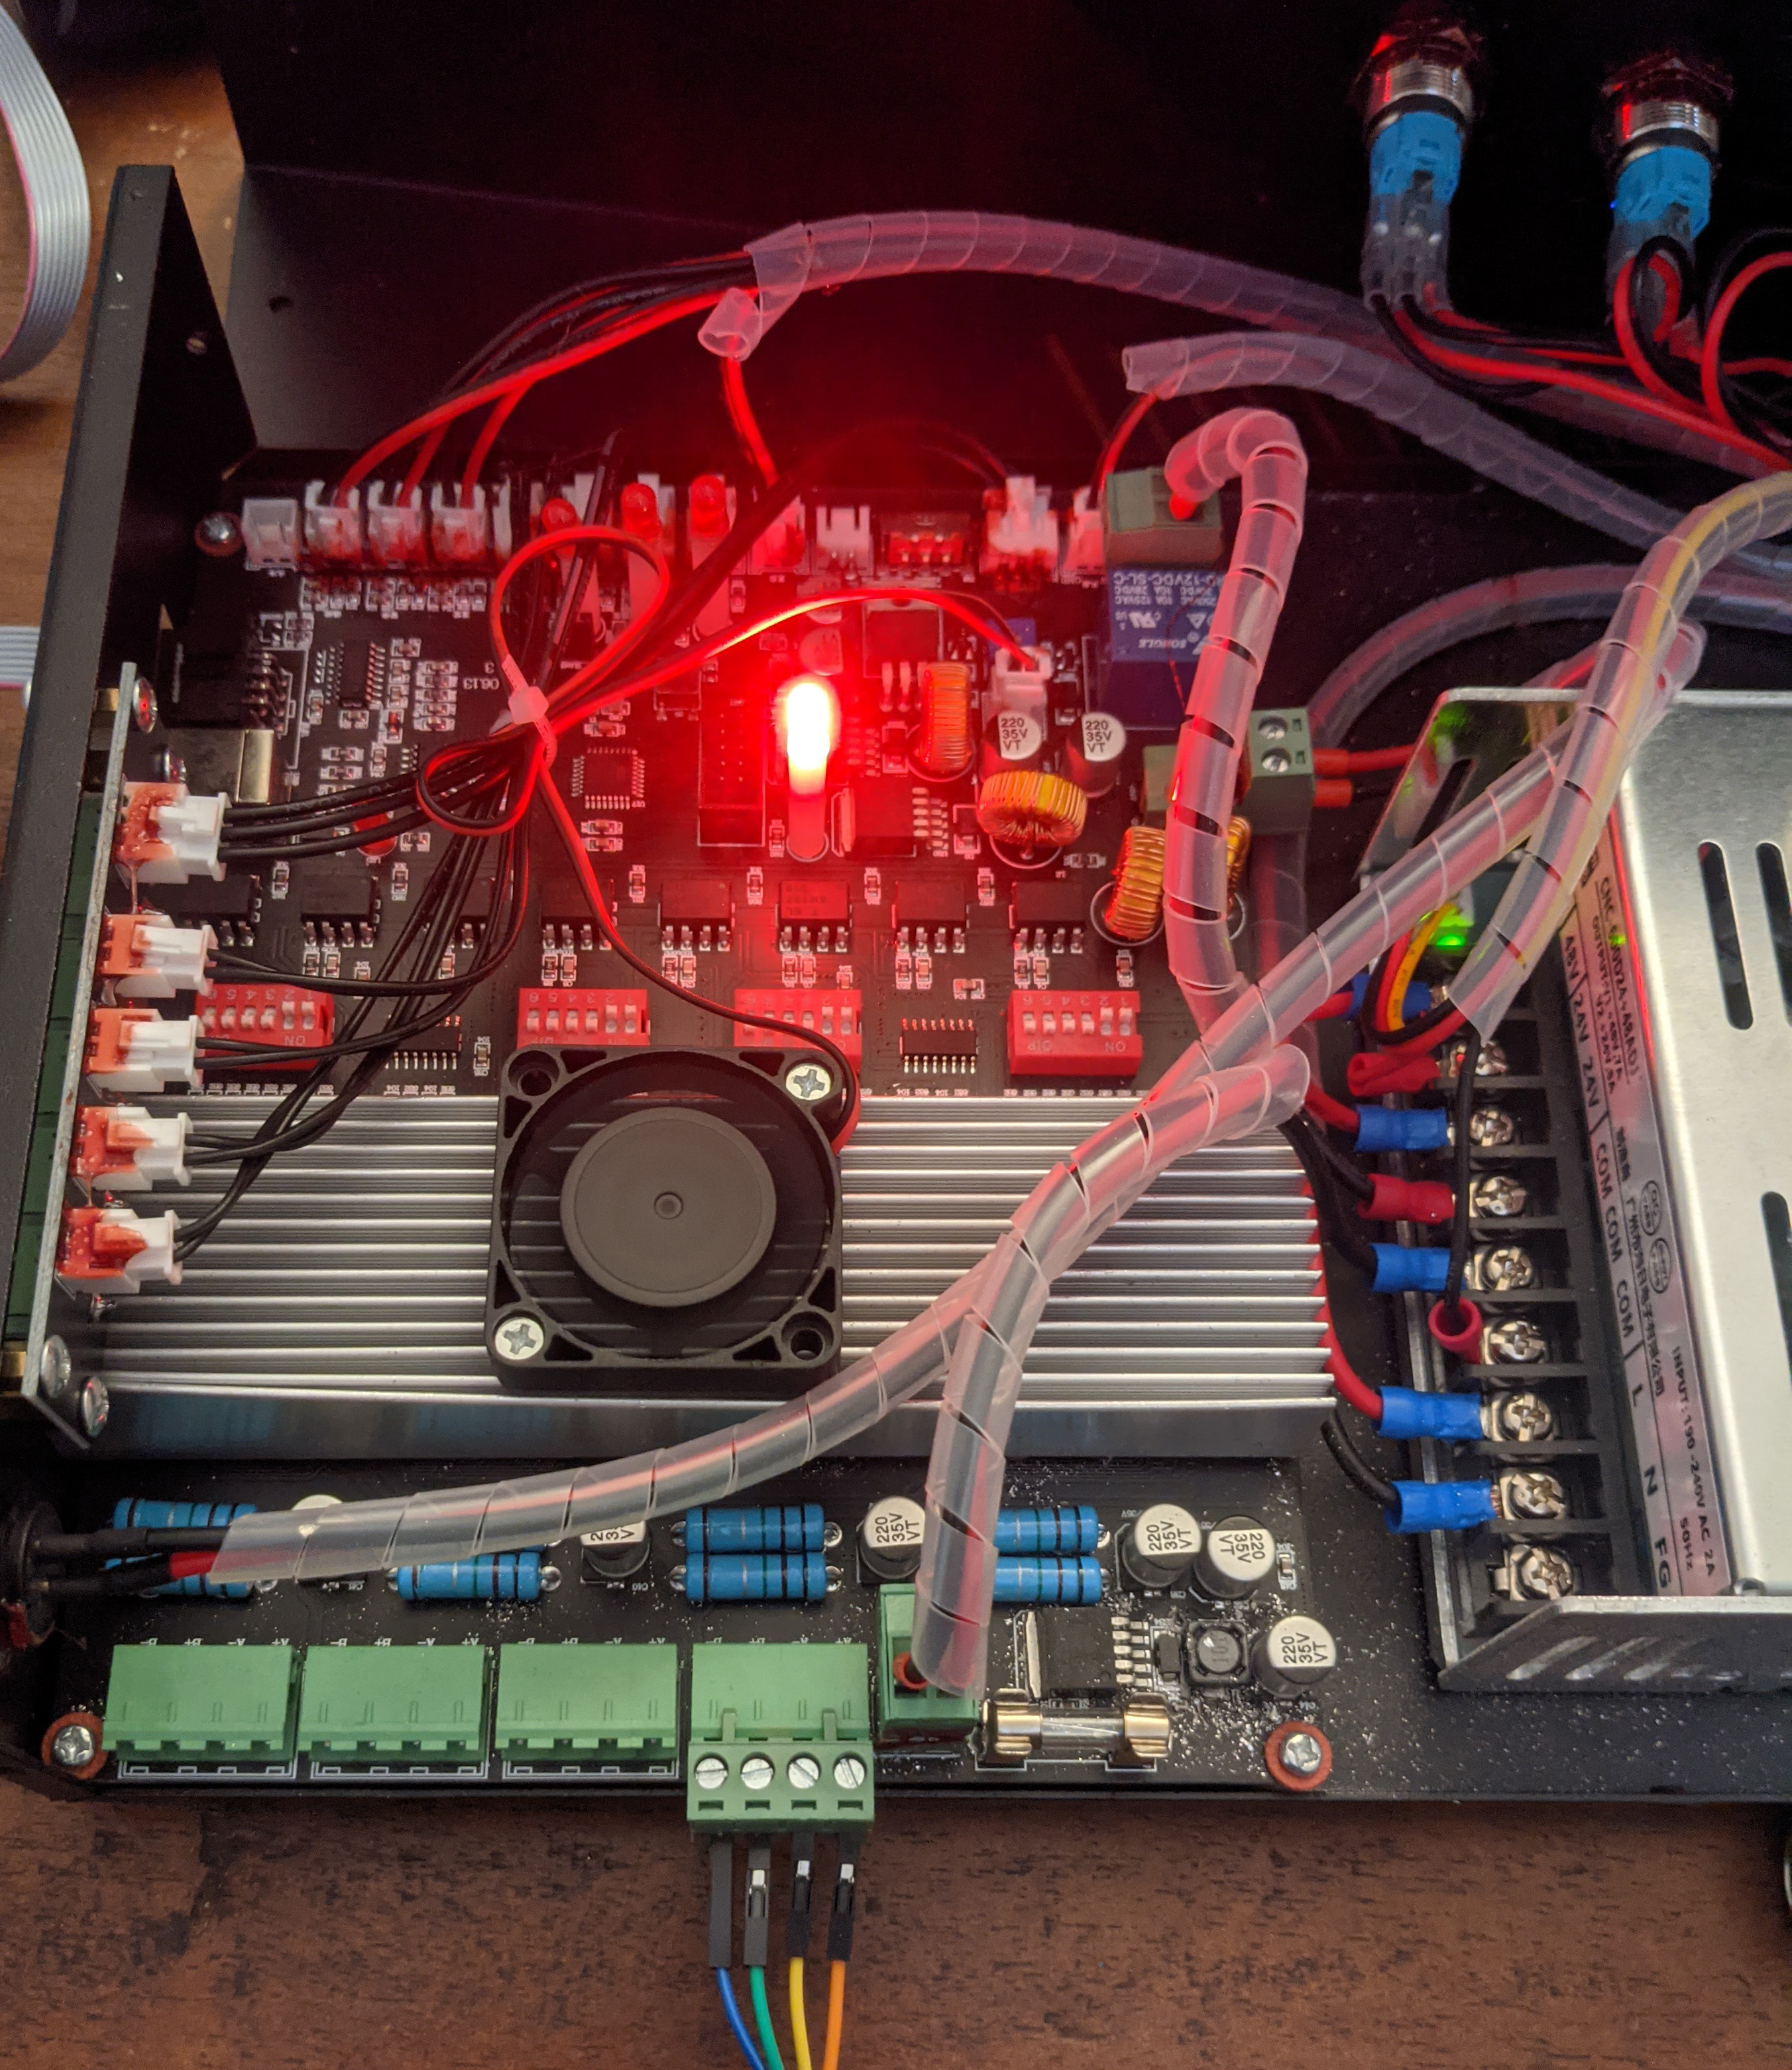
With your 4030 control box entirely unplugged and powered off, you will need to remove all the screws on the front and back in order to take the top off. Some wires are attached to the top, but it can be partially opened without unplugging anything, as shown below:
Inside you will see 4 red boxed, each with 6 little switches:
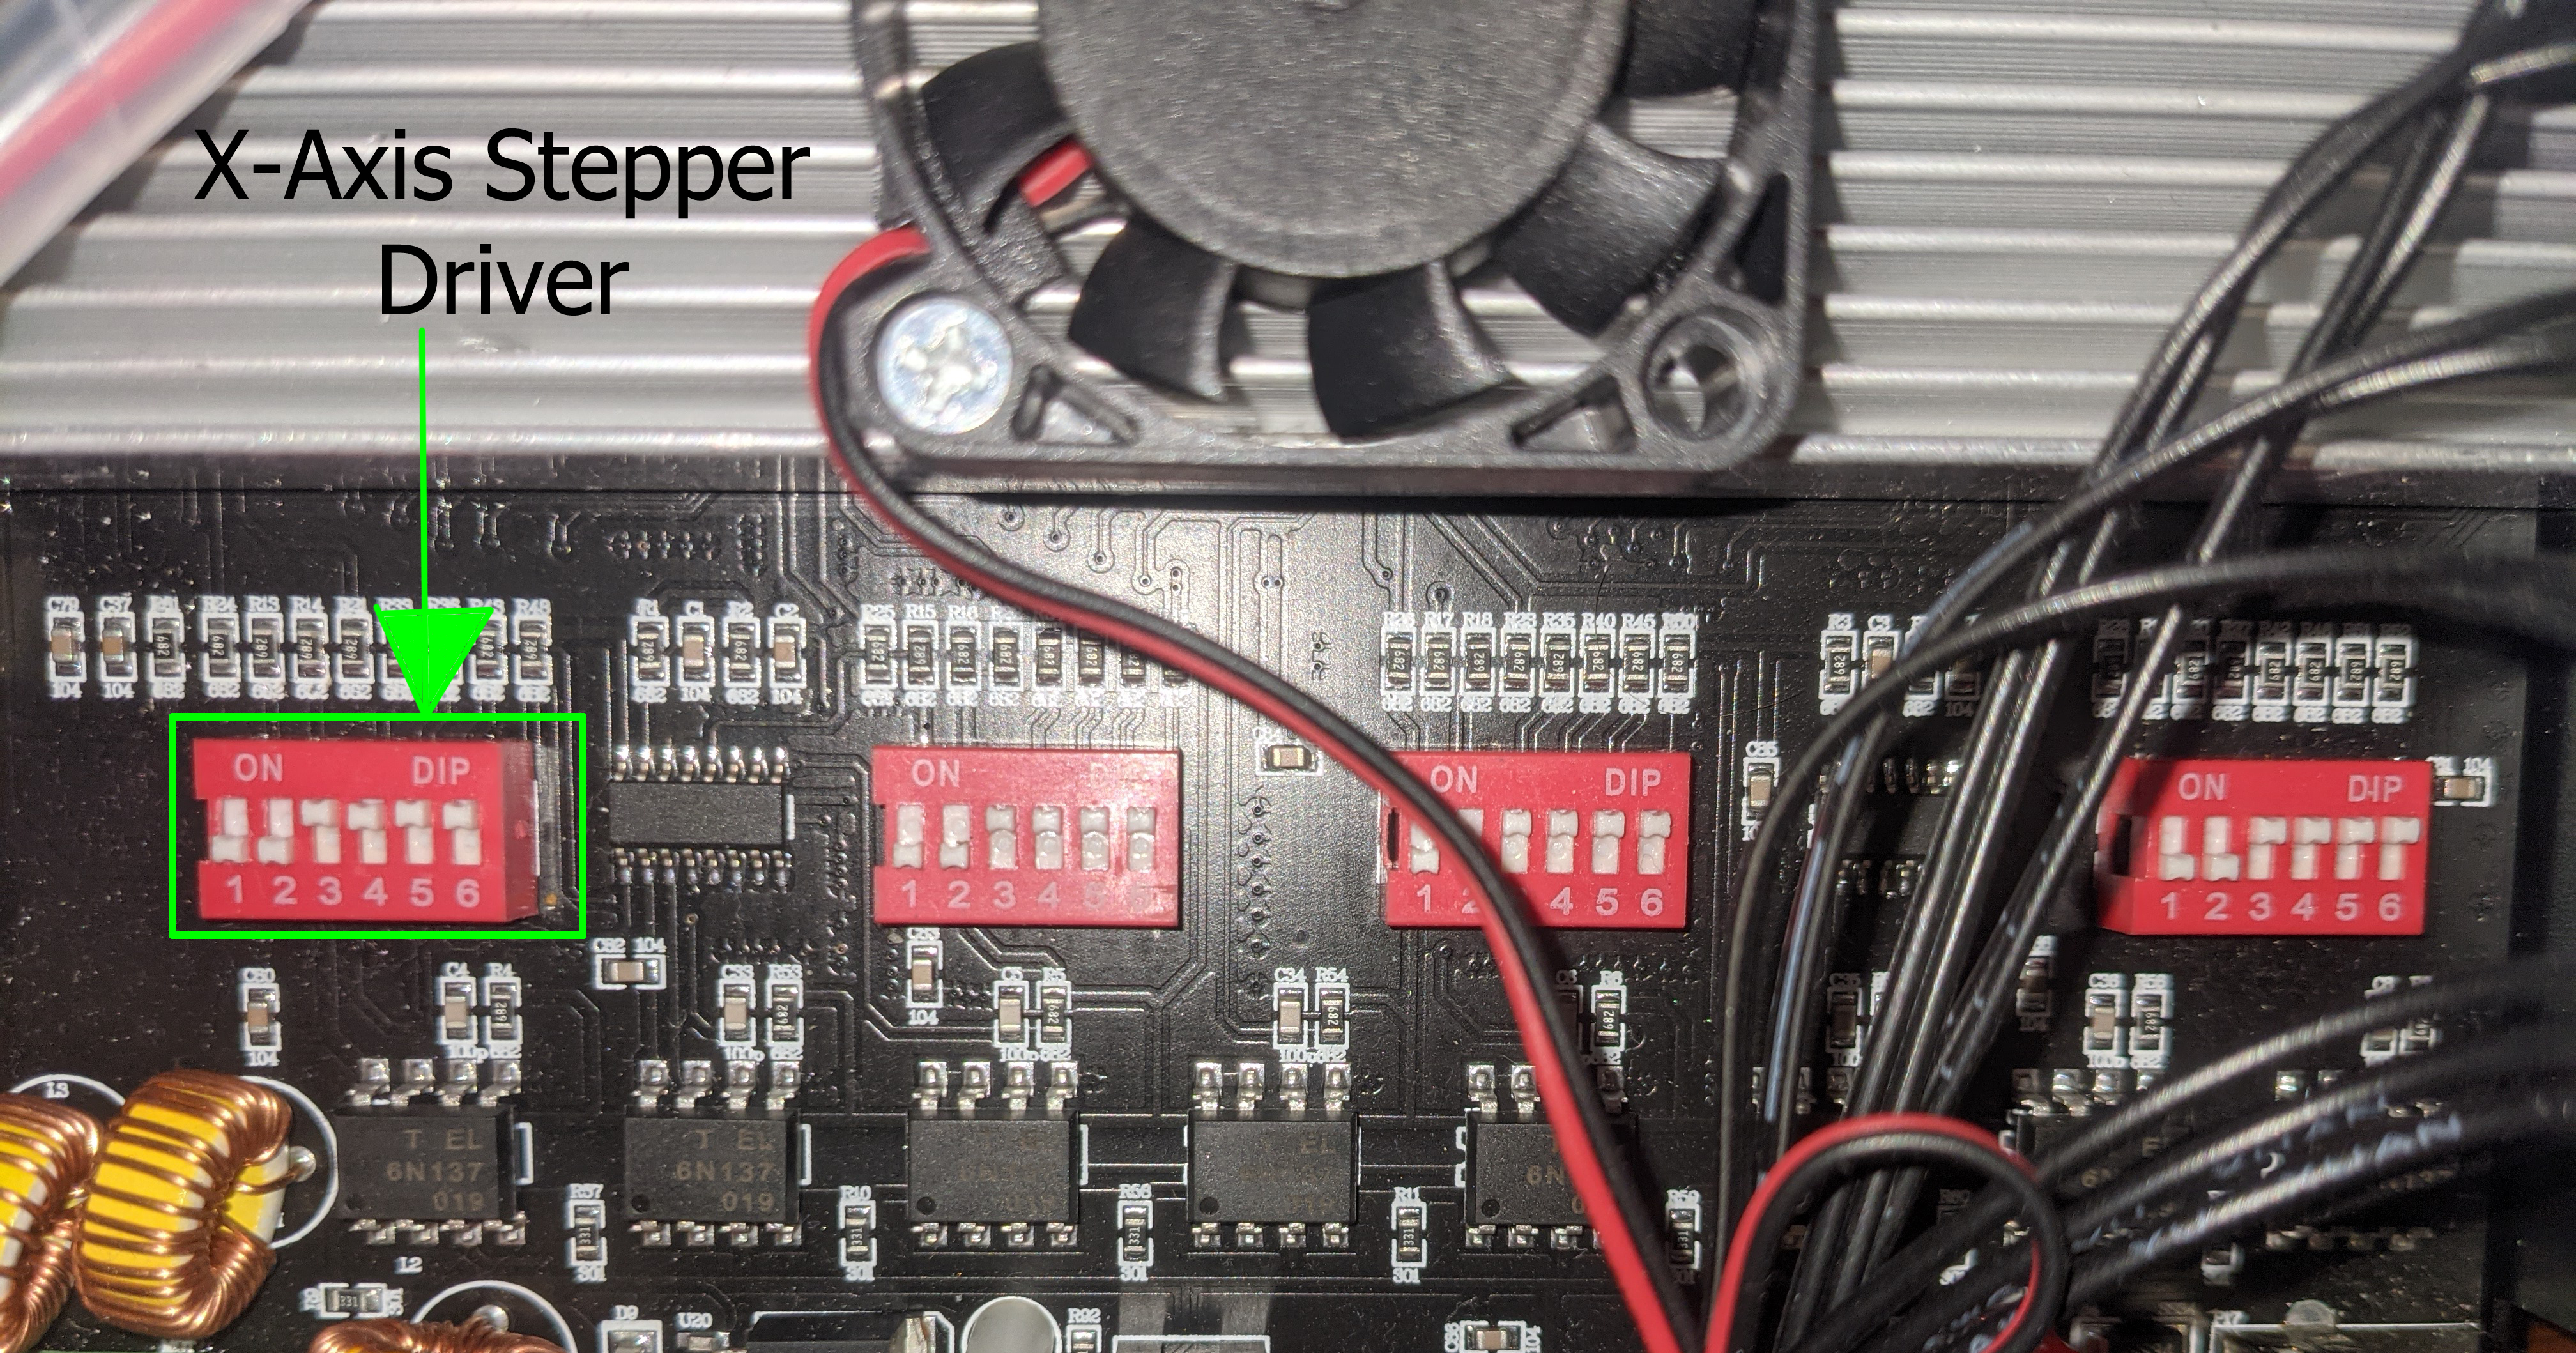
These are the stepper drivers for your CNC, and they are in the same order as the ports. All we are interested in is the X-Axis stepper driver, shown above in the yellow box. If you are looking at it with the "ON" and "DIP" text facing towards you, then the X-axis is the one on the left.
These drivers are pre-configured to work with the larger NEMA 23 stepper motors, whereas your Laser Rotary Roller is using a less powerful NEMA 17 stepper motor, so we will need to change switches 1 and 2 to the "ON" position.
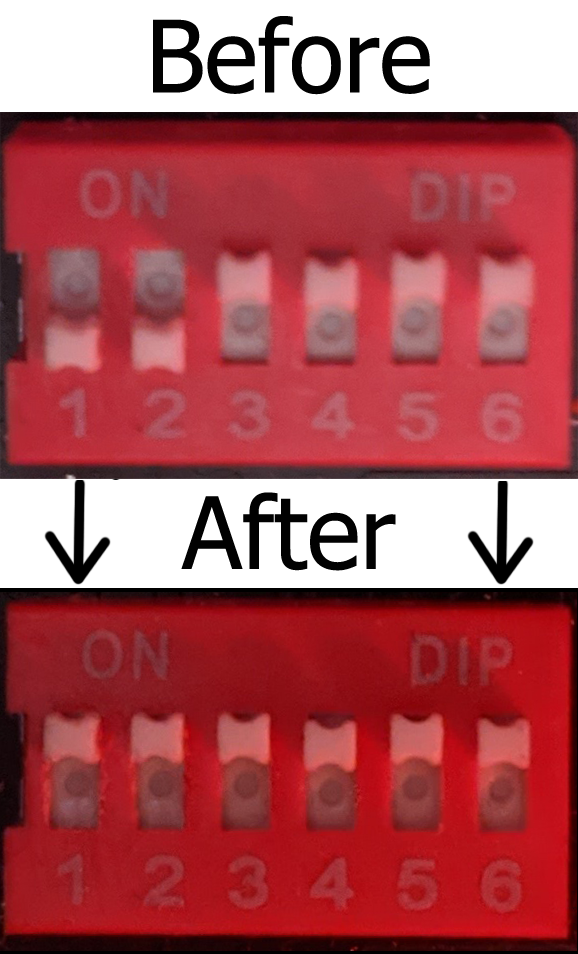
This will lower the amount to around 1/4 of the prior value. In testing, this ran the stepper motor more quietly and kept cool while doing so.
With this change made, and only to the X-Axis, you can go ahead and close up the control box, reinstalling the screws afterwards.
Step 3: Modifying Firmware Parameters
At this point, if you powered up your CNC and tried jogging the X-Axis, you would see the roller move as expected, but without step 3, any projects would not turn out correctly.
To complete setup you will need to connect your CNC to Candle, UGS or another controller program with a console, such as the one in the yellow square below:
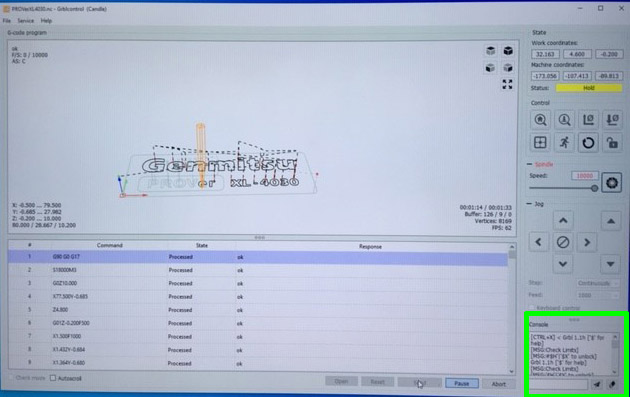
In the console you will need to type $100=84, which will change the steps/mm for the X-axis to match what is needed to correctly use the Laser Rotary Roller.
How to Revert Your 4030 Back to Normal for CNC Use.
In order to revert your CNC back for normal use, here is a checklist for you to follow:
1. Re-wire the X-axis stepper motor to the green terminal using the picture you tool for wire order.
2. Change the stepper driver switches 1 and 2 on the X-Axis back to the "OFF" position
3. Set $100=160 in the console of your controller software. You can confirm that the change took hold by typing $$ into the console, after which all firmware parameters will be displayed for you to check. (NOTE: This value is only for the 4030 CNC, and will not work with the LE5040 or 3018 PROVer since they use different values.)