775 Spindle Motor Collet Installation & Operation Guide

Collet Installation
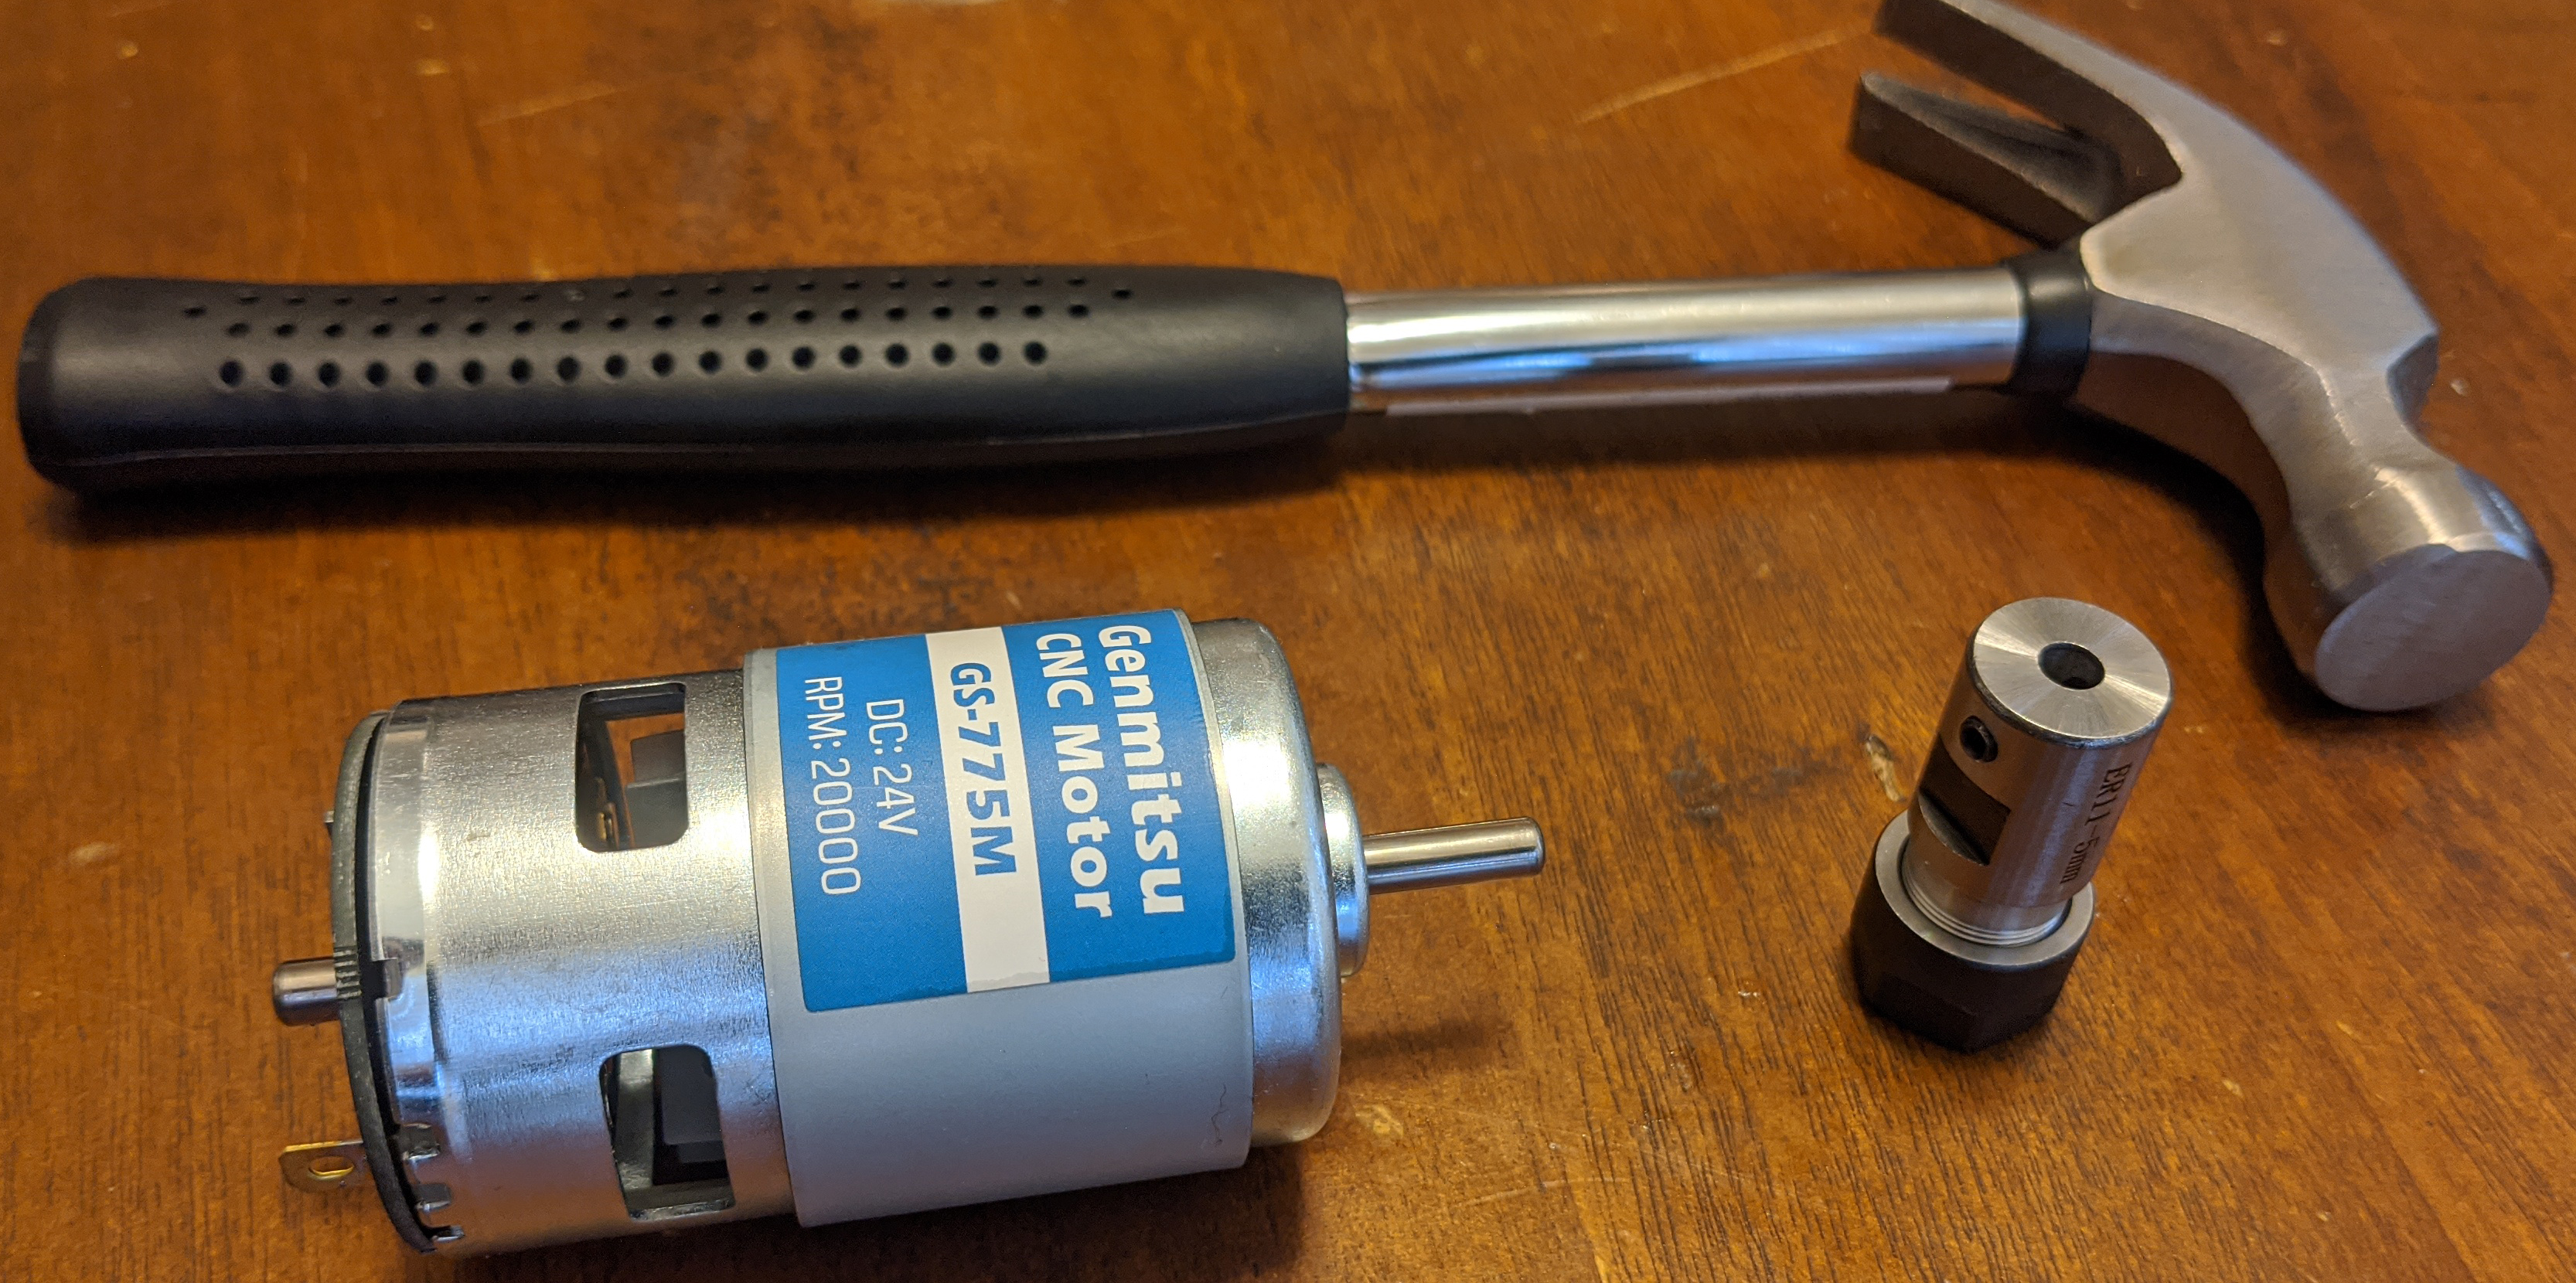
Things You Will Need
- 775 Spindle Motor
- Spindle Collet Adapter
- Small Hammer
- A hard, solid surface (Driveway/Sidewalk/Anvil/ETC
How It Works
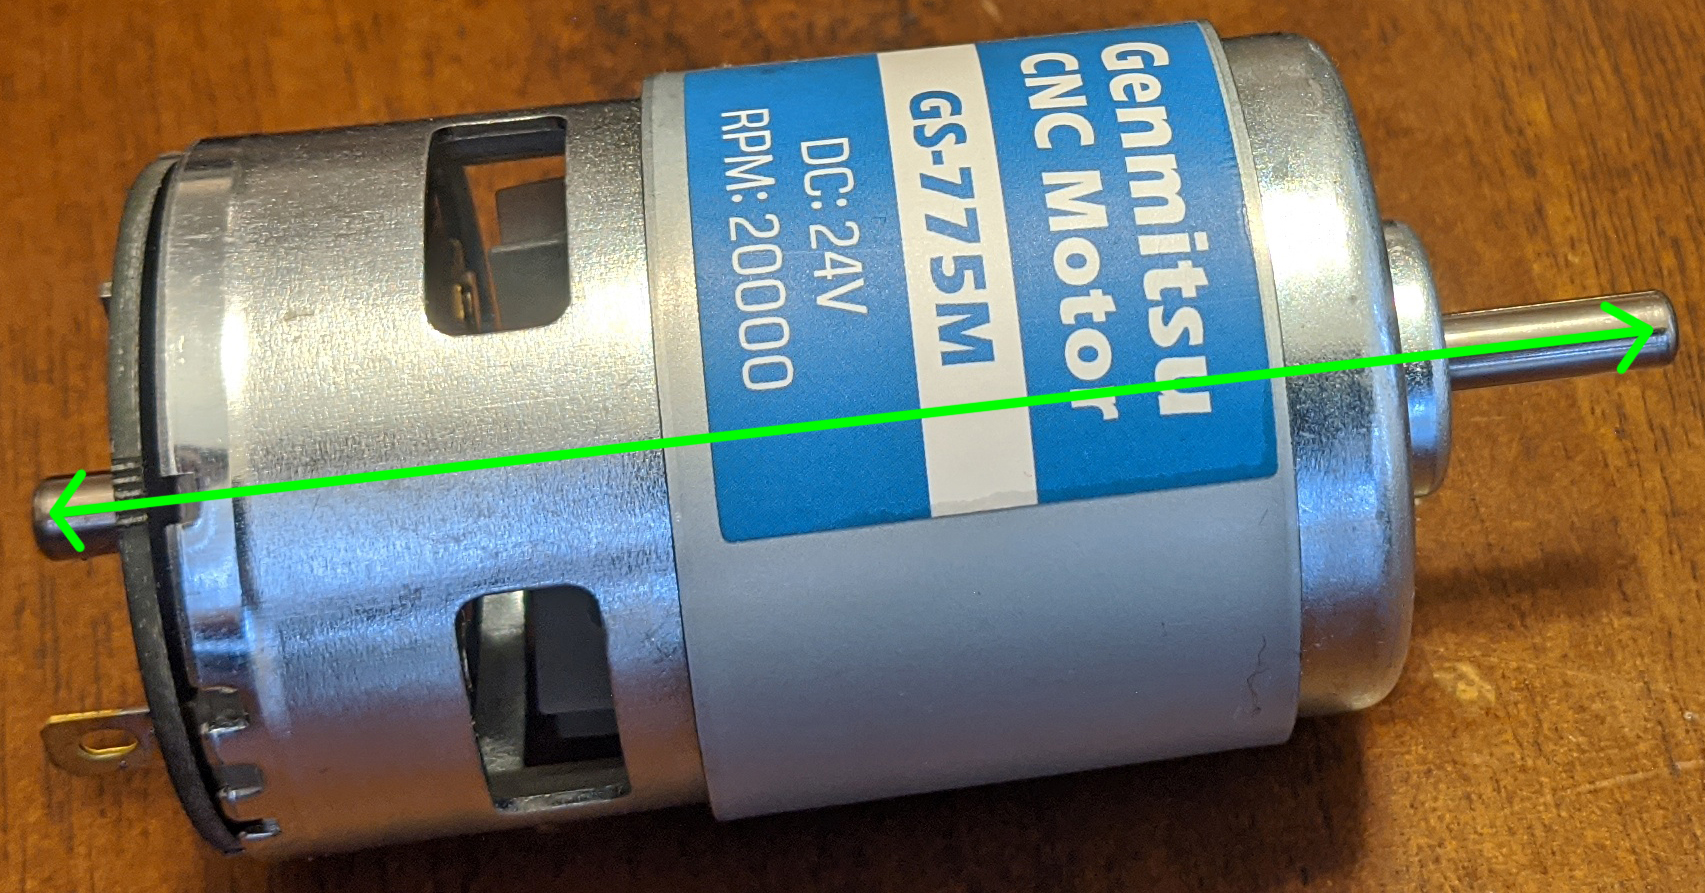
As we have tried to illustrate above, the spindle shaft is one continuous piece of metal through the motor and out the back. Because of this, great amounts of force can be applied to either the front or back end of the spindle shaft without causing damage to the motor itself.
Please note that while the images show a wood table was shown in the images, that you should not install the collet on a wooden floor or table. This will damage the table/flooring!
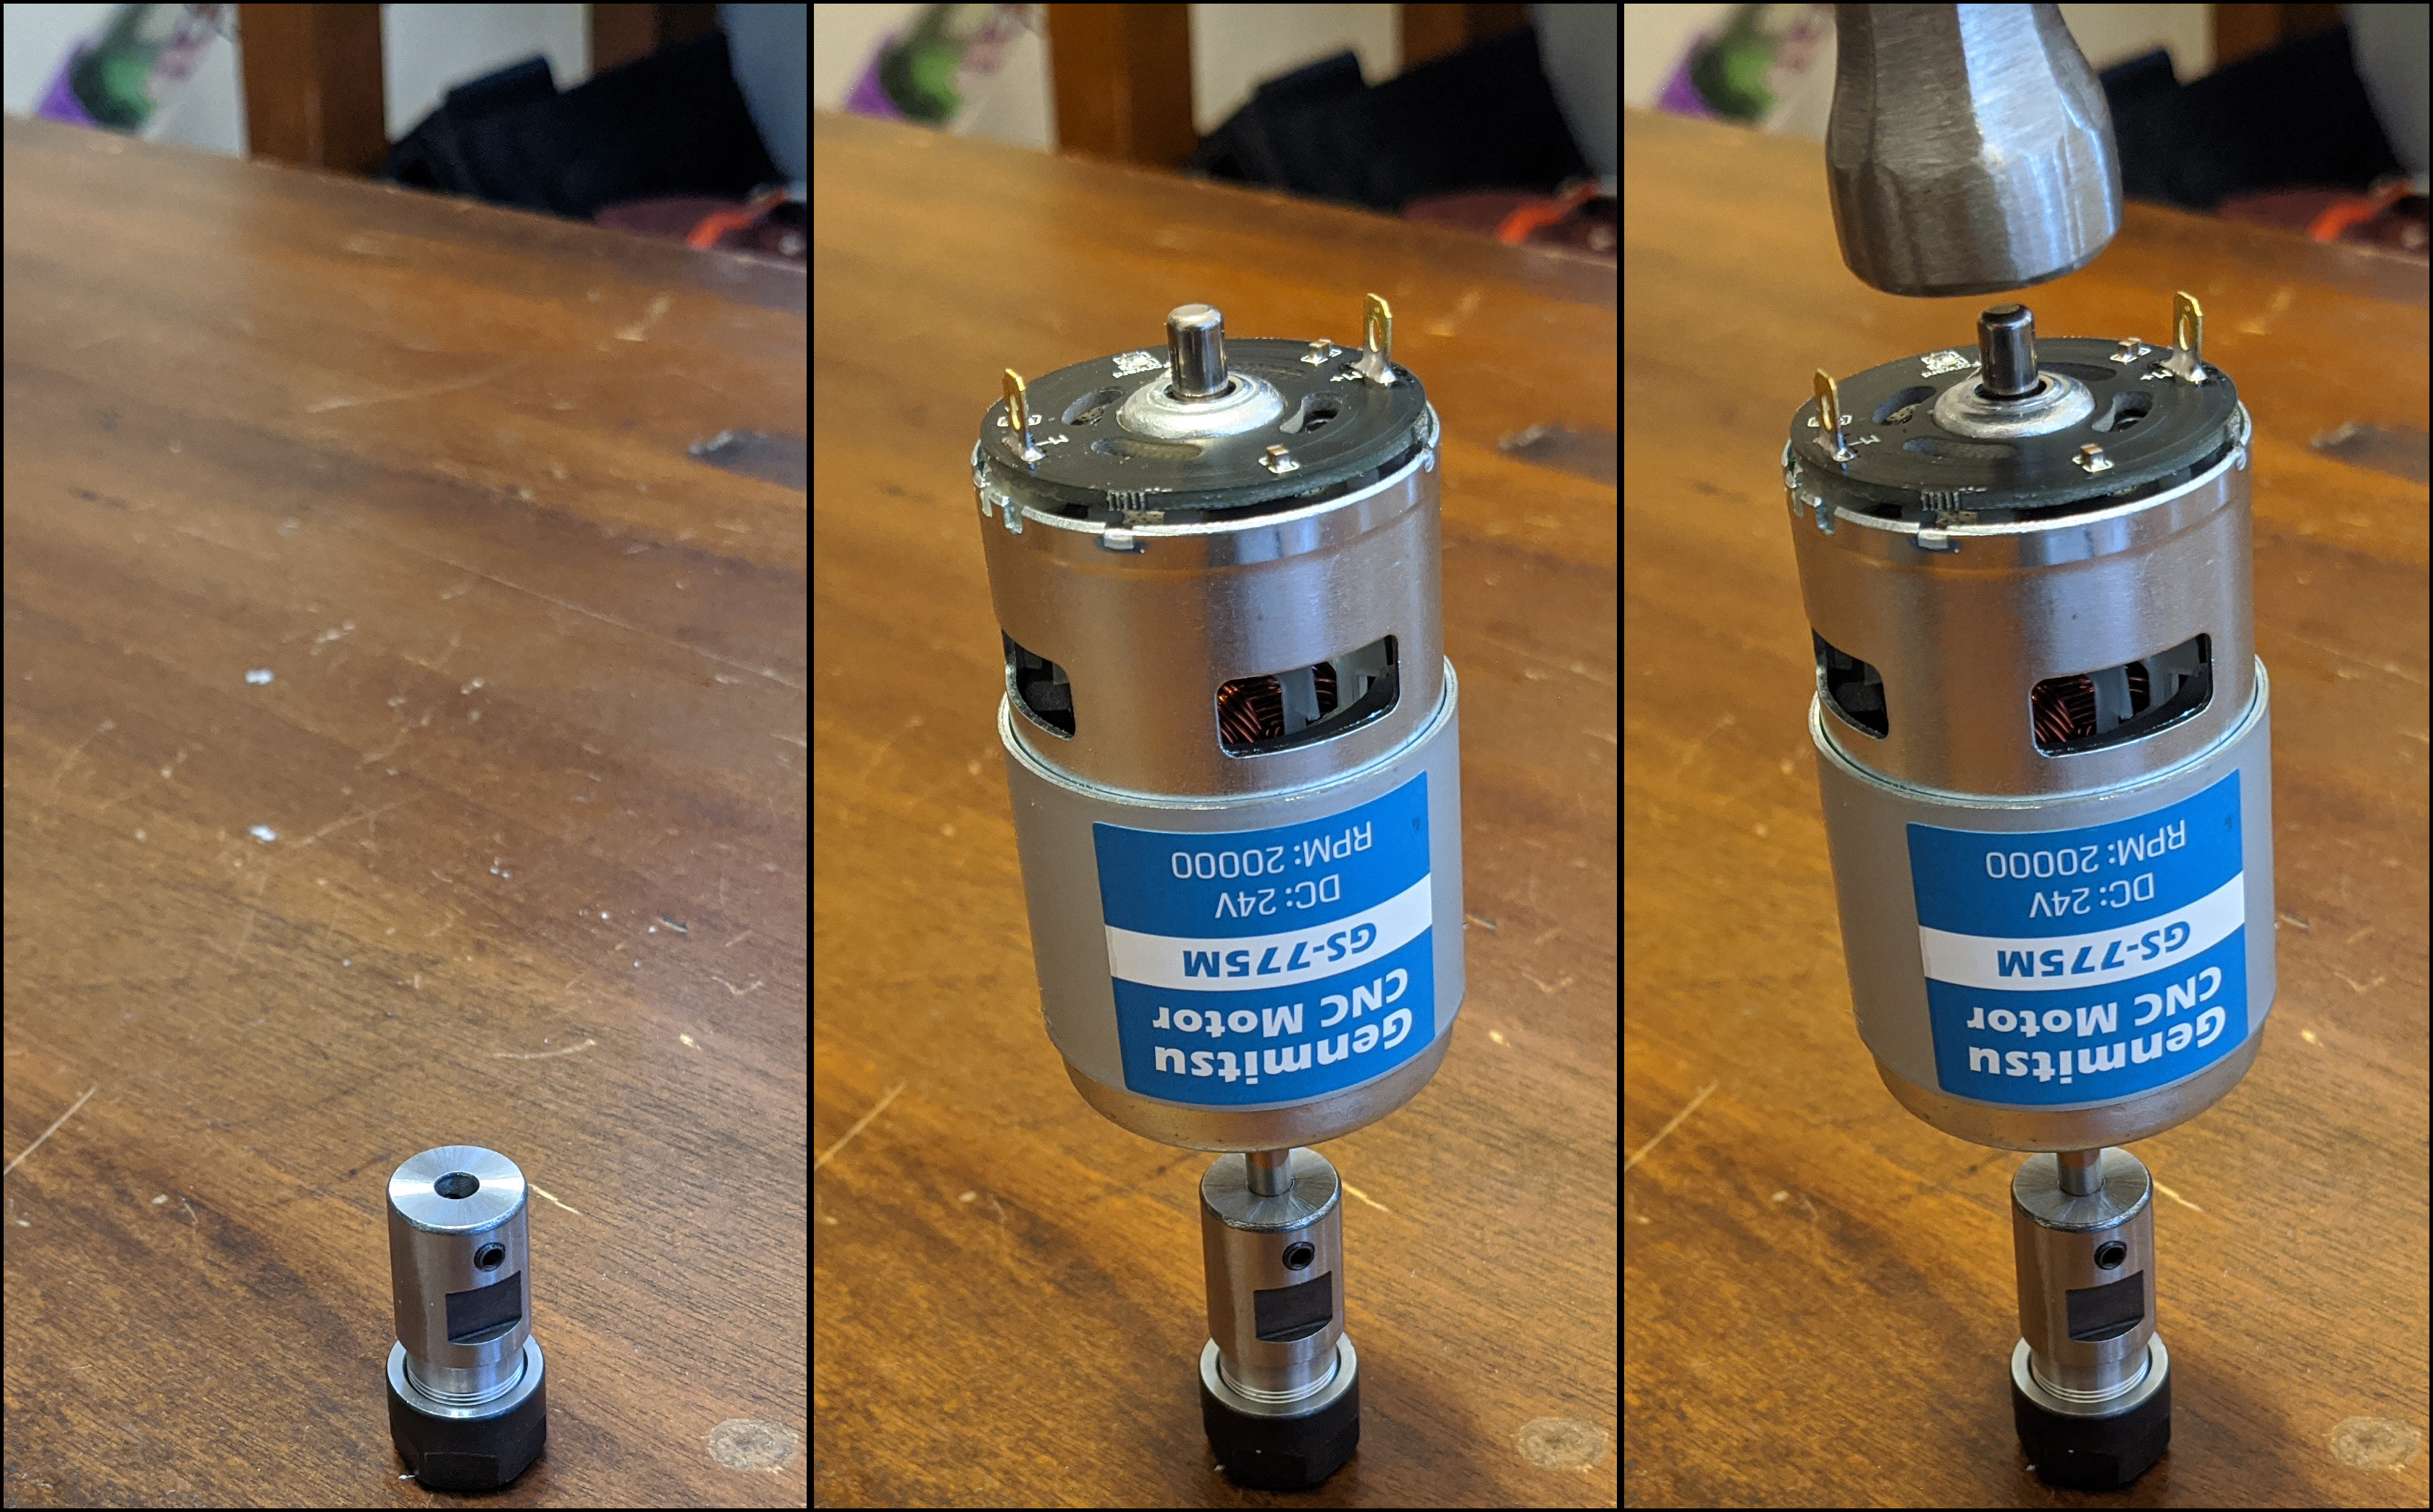
- To start off, remove the set screws from your collet holder and place it face down on your hard surface with the black cap tightened by hand. If you do not have the cap on during the installation process you will very likely damage the threading that the cap screws on to.
- Use your non dominant hand to hold the spindle in place with the collet holder. If you work at it a bit by hand you can get the two parts to loosely stick together to make things easier for yourself.
- Holding the spindle pressed against the collet holder, against the ground, take the hammer in your dominant hand and start lightly hitting the rear of the shaft. In order not to damage the spindle, it is very important not to try to hit the hammer to the shaft too hard, a missed hit could damage the electrical board. Accuracy is a lot more important than power.
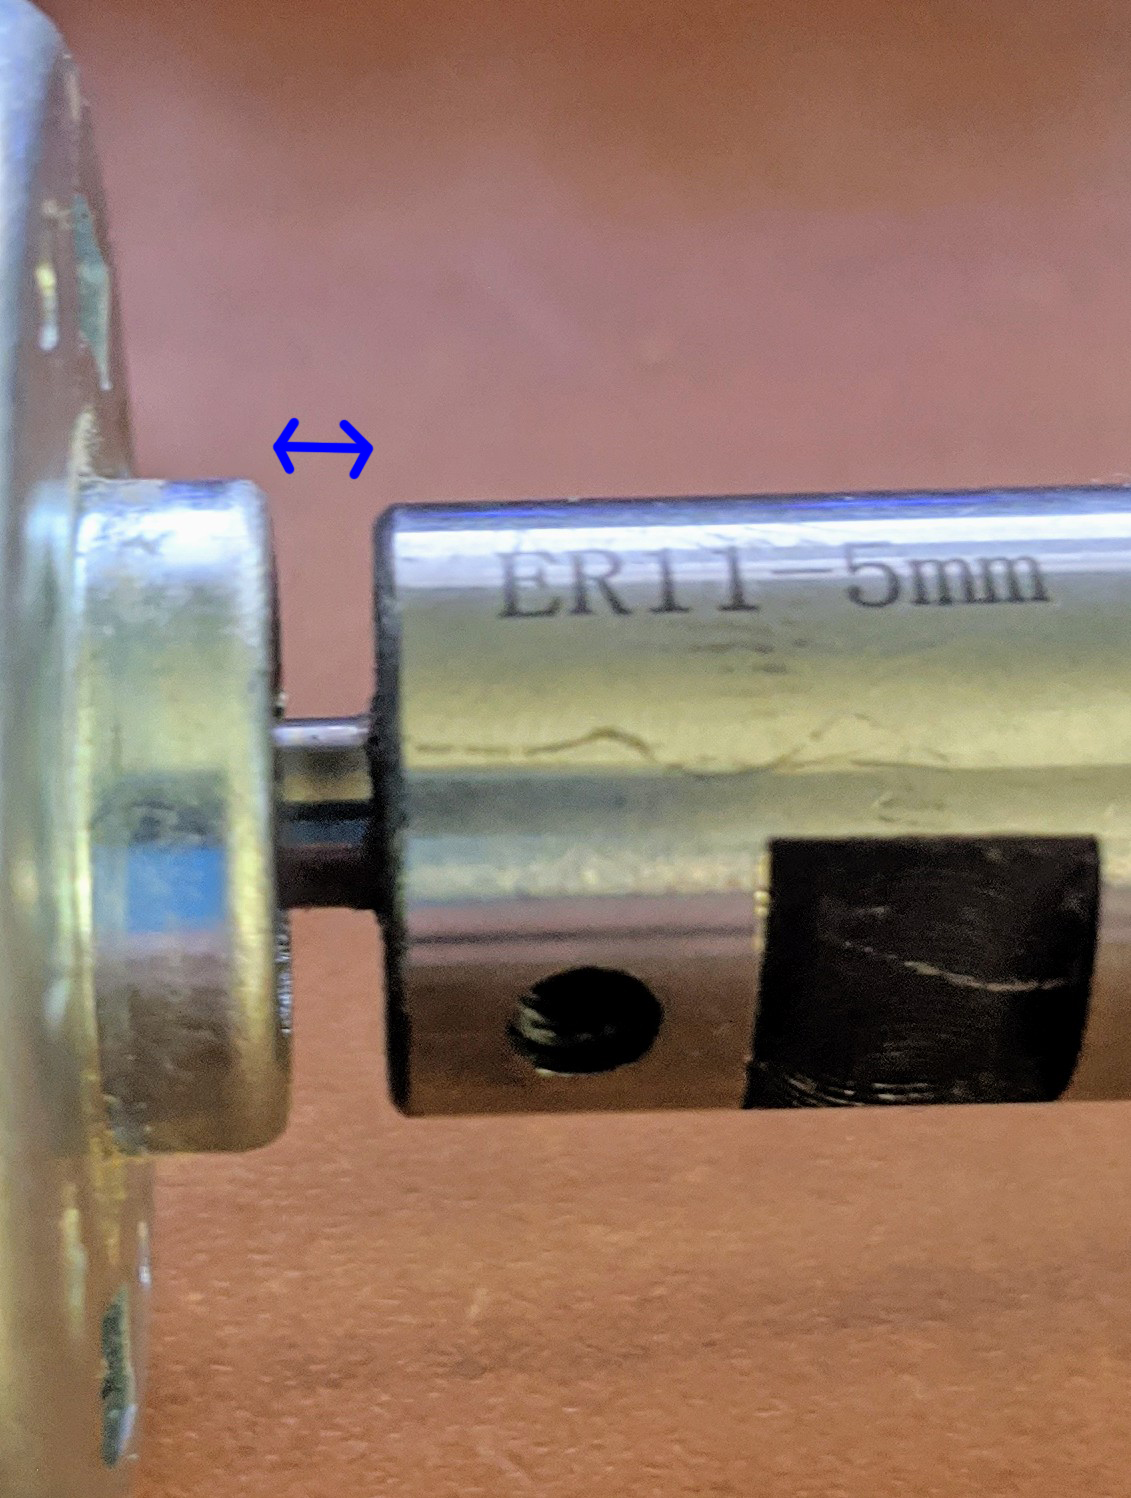
As you continue to slowly happier the collet holder into the spindle shaft, take great care to make sure to leave a small gap where the spindle shaft is exposed. If you close the gap shown above completely this will cause friction to be created as the back of the collet holder collides with the spindle motor housing.
Using your 775 Spindle Motor
One of the key attractions of this upgraded spindle is the ability to turn at 20,000 RPM. What you may find the first time you try to utilize the spindle at it's maximum speed is that it will not turn properly.
Please do not be alarmed. What is happening is that the current being drawn when the spindle tries to go from 0 to 20,000 RPM is more than the 5A power supply that came with your CNC can provide for that moment of peak power draw.
That being said, if you ease the spindle into the maximum RPM, everything works without issue. How we suggest you do this is by replacing your spindle speed command with a few extra lines of code which brings your spindle up to full speed over the course of a second.
In order for this code below to work, make sure to set $30=10000 in your console. This sets the maximum spindle speed in your firmware.
So
S10000
M3
is replaced with:
S4000
M3
G4 P.25
S6000
M3
G4 P.25
S8000
M3
G4 P.25
S10000
M3
The above starts the spindle speed at around 40% of maximum speed and ramps up from there over one second.