What is a Z Probe & How do I Use it?

What is a Z Probe?
When you are running any project on your CNC, it is vital for a successful outcome that you carefully define the point at which Z=0.
For most projects, Z-0 is the location on the Z axis of your CNC where the tip of your end mill is flush, or just touching the surface of your stock material. By knowing this point as accurately as possible, as well as the exact thickness of your stock material, you are able to fully define your workspace.
Having trouble visualizing? Take a look at this image:
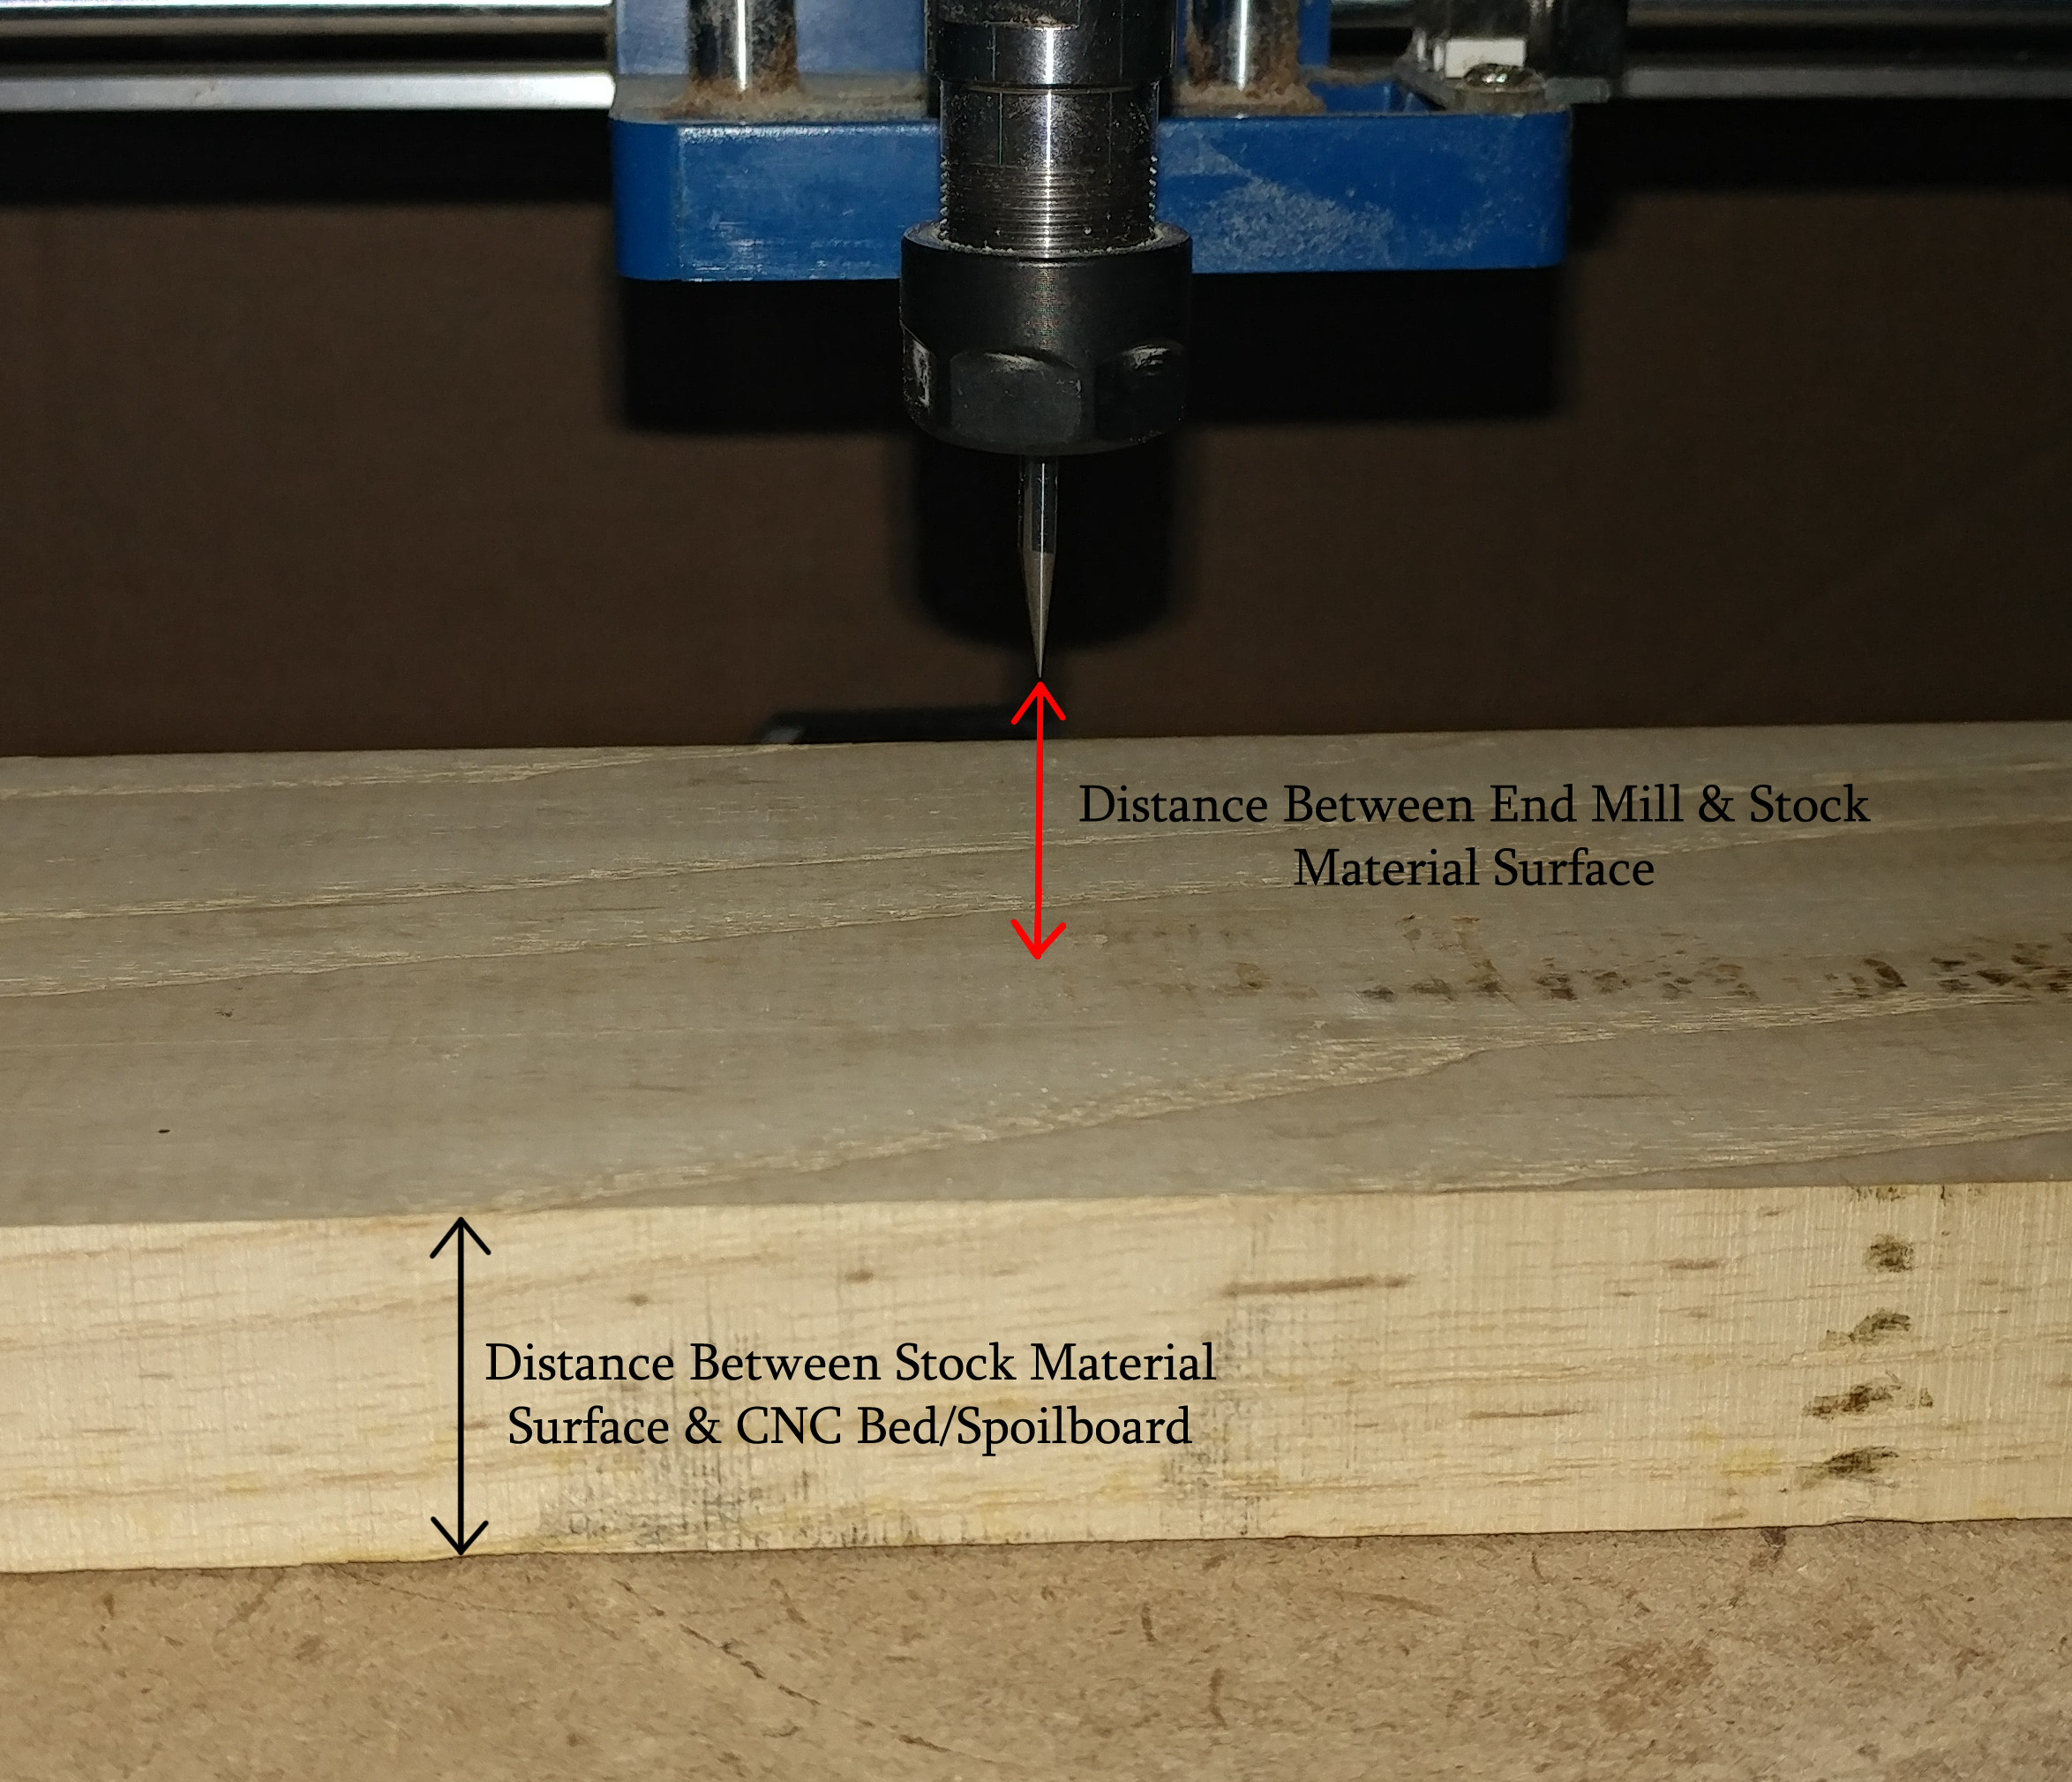
Obtaining the stock thickness is easy enough, you just use a caliper or similar measuring device to get a measurement, but the Z-0 point can be tricky.
Historically, CNC operators would use a thin piece of paper or a feeler gauge. By sliding this back and forth along the surface of your stock material while lowering the Z axis very slowly, you could teach yourself to feel when the tip of your end mill would start to pinch the paper to the stock ever so slightly. At that point you can tell the CNC that the current location is Z-0 = current location - thickness of paper used.
Those familiar with 3D printers will probably be familiar with this process and know that using this method is as much of an art as it is a science. There are a lot of different level of the bit pinching your paper, ranging between too little, just right, and too much. It's the kind of thing that's hard to teach because you can only know and remember the right "feeling" through practice and experience.
That's where the Z Probe comes in!
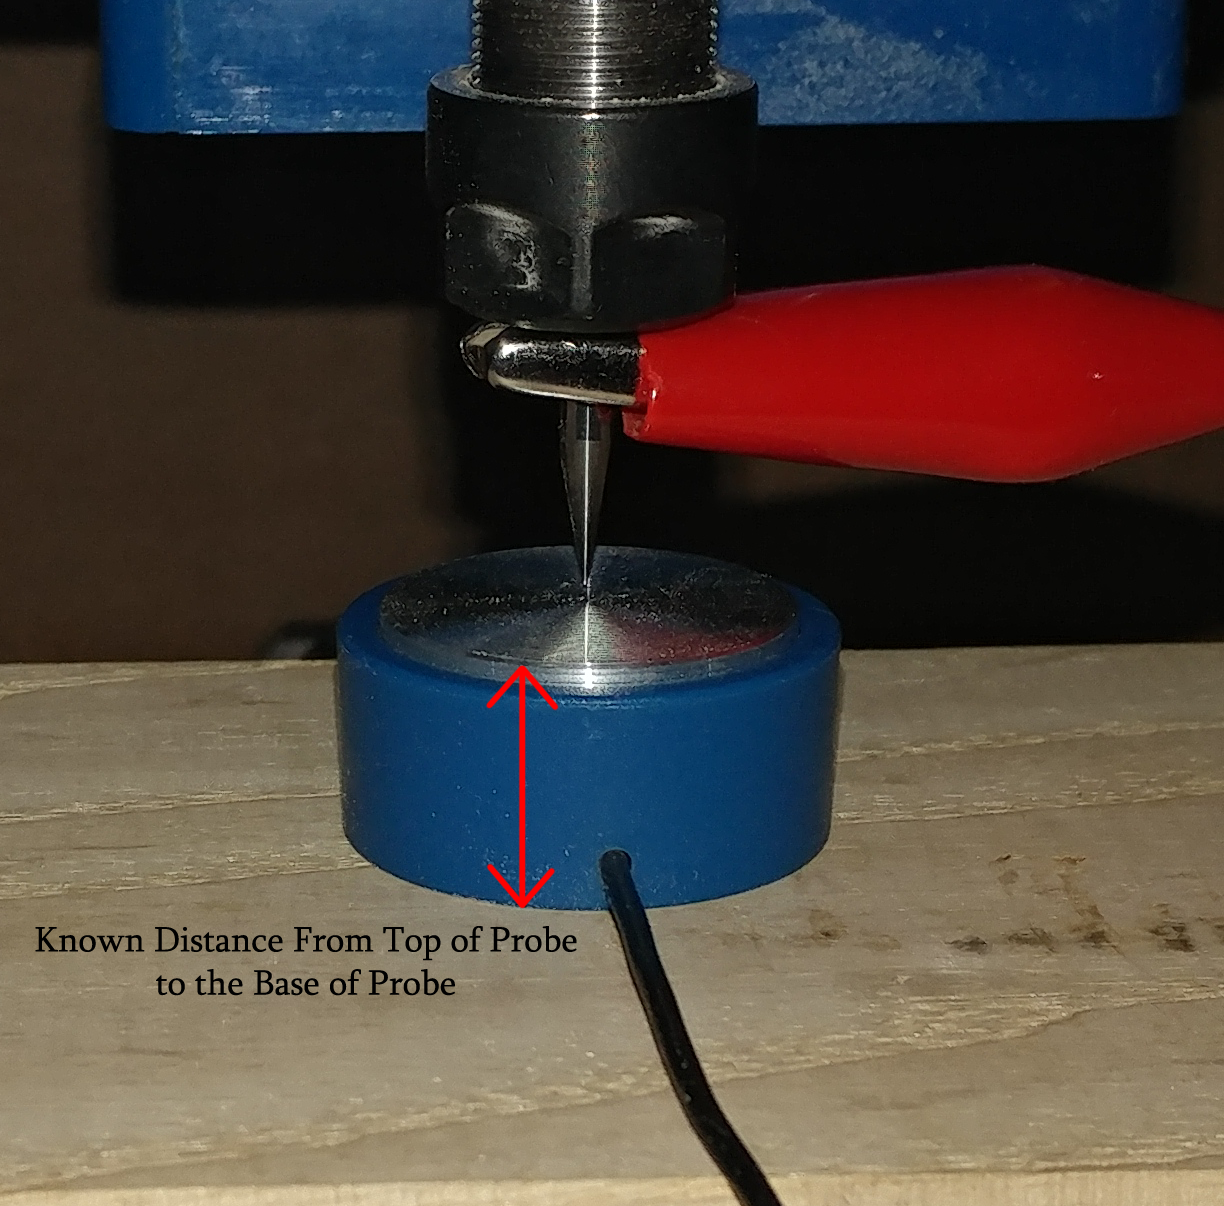
The Z Probe is made from two components: A base which is connected to a black wire, and an alligator clip which is connected to a red wire. They are connected in such a way to your CNC that when the alligator clip (or something conductive it's attached to) touches the base, a circuit is made.
Your CNC knows the exact moment this circuit is created and, along with some simple programming, lets you know a very accurate Z-0 for the stock material combined with the probe base on top of it.
Since the base is a known quantity as a manufactured product, you can pre-program your CNC to know the exact thickness of your probe base (measuring it with calipers) and forever afterwards you can achieve setting Z -0 with a press of a button as the CNC uses the following formula:
True Z-0 = (Stock/Base Z-0) - Base thickness
And there you have it, the true value of a Z Probe. Once you've used one, you'll never want to go back to the old method.
How do I Set It Up?
Part 1: Probe Installation
While the entire process isn't too difficult, this is definitely the easy part! The image below shows out 3018-PROVer CNC controller board.
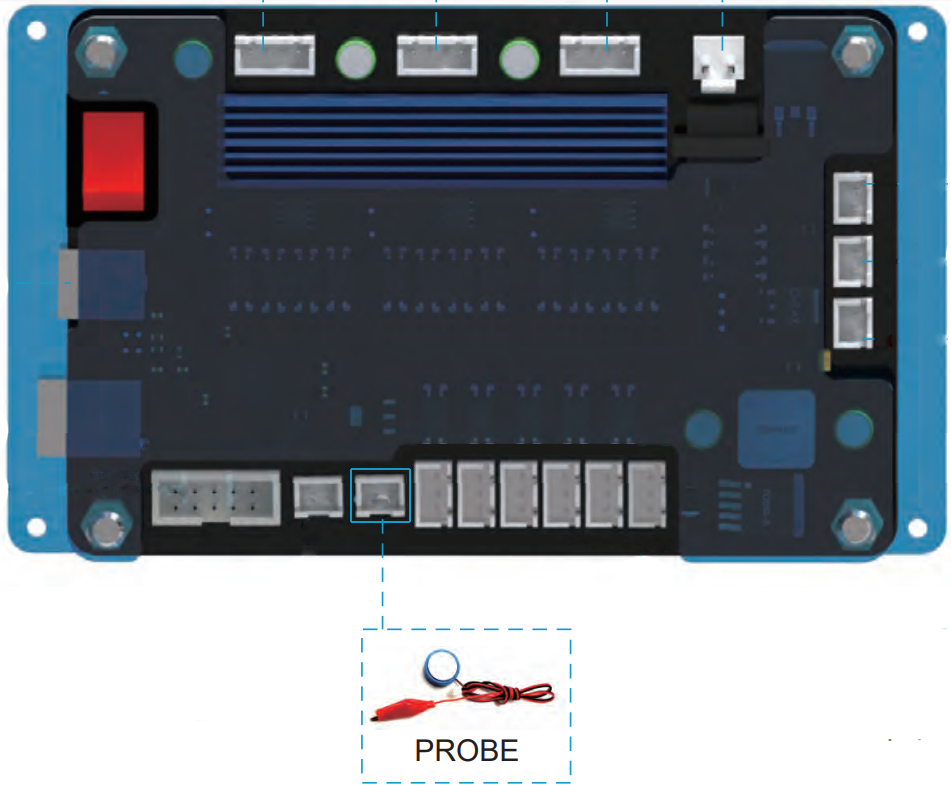
Since you are going to be working with the CNC from the front, with this board facing away, it's best to consider how to bring the probe to you for easy use in the future. The best way to do this is to take the other end of the Z Probe not connected to the board, and bring it around and to the left of your CNC. When not in use, you can even wrap the wire around the X axis stepper motor a few times to make it is not in the way when actively working on projects.
Getting the Probe Thickness/Height:
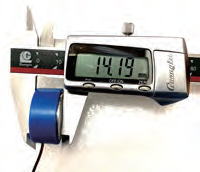
While we manufacture our probes to be as consistent as possible to bring you the best experience, inconsistencies can happen, so it is important for you to measure your specific probes height/thickness.
Make sure to keep this number handy for the next step.
Part 2A: Configuration in Candle
To configure Candle for the use of your Z Probe, you do not need your CNC to be connected to the computer. Just open Candle, click the "Service" Toolbar and select "Settings". A window like this one will appear:
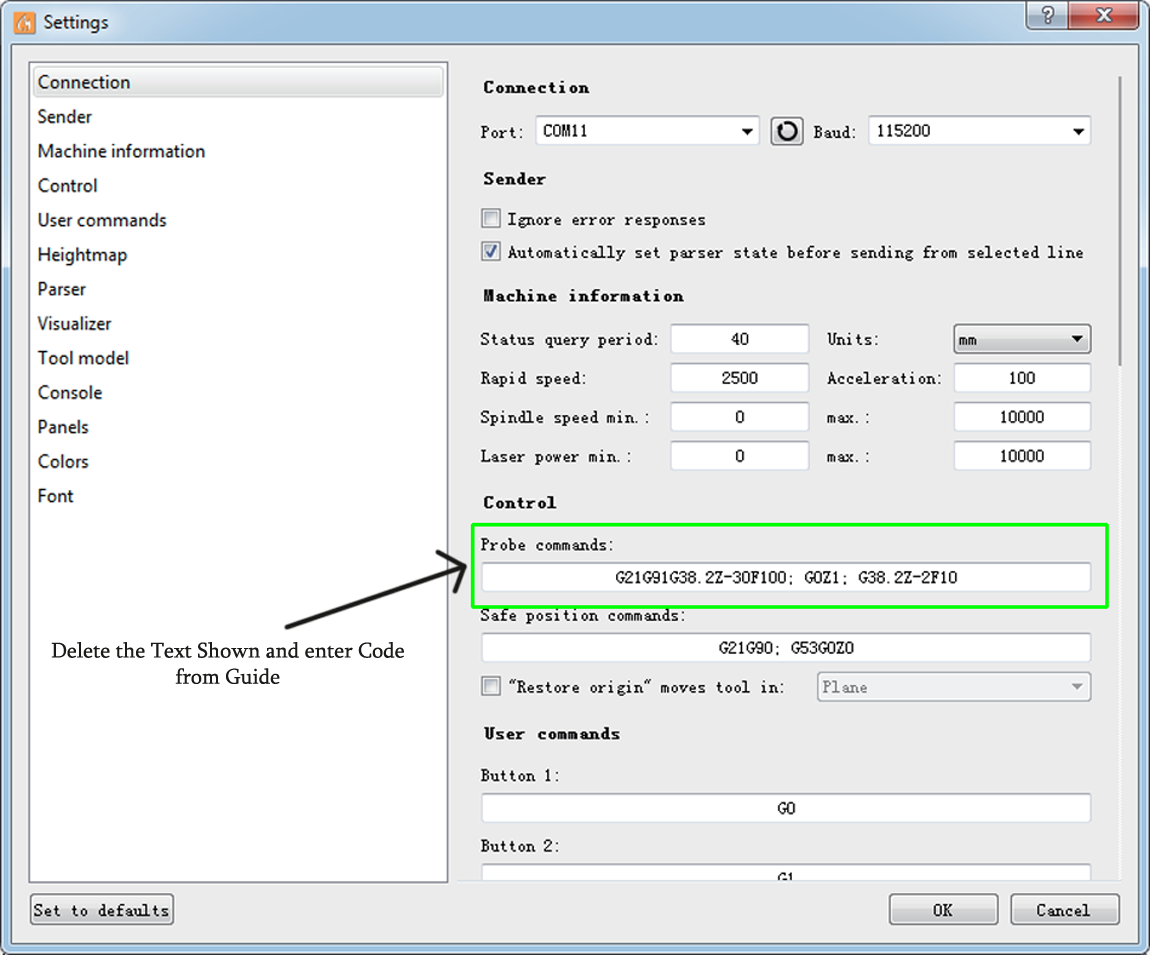
You'll want to delete the code already saved under probe commands and paste/type the following:
G91G21G38.2Z-50F100; G92 Z14.09; G0Z5M30
Please note that you will need to substitute Z14.09 with the number you saved from Step 1. If you have 4030 CNC then you can NOT use the stock 14.09 value and must measure your probe base, it is much larger.
Part 2B: Configuration in Offline Controller
Note: This section does not apply to the 4030 at all.
The commands sent to the router for the Z-Probe command are contained in the probe.txt file in the root directory of the SD card that came with your 3018-PROVer CNC. Place the SD card in the reader (also provided) and plug it into your PC.
Open the probe.txt file in a text editor such as Notepad and replace the entire contents of the file with:
(The code below is pre-set for a for Z-Probe base that measured 14.19mm high. Your own probe height may vary from this, so it's important to measure)
G91 G21
G38.2 Z-50 F100
G92 Z14.09
G0 Z15
G90
M30
Now substitute your measured value for them 14.19 and save. It's important to note that for offline controller use, your MicroSD card must be installed in the offline controller, along with this Probe.txt file.
How Is It Used?
With the Z Probe plugged into the board, look at the Image below and follow the steps as written.
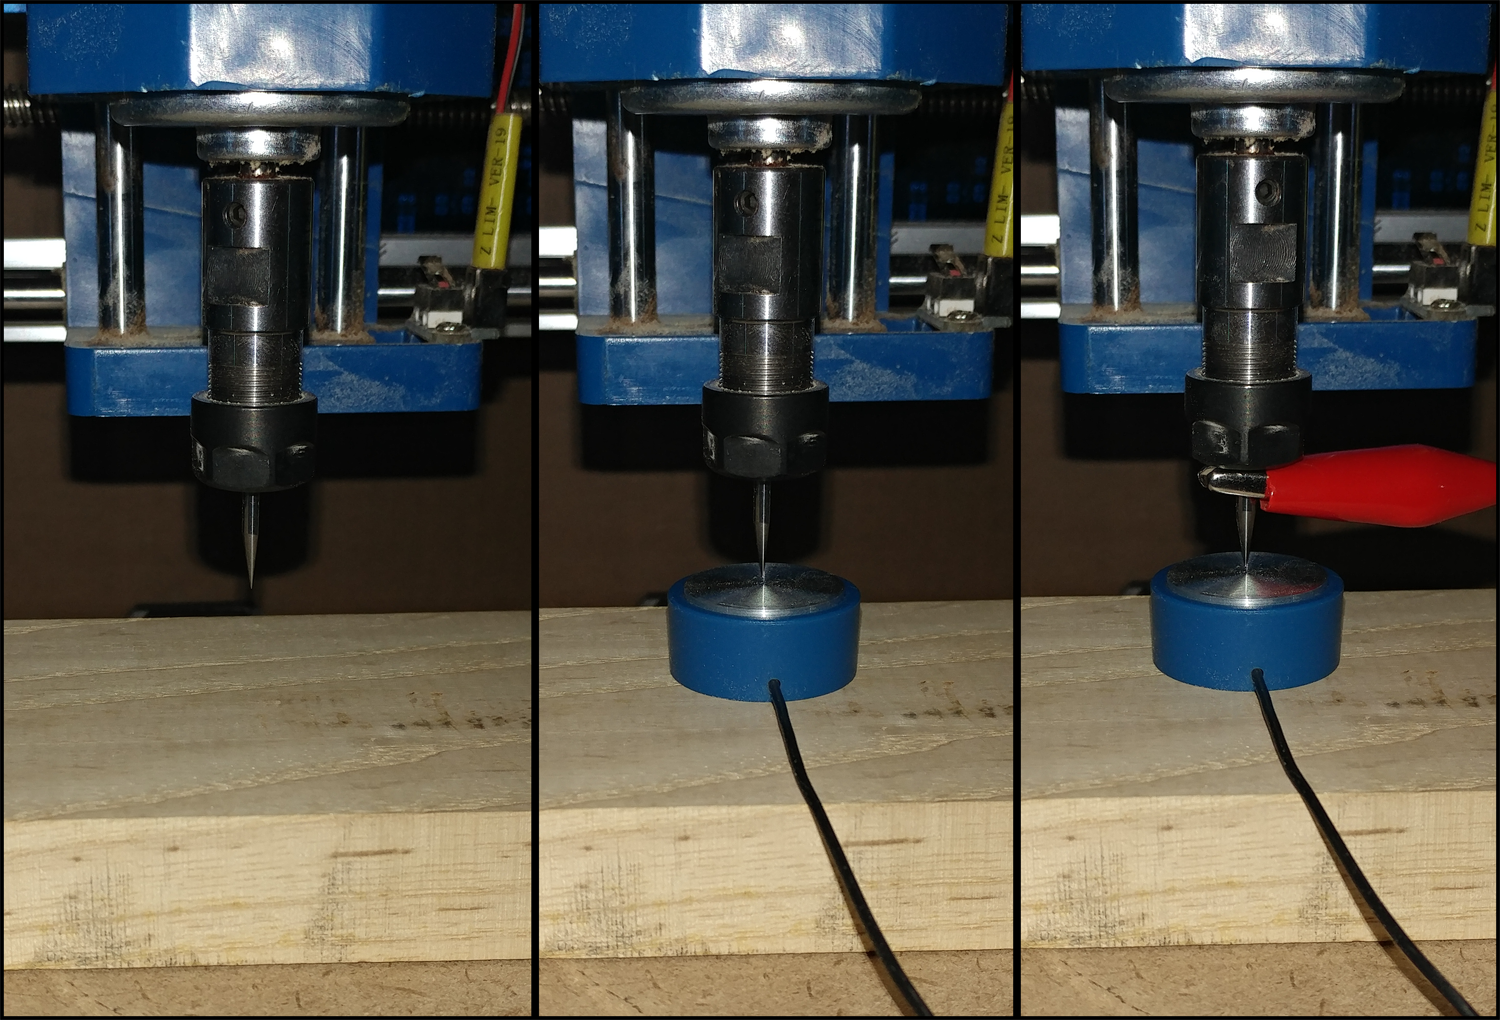
- Jog your spindle until it is over the stock material.
- Raise the Z axis so that the Base of the Z probe can fit under the end mill. Please note that it is usually better for it to be farther away than shown in the images above. How far doesn't matter.
- Take the alligator clip portion of the probe and and clamp it firmly onto your end mill, making sure that it won't get in the way when the probing program runs.
- Run the Probing Program.
- If you are using Candle, you will want to press this button:

- If you are using the Offline Controller, please see the this video on how to navigate to the Probe command with the offline controller.
- Your Z-0 is now set and you can now move the Z axis freely without worrying about it being lost.